Simple Amish White Bread

WP_20140317_07_22_09_Pro

I’m always on the look out for my next favorite bread recipe, and this one is high on the list. There is a lot of liquid in this recipe, so I used all the 7 cups of flour and my dough was slightly tacky but smooth. Don’t fret about the full stick of butter – you should be able to cut each loaf into 18 slices, so that stick goes a long way. Thanks for reading, enjoy!

WP_20140321_18_53_46_Pro
*I loved the texture and flavor of this bread and I decided to make the suggested buns.

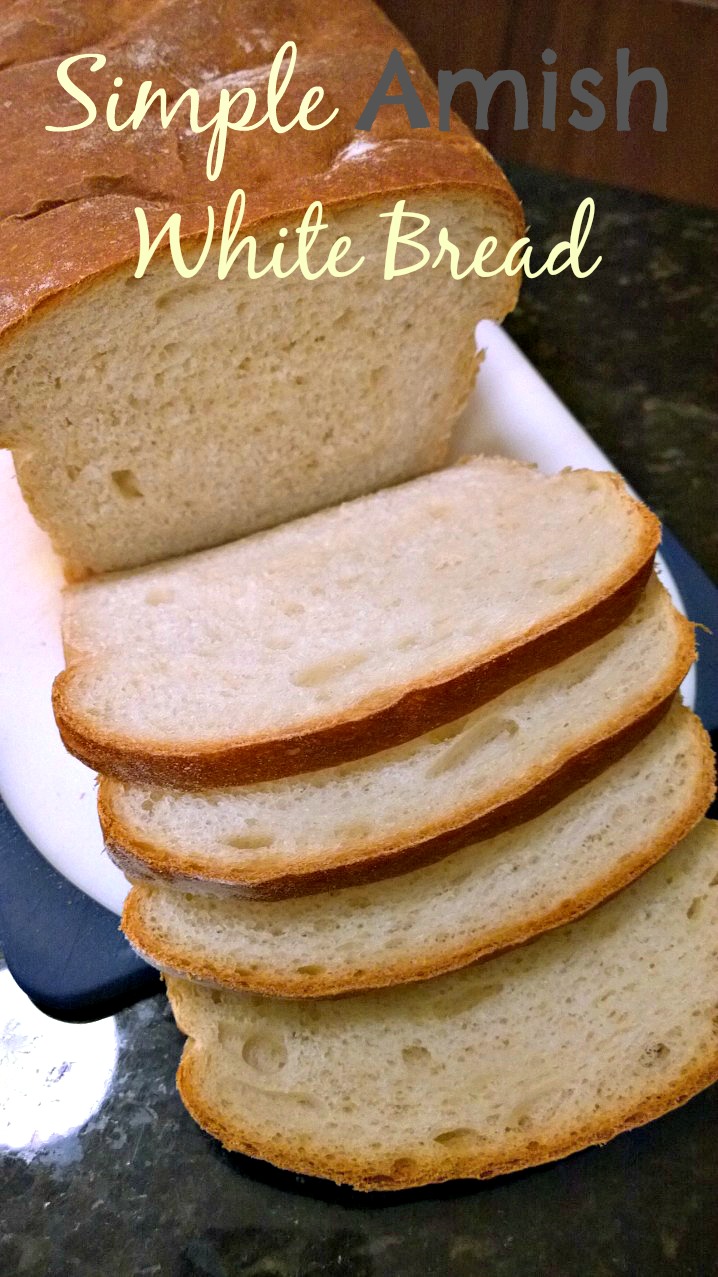
Simple Amish White Bread Recipe – The Slow Roasted Italian

makes 2 9×5” loaves or 16 big hamburger buns
  • 1 ½ tablespoons active dry yeast (2 packets)
  • 2 ½ cup warm water (110° to 120°)
  • 1/2 cup granulated sugar
  • 8 tablespoons unsalted butter, divided
  • 1 tablespoon kosher salt
  • 6-7 cups bread flour (I used all 7)
Directions –
Melt ¼ cup of butter.  I microwave on high for 30 seconds at a time until it is mostly melted.  I recommend covering with a paper towel to avoid messes.  Set aside.
In the bowl of a stand mixer add sugar and water.  Sprinkle yeast over top and swirl with spoon or fingers to combine.  Allow to sit for about 5-10 minutes while the yeast bloom and become aromatic.
Add melted butter, 4 cups flour and salt.  Mix on low, using dough hook, until smooth.  Add remaining flour 1 cup at a time until a soft dough ball forms (I use the entire 7 cups).  Turn to medium and knead for 5 minutes.  Your ball of dough should be tacky (not sticky).  If it is sticky, add a little more flour 1 tablespoon at a time until it becomes tacky (does not leave dough on your fingers when you touch it).
Turn onto a floured board; knead about 10 turns. Place 1 tablespoon butter in a large microwave safe bowl.  Heat butter in the microwave until butter is melted.  Place dough into bowl, turning once to grease top. Loosely cover with plastic wrap and a cloth over top and let rise in a warm place until doubled in size, about 1 hour.
Punch dough down and shape into two loaves (or 16 hamburger buns).  I like to make half and half.  Place loaves in greased 9-in. x 5-in loaf pans.  For hamburger buns, grease a cookie sheet.  Divide dough and roll into balls.  Gently press on dough balls with the palm of your hand (creating a bun shape).  Cover and let rise until doubled, about 45-60 minutes.  Preheat oven to 350°.  Bake for 30-35 minutes or until golden brown.
If bread starts to brown too quickly, cover with aluminum foil.  When bread is removed from the oven, brush with remaining butter.  Serve and enjoy!
Hungry for More?
WP_20140111_21_58_14_Pro
milkandhoney

Milk and Honey Bread

eggbread

Egg Bread

bread11Buttermilk Oatmeal Bread

photo (3)Whole Wheat Sandwich Bread

Advertisement

Soft and Fluffy Cinnamon Rolls

WP_20140112_11_11_01_Pro

Verdict: These were really good and I only made some minor modifications – 1/4 cup butter and 1 cup brown sugar in the filling, 1 tablespoon of cinnamon, and  a pinch of salt. My husband likes my go-to cinnamon roll recipe just a bit more, but likes this frosting recipe better. These rolls are so much bigger than those (about 3 inches in diameter), and they are lighter – just stop yourself from adding too much flour. The dough rolls out easily, but it’s not as easy to slice into rolls. I need to invest in some flavorless and wax-free dental floss – that would definitely help. Thanks for reading, enjoy!

Go to AverieCooks.com for the recipe: Overnight Buttermilk Soft and Fluffy Cinnamon Rolls

WP_20140111_20_58_53_Pro

WP_20140111_21_13_24_Pro

WP_20140111_21_36_36_Pro

WP_20140112_11_00_11_Pro

Thanksgiving Day Recipe Round-Up

rolls1
Fall is my absolute favorite season because of the cooler weather, but mostly it’s because of the food! Thanksgiving dinner is hands-down the most time-consuming meal I make all year; but I love it! It’s a little depressing when I think of all the planning, shopping, prep-work, cooking, baking – not to mention the dish washing involved; and everyone is finished eating in about 20 minutes. Thankfully, there are the leftovers which can be the best part of the ordeal 🙂 I decided to round-up some of our favorites to help those of you who need inspiration and ideas.

A couple of tips for you novices out there – don’t be intimidated! 🙂 Plan at least a week in advance, especially if you plan on brining your turkey – I highly recommend it! You will never have a more moist, perfectly seasoned bird than when you’ve taken the time to brine. It’s not difficult, but you will need some extra space in your refrigerator and if you don’t have a huge, lidded container you can use heavy-duty brining bags, (I have used these). Also, invest in a digital probe thermometer, because who wants to go through all that trouble only to end up with overcooked (or under-cooked) turkey? Thanks for reading!

3

Breakfast

*Update* Pumpkin Cinnamon Rolls

Pumpkin Chocolate Chip Muffins

Pumpkin Bread

Overnight Cinnamon Rolls

Pumpkin Waffles

Baked Apple Cinnamon Oatmeal

Cinnamon Pull-Apart Bread

Cinnamon Sugar Donut Muffins

soup12

Appetizer/Sides

Spinach Artichoke Dip

Vanilla Almonds

Brioche and Sausage Dressing

Loaded Potato Soup

Roasted Garlic Mashed Potatoes

Perfect Au Gratin Potatoes

Garlic Green Beans

rolls3

Breads

Honey Yeast Rolls

Basic Buttery Brioche

Homemade Crescent Rolls

Dinner Rolls

Parker House Rolls

Golden Pull-Apart Butter Buns

Honey Cornbread Muffins

4

Mains

Brined Herb-Crusted Turkey

Honey Ham 

pumpkincheesecake

Desserts

Pumpkin Cheesecake

Brown Sugar Apple Cheesecake

Deep Dish Apple Crumble Pie

Apple Crisp I

Apple Crisp II

Vegan Apple Crisp

1

For the Leftovers

*Update* Chicken (or Turkey) Pot Pie with Cheddar Biscuit Crust

Turkey, Bacon and Avocado Sandwiches

Navy Bean and Ham Soup

Ham and Potato Soup

Oreo Brookies…or BrOreos?

oreobrookies

This insane dessert takes a little bit of planning, but it’s easy enough. Just don’t expect to be able to whip it up last minute because you need to allow the first layer to cool completely before you can continue with the other layers. My friend asked me if I could make her husband a special treat for his birthday – what a fun surprise! Of course I said yes. What better way to get the opportunity to make something so completely ridiculous and decadent? Birthdays are a great excuse to make something so butter, sugar, calorie and fat-filled and you don’t have to feel so bad about it cause, hey – we’re celebrating here! 😉

Verdict: Everyone loved these. They are so rich and gooey! I wasn’t a huge fan until the second day – wow…they reached another level of awesome! My health-nut friend thought she could get by on a tiny piece; but once she tried that she had to go back for more – something she rarely allows herself to do! I heard from more than one person that this was the best dessert they have ever eaten and have already received requests for this on their birthdays…so, yeah – this recipe is a keeper! Thanks for reading, enjoy!

Oreo “Brookies” – adapted from Brown Sugar

For the Cookie Crust –

  • 2 sticks unsalted butter, at room temp
  • 1 cup brown sugar
  • 1 cup white sugar
  • 2 eggs
  • 1 TBSP vanilla extract
  • 2 1/4 cups AP flour (281 grams)
  • 1/2 cup unsweetened cocoa powder
  • 1 tsp baking soda
  • 1 tsp salt
  • 12 ounce bag of semi-sweet chocolate chips

For the Brownie Layer –

  • 1 stick unsalted butter, room temp
  • 1 1/2 cups sugar
  • 4 eggs
  • 1 tsp vanilla
  • 3/4 cup AP flour (94 grams)
  • 1/4 unsweetened cocoa powder
  • 1/2 tsp salt
  • 8 ounces bittersweet chocolate, melted
  • 12 whole Oreo cookies

Directions –

For the Cookie Dough: Preheat your oven to 350 degrees. Lightly butter a 13×9 inch baking dish.

In a mixer bowl, beat the butter and sugars until light and fluffy. Add eggs one at a time, blending each one in before adding the next – periodically scrape the sides of the bowl down. Add vanilla extract.

In a separate bowl, add all your dry ingredients and whisk to combine. Add your dry ingredients to your butter/sugar mixture in three parts, scraping the sides of the mixer bowl if needed. Mix in your chocolate chips.

Place the finished dough in your baking dish and with a damp spatula (or your hand) pat the dough until flat and evenly distributed. Bake for 20-25 minutes, take out and allow to cool completely. (*I let it cool for an hour at room temp, and then I placed it in my fridge for another hour*)

For the Brownie: Preheat your oven to 350 degrees.

In a standing mixer bowl, beat together butter and sugar until light and fluffy. Add each egg to the mixer one at a time, being sure to mix in each addition before adding the next. Add in vanilla extract.

In a separate bowl, combine cocoa, flour and salt. Slowly add the dry ingredients to the butter/sugar mixture until blended. Fold in the melted chocolate until combined.

brookies1

Pour half of the brownie batter on top of the cookie crust, then evenly space out the Oreo cookies; then pour the rest of the brownie batter over all and spread evenly across the top of the Oreos. Bake for 25-30 minutes.

Ham and Cheese Rolls

Quick Post: After I made the kids these pizza rolls, I knew I needed to make ham and cheese filled for their school lunches. These are quick, easy and the kids loved them! Thanks for reading, enjoy!

Ham and Cheese Rolls –

  • 1 lb. pizza dough
  • swiss cheese, sliced or shredded
  • cheddar cheese, sliced or shredded
  • sliced deli ham, chopped or torn

Directions –

Preheat oven to 400 degrees. Grease a baking sheet with non stick cooking spray and set aside. Roll pizza dough into a 12×18 inch rectangle and cut into 4 strips width wise (so you’d end up with 4 pieces of dough that are 4 1/2 inches x 12 inches). Place the slices of ham on top of the dough and then with swiss and cheddar cheese.Roll up each piece of dough and place on prepared baking sheet seem side down. Press the open edges down to seal. Bake for 20-25 minutes or until tops are golden and bottoms are brown.

Pepperoni Pizza Rolls

In an effort to give my kids something other than sandwiches (I would have gotten burned out on those a long time ago), I decided to make these. The best were so easy to make and the kids loved them. My son said I should have doubled the recipe so he could have eaten more – but these are pretty big and the kids split one. Thanks for reading, enjoy!

Pepperoni Pizza Rolls – adapted from Lauren’s Latest

**I used this sauce recipe and a new pizza dough recipe**

  • 1 lb. pizza dough
  • 2 cups grated mozzarella cheese
  • 1/2 cup grated cheddar cheese
  • 1-3.5 oz. package sliced pepperoni
  • 2/3 cup prepared pizza sauce

Directions-

Preheat oven to 400 degrees. Grease a baking sheet with non stick cooking spray and set aside. Roll pizza dough into a 12×18 inch rectangle and cut into 4 strips width wise (so you’d end up with 4 pieces of dough that are 4 1/2 inches x 12 inches). Divide pizza sauce between all 4 slices and spread, leaving a 1/4 inch border approximately. Shingle the slices of pepperoni on top of the sauce. Top with mozzarella cheese (1/2 cup per pizza roll) and cheddar cheese (2 tablespoons per roll).Roll up each piece of dough and place on prepared baking sheet seem side down. Press the open edges down to seal. Bake for 20-25 minutes or until tops are golden and bottoms are brown. Serve warm with more pizza sauce for dipping.

Pretzel Dogs

These are seriously good! My sister made these for our 4th of July party this summer and they were a big hit with kids and adults alike. In an effort to redeem these nutritionally (every little bit helps), I used half white whole wheat and half all-purpose flour for these. Also, the hot dogs are uncured, grass-fed beef…yes, I am a food snob! 😉

This dough is so easy to work with and easily rolled, and shaped without that annoying snap-back of some other doughs I have worked with. Be careful when you add the baking soda to your pot of boiling water, as it will boil more aggressively. Use a slotted spoon to carefully add the dogs to the pot and, again watch for the crazy boiling water!  We’re going to experiment with these in the kid’s lunch for school tomorrow – here’s hoping for no soggy pretzel dogs! 😉

UPDATE: The kids took one each in their lunch yesterday, and they didn’t become soggy! It helps that I didn’t refrigerate the leftovers, and I ate some for lunch too and they still tasted great. I’m really happy with these, and no one could tell that they’re nearly half whole wheat! Thanks for reading, enjoy!

Pretzel Dogs – adapted from Fake Ginger

  • 1 tablespoon sugar
  • 1½ cups warm water
  • 2 teaspoons kosher salt
  • 1 package dry active yeast
  • 2 1/2 cups all-purpose flour (312 grams)
  • 2 cups white whole wheat flour (240 grams)
  • 2 tablespoons unsalted butter, melted and cooled
  • 10 cups water
  • ⅔ cup baking soda
  • 1 large egg yolk, beaten with 1 tablespoon water
  • Pretzel salt (or kosher salt), for topping
  • 8 hot dogs, cut in half (*I used these*)

Directions:
Combine the warm water, sugar and kosher salt in the bowl of a stand mixer and sprinkle the yeast on top. Let the mixture sit for about 5 minutes, until the yeast is foamy and begins to smell of yeast.
Add the flour and butter to the yeast mixture. Attach the dough hook to the stand mixer and, on medium-low speed, combine the mixture until the dough pulls away from the sides of the bowl and appears shiny, roughly 4 to 5 minutes.
Spray a large bowl with non-stick spray (or lightly grease with vegetable oil) and place dough in greased bowl. Cover with plastic wrap. Place bowl in a warm area and let dough rise for about 1 hour, or until doubled in size.
Preheat oven to 450 degrees. Line two cookie sheets with parchment paper. Spray parchment paper with non-stick spray. Set aside.
In a large pot, bring the 10 cups of water and the baking soda to a roiling boil.
Place the dough on a greased surface, and divide into 16 equal pieces. Roll each piece into a long rope, roughly 12 inches long. Carefully wrap each piece around a half hot dog. Pinch the ends together to seal the dough.
Boil the shaped pretzels and pretzel dogs, one at a time, in the baking soda water for 30 seconds each. Using a slotted spatula, remove each pretzel dog from the water and place it on a drying rack to allow any extra baking soda mixture to drip off.
Place the boiled pretzel dogs back on a parchment lined baking sheets.
Brush with beaten egg yolk and sprinkle with pretzel or kosher salt.
Bake until golden brown, roughly 14 to 15 minutes. Transfer pretzel dogs to a cooling rack for a few minutes before serving. Serve with a variety of mustards.

Self-Rising Biscuits

The kids let us sleep in this morning, which was a happy surprise. However, it meant that it was nearly “brunch time” by the time we rolled out of bed. Everyone wanted breakfast and had their own ideas of what it should be. One wanted pancakes, the other expected French toast – another suggested outside options. In an effort to avoid that, I remembered this recipe, and that I had the all important eggs and bacon! These biscuits came together quickly and were so easy to make. I cut the biscuits into squares to save time and avoid overworking the dough and piecing the scraps together to make more biscuits.  We enjoyed these sandwich style, but my favorite way is with butter and apricot preserves 🙂

I posted earlier this week about receiving a free bag of King Arthur Unbleached Self-Rising flour, and I thought I should give my opinion of it. I am a loyal KAF customer and have at least 3 different types of flour from this brand; so, it comes as no surprise to me that I would love working with this 🙂 . Their website is full of recipes, and my family and friends favorite one so far is the fudge brownies! I also have several specialty items I have purchased through the online shop, and the quality is superior and I always get consistent results with my baked goods. What I appreciated even before I opened the bag was that it’s unbleached. I have yet to find another company that makes unbleached, self-rising flour – which leads to the other unique quality: aluminum free baking powder. Because it’s aluminum-free, there is no weird “tinny” flavor, so your baked goods will be light, fluffy and flavorful! Thanks for reading, enjoy!

Up Next: Chocolate Cobbler

Easy Self-Rising Biscuits – from King Arthur Flour

Directions:

1) Preheat the oven to 425°.

2) Place the flour in a bowl. Work in the butter or shortening just until crumbs are the size of large peas.

3) Add 2/3 cup of the milk or buttermilk, and stir until the mixture holds together and leaves the sides of the bowl, adding more milk or buttermilk if needed.

4) Scoop the dough onto a well-floured surface, and fold it over on itself several times, using more flour as needed to prevent sticking.

5) Roll or pat the dough into a 5″ x 8 1/2″ rectangle about 1/2″ to 3/4″ thick.

6) Cut biscuits with a sharp, round 2″ cutter, dipping the cutter into flour between cuts to reduce sticking. Or cut the rectangle into 12 small rectangular biscuits, which will allow you to skip the step of re-rolling and cutting scraps.

7) If you’ve used a round cutter, pat the scraps together, and cut additional biscuits.

8) Place the biscuits on an ungreased baking sheet, leaving about 1″ between them for crisp biscuits. Arrange biscuits so they’re barely touching for soft-side biscuits. For higher-rising soft-side biscuits, place biscuits in an 8″ round pan.

9) Bake the biscuits for 10 to 14 minutes, or until they’re a light golden brown.

10) Remove them from the oven, and serve hot. Cool leftovers completely, wrap airtight, and store at room temperature for several days; freeze for longer storage. To refresh room-temperature biscuits, place on a baking sheet, tent lightly with foil, and bake in a preheated 350°F oven for 10 to 13 minutes, until heated through.

Yield: about 1 dozen 2″ biscuits.

Whole Wheat Sandwich Bread

Yes, it came out a little – okay, a lot wonky…but I have issues with braids on top of loaves. I didn’t tuck the braid underneath the loaf, and this is what happens. I should know by now that patience and reading through the full recipe is rewarded. Don’t be like me! 😉 However, in the end what the food looks like isn’t nearly as important as how it tastes.

Verdict: S calls this “cloud bread” and didn’t seem to mind that this is wheatier than other loaves I usually make. This bread tastes great and isn’t bitter from all the wheat flour. It’s also surprisingly soft and squishy, but not so soft that it fell apart while eating my sandwich. Thanks for reading, enjoy!

Whole Wheat Bread – adapted from My Kitchen Addiction

  • 2 tablespoons orange juice
  • 1 cup lukewarm water
  • 2 1/2 teaspoons instant yeast (or one packet)
  • 3 tablespoons granulated sugar
  • 1/2 cup plain Greek yogurt
  • 1/4 cup canola oil
  • 1 teaspoon salt
  • 1 cup bread flour (King Arthur)
  • 3+ cups white whole wheat flour (King Arthur)

In a large mixing bowl, combine the water and the orange juice.  Sprinkle with the yeast and granulated sugar, and stir to dissolve.  Add the yogurt, canola oil, salt, and cup of bread flour.  Use a wooden spoon to mix, beating vigorously to start to develop the gluten in the bread flour.  Gradually, add the whole wheat flour, mixing with the wooden spoon until the dough pulls away from the sides of the bowl to form a ball. At that point, turn the dough out onto a clean, floured surface, and knead until you have a smooth dough (about 6-8 minutes). The amount of whole wheat flour needed will vary on the humidity and other factors.  Add just enough flour to keep the dough from sticking to your hands as you knead.

Return the dough to a lightly greased bowl, cover (with plastic wrap or a damp towel), and let rise until the dough has doubled (about an hour or two). It has risen sufficiently when the imprint of your fingers remains and the dough doesn’t spring back up.

Punch down the dough and form it into the shape of a loaf.  If you prefer, you can make a braid-topped loaf (like the one in my pictures) by reserving 1/3 of the dough, dividing it into three long strands, and creating a braid.  Place the braid on top of the loaf, tucking in the ends.  Place the shaped loaf into a greased loaf pan, cover, and let rise for an additional hour.

Preheat the oven to 350°F.  Bake the bread uncovered for 15 minutes, then cover with aluminum foil (to prevent over-browning on the top) and bake for an additional 20 – 25 minutes.  The internal temperature of the bread should be 190°F when the bread is done. Let the bread rest in the pan for a minute or two before transferring it to a wire rack to cool.  Cool for at least 30 minutes before slicing.