Chocolate Peanut Butter Cookies

cookie1

These cookies are so good and easily in my top five! They’re cakey, fudgy, rich and chocolaty. I’m not usually a fan of softer cookies, but these are so perfect. I am really glad that I made two batches – not all for my family of course!  Once every few weeks, my husband serves as assistant director and I always send goodies for the production crew. I know they appreciate the baked goods, and I love hearing about it 😉 Eight people polished off nearly three dozen cookies! Thanks for reading, enjoy 🙂

Chocolate Peanut Butter Cookies – adapted from King Arthur Flour

  • 1 1/2 cups all-purpose flour
  • 1/2 cup Dutch-processed baking cocoa
  • 1/2 teaspoon baking soda
  • 1/4 teaspoon salt
  • 1/2 cup granulated sugar
  • 1/2 cup brown sugar
  • 1/2 cup (8 tablespoons) unsalted butter, softened
  • 1/4 cup smooth peanut butter
  • 1 teaspoon vanilla extract
  • 1 large egg
  • 2 tablespoons water
  • 1 1/2 cups mini peanut butter cups

Directions

1) Preheat the oven to 375°F. Lightly grease (or line with parchment) two baking sheets.

2) In a medium-sized bowl, whisk together the flour, cocoa, baking soda, and salt.

3) In another bowl, beat together the sugars, butter, and peanut butter until light and fluffy.

4) Beat in the vanilla, egg, and water, then stir in the dry ingredients, blending well.

5) Stir in the mini peanut butter cups.

6) Scoop rounded tablespoonfuls of dough onto the prepared baking sheets. Flatten each cookie to about 1/2″ thick.

7) Bake the cookies for 7 to 9 minutes, or until they’re set and you can smell chocolate. Remove them from the oven, and cool on a rack.

Chocolate Cobbler

cake1

Chocolate – okay. Cobbler – what?? Never heard of you!  This recipe seems to be a favorite among Tasty Kitchen members, and since I have this brand new bag of King Arthur Self-Rising flour waiting to be used, I figured this was a good place to start. What makes KAF Self-Rising flour (besides the quality), is that it is unbleached and the baking powder is aluminum free. I know my local grocery store does not carry a similar product, and now I’m hoping that it will stock this soon!

I thought about making a fruit cobbler, but I know the hubbs appreciates a good chocolate dessert. This one is so simple and because I’m so darn lazy and didn’t feel like making a special trip to the store for fruit, I went with it. The batter is different from most desserts, especially because you don’t stir the whole batter together before pouring in the baking dish. It’s super simple and requires pantry and kitchen staples, but it takes 40 long minutes to bake! Hopefully it’s worth the wait! 🙂

Verdict: Chocolatey, gooey goodness! Make sure to top it off with a generous scoop of vanilla ice cream! Thanks for reading, enjoy!

cake

Chocolate Cobbler – adapted from Tasty Kitchen

Directions:

Preheat oven to 350 degrees.

First stir together the flour, baking powder, salt, 3 tablespoons of the cocoa, and 3/4 cup of the white sugar. Reserve the remaining cocoa and sugar.

Stir in the milk, melted butter, and vanilla to the flour mixture. Mix until smooth.

Pour the mixture into an ungreased 8-inch baking dish. I prefer my 2 quart casserole from Princess House.

In a separate small bowl, mix the remaining white sugar (it should be 1/2 cup), the brown sugar, and remaining 4 tablespoons of cocoa. Sprinkle this mixture evenly over the batter.

Pour the hot tap water over all. DO NOT STIR!

Bake for about 40 minutes or until the center is set.

Let stand for a few minutes if you can hold yourself back. Serve with homemade ice cream using the gooey sauce to spoon over all.

Lemon Yogurt Cake

This didn’t last long at our house!

Lemon Yogurt Cake – adapted from Ina Garten

  •  1 1/2 cups King Arthur Self-Rising flour
  • 1/2 teaspoon kosher salt
  • 1 cup Greek yogurt
  • 1 1/3 cups sugar, divided
  • 3 eggs
  • 2 teaspoons grated lemon zest
  • 1/2 teaspoon pure vanilla extract
  • 1/2 cup canola oil
  • 1/3 cup freshly squeezed lemon juice

Directions –

Preheat the oven to 350 degrees F. Grease an 8 1/2 by 4 1/4 by 2 1/2-inch loaf pan. Line the bottom with parchment paper. Grease and flour the pan.

Sift together the flour, baking powder, and salt into 1 bowl. In another bowl, whisk together the yogurt, 1 cup sugar, the eggs, lemon zest, and vanilla. Slowly whisk the dry ingredients into the wet ingredients. With a rubber spatula, fold the vegetable oil into the batter, making sure it’s all incorporated. Pour the batter into the prepared pan and bake for about 50 minutes, or until a cake tester placed in the center of the loaf comes out clean.

Meanwhile, cook the 1/3 cup lemon juice and remaining 1/3 cup sugar in a small pan until the sugar dissolves and the mixture is clear. Set aside.

When the cake is done, allow it to cool in the pan for 10 minutes. Carefully place on a baking rack over a sheet pan. While the cake is still warm, pour the lemon-sugar mixture over the cake and allow it to soak in. Cool.

Whole Wheat Apple Muffin

I added all the brown sugar into the batter…woops! I have a bad habit of not reading through an entire recipe – don’t be like me 😉  I figured the extra sugar couldn’t hurt these, and I was right. I didn’t add more to the tops, but next time I will be sure to remember that “divided” step. The kids and I love these and they are really flavorful, fluffy and moist. One of the ways I safeguard against dense baked goods that require whole wheat flour, is to make the simple substitution of whole wheat pastry flour. Another easy modification is to add the buttermilk and flour in three additions to the butter/sugar/egg mixture. The resulting batter is light and fluffy and baked into 16 Fall inspired muffins. And about the temperature called for in these – I cut it back to 350 degrees on convection for 20 minutes and they came out perfectly. Thanks for reading, enjoy!

Whole Wheat Apple Muffins – adapted from Smitten Kitchen via King Arthur Flour

Yield: They said 12, I got 16

  • 1 cup (4 ounces) whole wheat pastry flour
  • 1 cup (4 1/4 ounces) all-purpose flour
  • 1 teaspoon baking powder
  • 1 teaspoon baking soda
  • 1/4 teaspoon salt
  • 1 tablespoon cinnamon
  • 1/2 cup (1 stick, 4 ounces) unsalted butter, at room temperature
  • 1/2 cup (3 1/2 ounces) granulated sugar
  • 1/2 cup dark brown sugar, packed, divided
  • 1 large egg, lightly beaten
  • 1 cup (8 ounces) buttermilk or yogurt
  • 2 large apples, peeled, cored, and coarsely chopped

Directions –

Preheat the oven to 450°F. Grease and flour 18 muffin cups and set aside.

Mix together the flours, baking powder, baking soda, salt, and cinnamon, and set aside. In a separate bowl, cream the butter and add the granulated sugar and 1/4 cup of the brown sugar. Beat until fluffy. Add the egg and mix well; stop once to scrape the sides and bottom of the bowl. Mix in the buttermilk gently. (If you over-mix, the buttermilk will cause the mixture to curdle.) Stir in the dry ingredients and fold in the apple chunks.

Divide the batter evenly among the prepared muffin cups, sprinkling the remaining 1/4 cup brown sugar on top. Bake for 10 minutes, turn the heat down to 400°F, and bake for an additional 5 to 10 minutes, or until a toothpick inserted into the center of a muffin comes out clean. Cool the muffins for 5 minutes in the tin, then turn them out onto a wire rack to cool completely.

Buttertop Bread

I waited too long to blog about this one, so I don’t have much to tell about it 😉 Thanks for stopping by!

Buttertop Bread – adapted from King Arthur Flour

  • 3 cups King Arthur AP flour
  • 1 1/2 teaspoons salt
  • 1/3 cup dry potato flakes
  • 2 tablespoons sugar
  • 2 1/2 teaspoons instant yeast
  • 1 large egg
  • 2 tablespoons soft or melted butter
  • 3/4 cup to 7/8 cup lukewarm milk

Directions –

1) Mix and knead all of the dough ingredients together until you’ve made a smooth, though somewhat sticky dough. If you’re uncertain about the amount of milk to use, start with the lesser amount; you can always add more as you go along.

2) Place the dough in a lightly greased bowl. Cover, and allow the dough to rise for about 90 minutes; it should become quite puffy, though it may not double in bulk.

3) Gently deflate the dough, and shape it into a 9″ log. Place it in a lightly greased- 9×5 inch loaf pan.

4) Using a sharp knife, cut the loaf vertically down the middle from one end of the pan to the other, almost but not quite to the bottom of the pan.

5) Cover the loaf with lightly greased plastic wrap (or a shower cap), and allow it to rise until its top has crowned about 1″ over the rim of the pan, about 45 to 60 minutes. Towards the end of the rising time, preheat the oven to 350°F.

6) Bake the bread for 35 to 40 minutes, until it’s golden brown. Tent it lightly with aluminum foil after about 15 minutes of baking; because of its somewhat higher sugar content, this bread tends to over-brown if not covered.

7) Remove the bread from the oven, and brush it with melted butter. Cool completely before slicing.

8) Store bread, tightly wrapped, for several days at room temperature; freeze for longer storage.

Pretzel Dogs

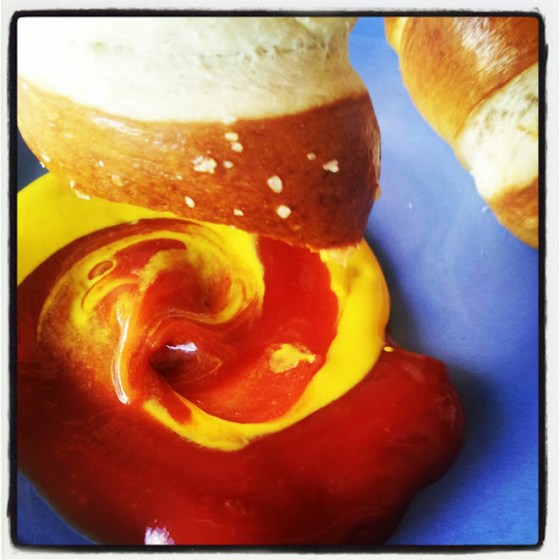
These are seriously good! My sister made these for our 4th of July party this summer and they were a big hit with kids and adults alike. In an effort to redeem these nutritionally (every little bit helps), I used half white whole wheat and half all-purpose flour for these. Also, the hot dogs are uncured, grass-fed beef…yes, I am a food snob! 😉

This dough is so easy to work with and easily rolled, and shaped without that annoying snap-back of some other doughs I have worked with. Be careful when you add the baking soda to your pot of boiling water, as it will boil more aggressively. Use a slotted spoon to carefully add the dogs to the pot and, again watch for the crazy boiling water!  We’re going to experiment with these in the kid’s lunch for school tomorrow – here’s hoping for no soggy pretzel dogs! 😉

UPDATE: The kids took one each in their lunch yesterday, and they didn’t become soggy! It helps that I didn’t refrigerate the leftovers, and I ate some for lunch too and they still tasted great. I’m really happy with these, and no one could tell that they’re nearly half whole wheat! Thanks for reading, enjoy!

Pretzel Dogs – adapted from Fake Ginger

  • 1 tablespoon sugar
  • 1½ cups warm water
  • 2 teaspoons kosher salt
  • 1 package dry active yeast
  • 2 1/2 cups all-purpose flour (312 grams)
  • 2 cups white whole wheat flour (240 grams)
  • 2 tablespoons unsalted butter, melted and cooled
  • 10 cups water
  • ⅔ cup baking soda
  • 1 large egg yolk, beaten with 1 tablespoon water
  • Pretzel salt (or kosher salt), for topping
  • 8 hot dogs, cut in half (*I used these*)

Directions:
Combine the warm water, sugar and kosher salt in the bowl of a stand mixer and sprinkle the yeast on top. Let the mixture sit for about 5 minutes, until the yeast is foamy and begins to smell of yeast.
Add the flour and butter to the yeast mixture. Attach the dough hook to the stand mixer and, on medium-low speed, combine the mixture until the dough pulls away from the sides of the bowl and appears shiny, roughly 4 to 5 minutes.
Spray a large bowl with non-stick spray (or lightly grease with vegetable oil) and place dough in greased bowl. Cover with plastic wrap. Place bowl in a warm area and let dough rise for about 1 hour, or until doubled in size.
Preheat oven to 450 degrees. Line two cookie sheets with parchment paper. Spray parchment paper with non-stick spray. Set aside.
In a large pot, bring the 10 cups of water and the baking soda to a roiling boil.
Place the dough on a greased surface, and divide into 16 equal pieces. Roll each piece into a long rope, roughly 12 inches long. Carefully wrap each piece around a half hot dog. Pinch the ends together to seal the dough.
Boil the shaped pretzels and pretzel dogs, one at a time, in the baking soda water for 30 seconds each. Using a slotted spatula, remove each pretzel dog from the water and place it on a drying rack to allow any extra baking soda mixture to drip off.
Place the boiled pretzel dogs back on a parchment lined baking sheets.
Brush with beaten egg yolk and sprinkle with pretzel or kosher salt.
Bake until golden brown, roughly 14 to 15 minutes. Transfer pretzel dogs to a cooling rack for a few minutes before serving. Serve with a variety of mustards.

Orange Raspberry Muffins

The co-op has inspired me to find new way of enjoying organic produce! And after doing a quick search on FoodGawker, I found this recipe, and it was just in time, because I hate wasting food. These have great flavor, but the oven time and temp was way off for me. I thought as I read “400 degrees for over 20 minutes”, it wouldn’t be right for a muffin. Next time I will bake them at about 375 for 15-20 minutes. When these had about 8 minutes left, I knocked down the temp for a couple more minutes, then tested the muffins with a toothpick. I don’t know why I don’t always go with my gut on this sort of thing! 😉 Thanks for reading, enjoy!

Orange Raspberry Muffins –  adapted from Susi’s Kochen via Baking: From My Home to Yours

  • Grated zest and juice of 1 orange
  • About 3/4 cup buttermilk
  • 2 large eggs
  • 3 tablespoons honey
  • 1 stick (8 tablespoons) unsalted butter, melted and cooled
  • 1/3 cup sugar
  • 2 cups King Arthur Self-Rising flour (250 grams)
  • 2 1/2 teaspoons baking powder
  • 1/2 teaspoon baking soda
  • 1/2 teaspoon salt
  • 1 1/2 cups raspberries – fresh, preferably, or frozen (not thawed)
  • Decorating sugar, for topping (optional)

Directions –

Center a rack in the oven and preheat the oven to 400 degrees F.
Butter or spray the molds in a regular-size muffin pan or fit the molds with paper muffin cups. Place the muffin pan on a baking sheet.

Pour the orange juice into a large glass measuring cup or a bowl and pour in enough buttermilk to make 1 cup. Whisk in the eggs, honey and melted butter.

In a large bowl, rub the sugar and orange zest together with your fingertips until the sugar is moist and the fragrance or orange strong. Whisk in the flour, baking powder, baking soda and salt. Pour the liquid ingredients over the dry ingredients and, with the whisk or a rubber spatula, gently but quickly stir to blend. Don’t worry about being thorough – the batter will be lumpy and bubbly, and that’s just the way it should be. Stir in the raspberries. Dived the batter evenly among the muffins cups.

Bake for 22 to 25 minutes. If you want to top the muffins with decorating sugar, sprinkle on the sugar after the muffins have baked for 10 minutes. When fully baked, the tops of the muffins will be golden and springy to the touch and a thin knife inserted into the center of the muffins will come out clean. Transfer the pan to a rack and cool for 5 minutes before carefully removing each muffin from its mold.

Cheddar Biscuits

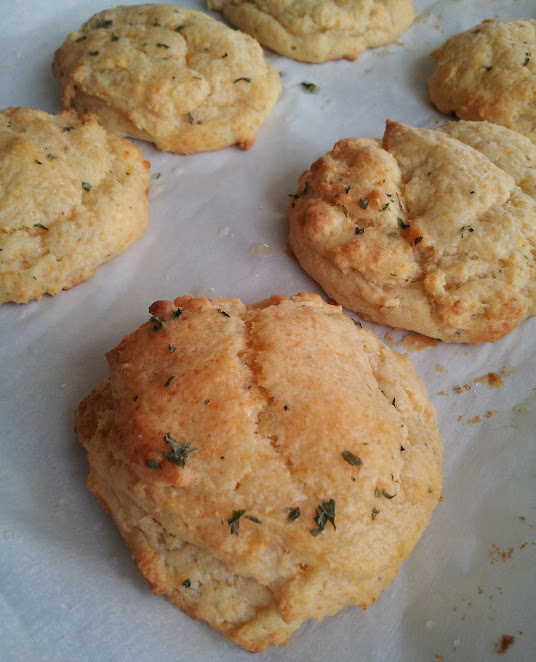
Quick Post: I made these to go with this salad. They were cheesy and delicious. The End!

Cheddar Biscuits – adapted from No More To Go

  • 1 ¾ cups King Arthur Self-Rising flour
  • 1 teaspoon salt (*next time I will use less salt – at least 1/4 tsp less*)
  • ¼ teaspoon garlic powder
  • ½ cup butter, cold
  • 1 cup cheddar cheese, shredded
  • ¾ cup buttermilk

Butter:

  • 3 tablespoons butter, melted
  • ½ teaspoon garlic powder
  • ¾ teaspoon dried parsley

Directions –

1. Preheat oven to 400. Line a rimmed baking sheet with parchment paper or spray lightly with canola oil.
3. Combine flour, salt, and garlic powder in a large bowl.
4. Using a pastry cutter, food processor, or just two forks, cut in the cold butter.Combine the butter using this method until you have pieces of butter no bigger than a pea.
6. Add cheese and milk and mix with your hands until just combined.
8. Drop using a ¼ cup measuring cup onto your prepared baking sheet.
9. Bake for 11-13 or until the tops of the biscuits are light brown.
10. While the biscuits are cooking, combine the glaze ingredients in a small bowl.
11. When the biscuits come out of the oven, brush them with the butter glaze and serve

Soft Wrap Bread

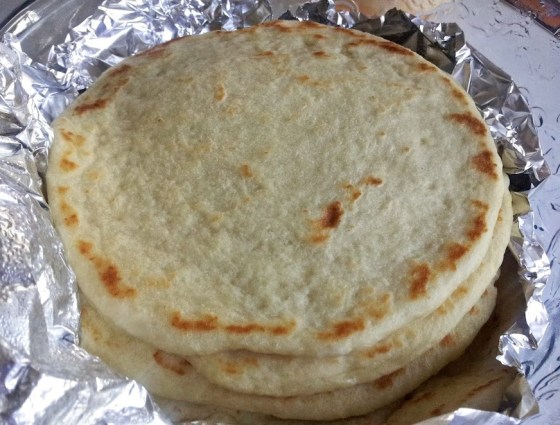
The name says it all – soft! The bread easy to make, a cinch to roll out (always a plus), and quick to cook up. I like that I didn’t have to heat up my oven to bake these, and they cooked up tender and pliable. These qualities made them perfect for this dinner I made the other night. I’m going to use some of the leftovers for the kid’s lunches and if they work out, I’ll definitely make them whole wheat next time. Thanks for reading, enjoy!

Soft Wrap Bread – adapted from King Arthur Flour

  • 3 to 3 1/4 cups (12 3/4 to 13 3/4 ounces) unbleached all-purpose flour
  • 1 1/4 cups (10 ounces) boiling water
  • 1/4 cup (1 1/2 ounces) potato flour OR 1/2 cup (5/8 ounces) potato buds or flakes
  • 1 1/4 teaspoons salt
  • 2 tablespoons (7/8 ounce) vegetable oil
  • 1 teaspoon instant yeast

Making the Dough: Place 2 cups of the flour into a bowl or the bucket of a bread machine. Pour the boiling water over the flour, and stir till smooth. Cover the bowl or bucket and set the mixture aside for 30 minutes.

In a separate bowl, whisk together the potato flour (or flakes or buds) and 1 cup of the remaining flour with the salt, oil and yeast. Add this to the cooled flour/water mixture, stir, then knead for several minutes (by hand, mixer or bread machine) to form a soft dough. Note: You can allow the dough to go through the entire kneading cycle(s) in the bread machine, but it’s not necessary; about a 5-minute knead in the machine, once it gets up to full kneading speed, is fine. The dough should form a ball, but will remain somewhat sticky. Add additional flour only if necessary; if kneading by hand, keep your hands and work surface lightly oiled. Let the dough rise, covered, for 1 hour.

Shaping: Divide the dough into 8 pieces (each about the size of a handball, around 3 ounces), cover, and let rest for 15 to 30 minutes. Roll each piece into a 7- to 8-inch circle, and dry-fry them (fry without oil) over medium heat for about 1 minute per side, until they’re puffed and flecked with brown spots. Adjust the heat if they seem to be cooking either too quickly, or too slowly; cooking too quickly means they may be raw in the center, while too slowly will dry them out. Transfer the cooked breads to a wire rack, stacking them to keep them soft. Serve immediately, or cool slightly before storing in a plastic bag.

Update: I made the kids turkey and cheese pinwheels with the leftover bread. I recommend microwaving the bread for about 10 seconds to prevent cracks from forming.

Whole Wheat Bread with Spelt Flour

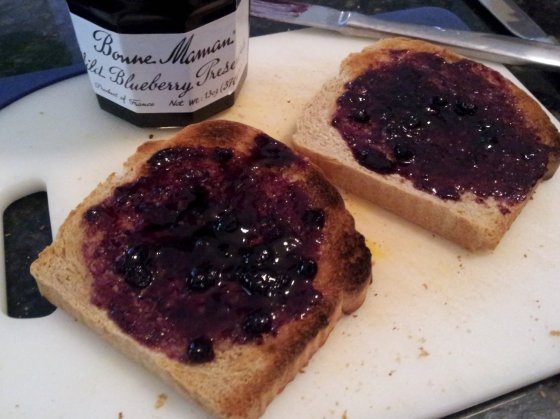
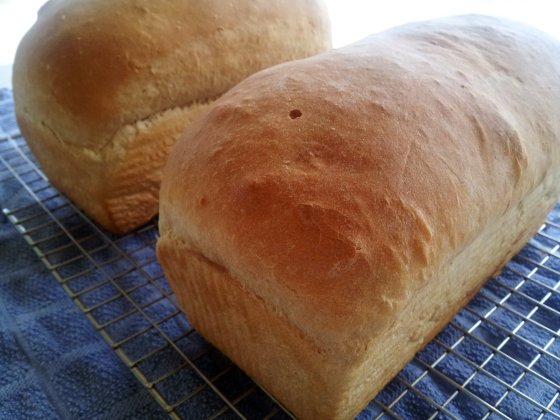
This bread tastes like whole wheat bread is supposed to taste! I substituted more spelt flour for the white flour, figuring the more whole grain the better. My substitution worked really well and I used bread flour instead of all-purpose to make up for the gluten that it might need because of my substitution. Spelt flour has less gluten and requires less water than wheat flour, and you need to be careful not to over knead the dough or it can create a crumbly finished loaf. Thanks for reading, enjoy!
Whole Wheat Bread – adapted from Musings of a Housewife
  • 6 cups white whole wheat flour (720 grams)
  • 2/3 cup honey
  • 1/2 cup coconut oil or butter, melted
  • 2 tablespoon salt
  • 3 tablespoons active dry yeast
  • 4-1/2 cups water
  • 2 cups Spelt or white flour (I used 3.5 cups or 402 grams)
  • 4 to 6 cups all-purpose flour (I used 3-3.5 cups or 381-444 grams)

Directions:

  1. Combine coconut oil, honey and 4-1/2 cups water in a small saucepan. Heat over low heat JUST until the oil is melted. It should be about 120 degrees so as to not kill the yeast.
  2. Place whole wheat flour, yeast and salt in a large mixing bowl. With the paddle attachment, mix about 15 seconds on Stir. (This is the mixer I have. It will do 4 loaves at once, but I often end up kneading the last few minutes by hand.)
  3. Continuing on Stir, add warm water mixture to flour mixture. Mix about a minute.
  4. Then with the dough hook in place, add the spelt and all-purpose flour, 1/2 cup at a time, mixing well between each addition.
  5. Mix about 2 minutes, or until dough starts to clean sides of bowl, adding flour as necessary.
  6. Knead on Speed 2 about 2 minutes longer.
  7. Place dough in greased bowl, and turn greased side up.
  8. Cover and let rise in warm place 40 to 60 minutes or until double. Dough is ready if indentation remains when touched.
  9. Form your loaves and place them in 8×4 loaf pans to rise for about an hour.
  10. When they look the right size, bake for 30 – 40 minutes in a preheated 350-degree oven, or until the internal temp is 190 degrees.
  11. Remove immediately to a cooking rack, brush tops with butter (optional), and try to wait a few hours before cutting into one.