
Hey all of you lovely, patient readers! I am back after two, long years of busyness with family and my general laziness. I have been cooking and baking just as much as before, but haven’t felt inspired to post until … Continue reading

Hey all of you lovely, patient readers! I am back after two, long years of busyness with family and my general laziness. I have been cooking and baking just as much as before, but haven’t felt inspired to post until … Continue reading

This recipe makes a huge batch and gets better over time. Thanks for reading, enjoy!
Spaghetti Squash Bake – Mom-Makes original

Preheat your oven to 350 degrees. Spread out the spaghetti squash into the bottom of a 13×9 inch baking dish. Combine the marinara sauce and the roasted veggies in a pot to warm slightly, then pour the mixture over the top of the squash. Top generously with the cheeses. Bake for 25 to 30 minutes.

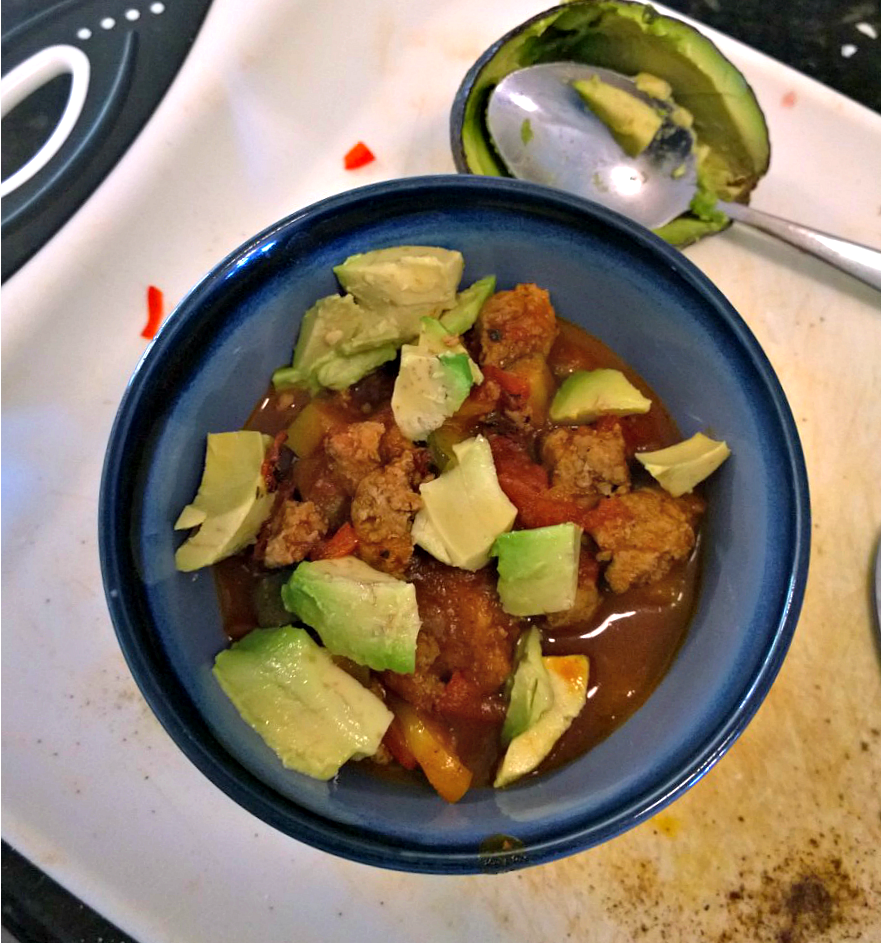
Pinterest has saved the day several times in my kitchen. I had some produce that was passed its prime in my fridge, along with ground turkey that had to be used; and I even had a can of fire roasted tomatoes that I didn’t know why I purchased in the first place. I love how forgotten ingredients can become something so satisfying! Thanks for reading, enjoy!
Paleo Turkey Chili – adapted from Turtlewoman
Directions –

2. Add more fat to the pan and brown the turkey over medium heat, stirring to break up. Season lightly with salt and pepper. Once the meat is cooked through, add the veggies back into the pot and pour the tomatoes, water and seasoning over all. Stir to combine and bring to a boil. Turn down the heat to a simmer and cook for about 30 more minutes.
3. Stir periodically while it is simmering. Taste and adjust seasoning if needed. Serve with chili toppings of your choice – I added diced avocado!

DIY Taco Seasoning – adapted from Against All Grain
Directions –
Mix all ingredients together thoroughly blended. Makes 1/2 cup.


Chilly nights are perfect for enjoying comfort foods that warm you from the inside out! This was flavorful and has the perfect amount of spiciness. We enjoyed it with this corn bread, aged cheddar cheese, cilantro and some sour cream. Thanks for reading, enjoy!
Chili Con Carne – adapted from Simply Recipes
Directions –
1. In a small bowl mix the chili powder, chipotle chili powder, ground cumin, oregano, and ground coriander. Set aside.
2. Heat a Dutch oven over medium high heat, add back in 1 tablespoon of bacon fat. Working in batches so that you don’t crowd the beef (crowding will steam cook the meat instead of browning it), brown the beef cubes on all sides. Remove beef from pan, set aside.
3. Add another Tablespoon of bacon fat to the pan. Add the chopped onions and sauté until soft, about 5 minutes. Add the garlic and jalapeño, cook until fragrant, 1 minute more. Add the chili paste and cook for 2-3 more minutes.
4. Put onion chili mixture, beef, tomatoes, water, lime juice. Heat the chili on medium high heat until it comes to a simmer. Then reduce the heat to low. Cover and cook for 1 1/2 hours. Then uncover and cook for another half hour, keeping the temperature at a place where you can maintain a simmer.
5. Gently mix in the kidney beans. Add salt to taste. Adjust seasonings. Sprinkle with grated cheddar cheese, cilantro and sour cream if desired. Serve with cornbread.

Grandmother’s Buttermilk Cornbread – adapted from Allrecipes
Directions:
1. Preheat oven to 375 degrees F (175 degrees C). Butter a 8×8 baking dish or a 9 inch cake pan.
2. Melt butter in large skillet (I put it in the microwave for about 45 seconds). Remove from heat and stir in sugar. Quickly add eggs and beat until well blended. Combine buttermilk with baking soda and stir into mixture in pan. Stir in cornmeal, flour, and salt until well blended and few lumps remain. Fold in the cheese and pour into your prepared pan.
3. Bake in the preheated oven for 30 to 40 minutes, or until a toothpick inserted in the center comes out clean.(*mine took 30 minutes with convection)


Whenever it’s even a little cooler here, I like to take advantage. This winter has been so mild that it feels more like spring/early summer. Sometimes I wish for cooler air, but then I see the pictures of what Northerners are dealing with. I’m a lightweight when it comes to temperatures below 75!
This is a dairy-free, “creamy” soup but you can substitute unsweetened coconut milk with heavy cream or half and half. In my experience, the coconut milk doesn’t make the food taste “coconutty”. Thanks for reading, enjoy!
Sausage, Potato and Kale Soup – adapted from The Candid Appetite
Directions –
1. Heat a large heavy-duty pot over medium-high heat. Once the pot has heated through, add the sausage, which you removed from the casing. Using a wooden spoon, begin to break up the sausage and allow it to cook, stirring occasionally, until it has fully browned. Remove the crisped sausage from the pot and transfer it to a plate or bowl. Set aside.
2. Lower the heat to medium, add the butter or oil and throw in the onions and garlic. Stir, scraping down the bottom of the pot picking up the browned bits of sausage with the back of a wooden spoon, and cook until soft and translucent about 3 to 5 minutes. Season with salt, pepper, and crushed red pepper flakes, if using. Continue to sauté until the onions have caramelized. Add the chopped kale in batches, allowing it to wilt down as it cooks.Cook the kale for another 3 minutes until it has turned bright green and completely wilted down. Throw in the sliced potatoes and cooked sausage.
3. Pour in the chicken stock or broth and bring it up to a boil. Lower the heat and allow the soup to simmer until the potatoes are cooked tender and soft. Taste the soup for seasoning, at this point you may add more salt, pepper or red pepper flakes, if desired. Once the potatoes are fully cooked, stir in the heavy cream. Serve right away with some bread on the side. Enjoy!

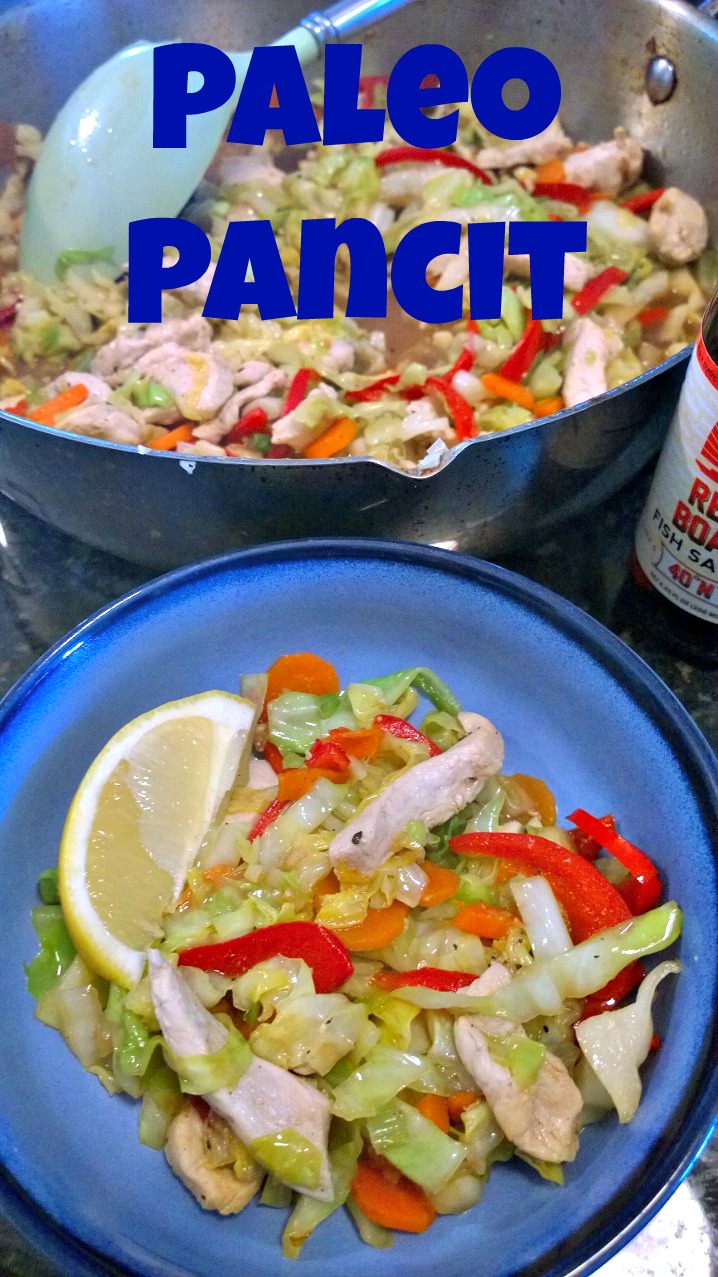
After making this, I learned – one: I love fish sauce, and two: more cabbage, please! I was worried about using both but this recipe just looked and sounded so good. I’m glad I didn’t let apprehension get the best of me, because this was so perfect! It was savory, sour and had just enough saltiness; and textures in each bite of this pancit, (which I had never tried or heard of before), that I am on the look out for more Asian recipes that might hit all those notes again. Thanks for reading, enjoy!
Chicken Pancit – adapted from Everyday Paleo
Directions –
In a large wok or skillet heat the coconut oil over medium to medium high heat. When the wok or pan is nice and hot, add the chicken, green onions and garlic and saute for about 6-7 minutes or until the meat is done all the way through but still tender. Remove the meat from the pan and set aside. Add the bell pepper and carrots to the wok or pan and cook for 3 minutes. Add in the cabbage and cook about 4 more minutes. Add the chicken back to the veggies and pour in the coconut aminos or soy sauce, chicken broth, and fish sauce. Season with lots of black pepper. Stir well and cook for another minute or two. Serve in bowls with a lemon wedge.


I love roast chicken! This was the most simply seasoned chicken I have ever made and also the quickest to roast. The pan sauce came together so easily while the finished bird was resting. I loved every bit of this meal and I would gladly make it weekly if my family let me 😉 Instead of typing up all the recipe here, I’m posting a link to where I found it at Nom Nom Paleo (I love that name). Over there you’ll get to see step-by-step photos and extra tips and tricks. Thanks for reading, enjoy!
**Weeknight Roast Chicken Recipe**


**Sorry for the lack of posting – things are much different in our house. My kids and I just finished our third week of homeschooling, so I have had to put the blog on the back burner 🙂 I will post when I can! Thanks for stopping by :)**
Quick Post: One of my favorite combinations is chicken and sweet potato – I practically live off of this pairing! This is one of the most simple and cheap dinners I have tried since I changed my eating habits, and it’s just so good. I love how crispy the skin becomes and I eat it unashamedly! 😉 Before I put the skillet in the oven, I browned up the skin in the pan on my stove – that’s optional, but I recommend it! Thanks for reading, enjoy!

Maple Roasted Chicken and Sweet Potatoes – adapted from Honey, Ghee and Me
Directions –
Preheat oven to 400 degrees. Begin by peeling sweet potatoes and chop them into one inch chunks. Chop the onions into a similar size and arrange the vegetables in the bottom of a baking dish. Pour in olive oil and maple syrup and season the chicken with salt and pepper. Toss to coat in the oil and maple syrup, and leave all the chicken and vegetables in one even layer. Top with thyme sprigs and bake for 1 hour uncovered, turning the chicken half way through cooking time.


This was so simple and flavorful, makes a big batch and it’s so versatile. We’re using this pork for BBQ pulled pork sandwiches, but you could use some in one of my favorite macaroni dishes or these amazing taquitos. I don’t cook pork often enough, but after trying this recipe out, I’m sure add it to the rotation. If you follow the recipe link, you’ll see that there are a few different ways to season this up, but I chose the “plain” version so the leftovers would be easier to use. Thanks for reading, enjoy!

**Potato Bun Recipe Here and Creamed Corn Recipe Here**
Slow Cooked Pork Roast – adapted from The Kitchn
Directions –
Preheat the oven to 325 degrees. Place a rack on the lower-third of the oven. Pat the pork dry with paper towels, and season with salt and pepper. Heat a large dutch oven over medium-high heat and add the oil. Sear all sides of the meat, add the vegetables and chicken stock and bring to a simmer. Once it simmers, cover and place in the oven. Bake for 2 to 4 hours, checking after the first two hours for “fork-tenderness” – My 4 pound bone-in roast was fall-off the bone tender at 3.5 hours. Transfer the pork to a large container. When cool enough to handle, use two forks or your fingers to shred the meat into pieces. Remove any large pieces of fat or bones. For more moist and flavorful pulled pork, you can mix some of the cooking liquid back into the pork. Start with a little, mix, then add more until the pork is as wet or dry as you like. Alternatively, for barbecue pulled pork, you can mix in barbecue sauce. Pulled pork will keep for 1 week in the refrigerator or for up to 3 months in the freezer.


Quick Post: This was pretty good, but next time I’ll add less arrowroot powder for thickening. Thanks for reading, enjoy!
Paleo Orange Chicken – adapted from Paleo Cupboard
**shown with my modifications**
For the Sauce
Directions –
1. Season chopped chicken pieces with sea salt and pepper. Set aside.
2. To make the sauce, combine all ingredients in a medium size saucepan and stir to combine. Place over medium high heat and bring just to a boil, stirring frequently. Allow sauce to thicken and then remove from heat and set aside.
3. Place a large skillet over medium-high heat and add 1 -2 tablespoons of coconut oil and heat until it shimmers. Toss in the veggies and cook for about 2 minutes – remove them and set aside. Add the remaining coconut oil. Add the chicken pieces and cook for about 5-7 minutes or until nicely browned. Drain any excess fat from the pan and pour the sauce into the skillet. Add the veggies to the pan and stir to coat. Serve over roasted cauli-rice.

