Gluten-Free Pumpkin Pancakes

pump

These are so yummy and you wont miss the gluten 🙂

Healthy Pumpkin Pancakes – adapted from Paleo Grubs

  • 1/4 cup pumpkin puree
  • 3 tbsp coconut milk
  • 1 tbsp maple syrup
  • 3 eggs
  • 1 tbsp coconut oil, melted, plus additional for pan
  • 1 tsp vanilla
  • 1/4 cup coconut flour
  • 1 tsp cinnamon
  • Pinch of nutmeg
  • 1/2 tsp salt
  • 1/4 tsp baking soda
Directions –
  1. In a large bowl, whisk together the dry ingredients – the coconut flour, cinnamon, nutmeg, salt, and baking soda. Then in a separate bowl, whisk together the wet ingredients – the pumpkin puree, almond milk, honey, eggs, oil, and vanilla. Add the dry ingredients to the wet ingredients. Stir together until just combined.
  2. Heat a griddle or non-stick skillet to medium heat. Coat pan with coconut oil. Pour about 1/4 cup of batter onto the skillet. Cook for 2-4 minutes until the bottom is cooked through, and then flip. Cook for another 2-4 minutes until lightly browned. Repeat with remaining batter. Serve warm and enjoy!
Advertisement

Healthier Pumpkin Spice Latte

6

This was my first pumpkin spice latte ever, so I can’t compare it well to a coffee shop drink. What I can tell you is that this is like pumpkin pie in a cup! It’s also much cheaper and not full of empty calories and syrupy-goodness that is the typical coffee chain offering. Thanks for reading, enjoy!

Healthier Pumpkin Spice Latte – adapted from Detoxinista

  • 1 cup coconut milk
  • 1 cup hot brewed coffee
  • 2 tablespoons pumpkin puree
  • 2 tablespoons pure maple syrup
  • ½ teaspoon pumpkin pie spice
7
Directions – 
Combine all of the ingredients in a high-speed blender, and blend until smooth and creamy. Adjust flavor to taste, and serve warm.

Pumpkin Spice Bread

The apple spice bread I made two days ago is already gone… I did give my neighbor an entire loaf, so I’m not that much of a glutton 😉 As expected, the bread tasted much better the day after I made it, especially when I topped it with Kerrygold butter and popped it in the microwave! So good and none of the guilt or bloat.

5

I used the exact recipe, but exchanged the apple sauce for pumpkin puree – easy swap and an even tastier product! Thanks for reading, enjoy! 🙂

11

Apple Spice Bread

2

Yum! This was my first attempt at grain-free, gluten-free, refined sugar-free baking… that’s a lot of “free”! 😉 I am so used to baking with flour that I was slightly apprehensive about how this recipe might turn out. I was relieved when this baked up beautifully light and soft. The kids and I, (well, mostly I), ate a whole loaf today. Instead of making one large loaf, I made three minis, cooled them completely, then wrapped them and stored them in the refrigerator. I know I’ll make this again and I’ll have fun trying out new coconut flour recipes soon. My next experiment will be testing this same recipe, but swapping the apple sauce for pumpkin puree. Thanks for reading, enjoy!

1Ingredients, minus the vanilla extract.

WP_20141029_012 1

These popped out of the pan nicely after cooling for 15 minutes. I love my USA Pans! 🙂

Applesauce Spice Bread – adapted from Au Naturale Nutrition

  • 6 eggs
  • 3 Tbsp coconut oil, butter, or ghee (melted)
  • 1/2 cup raw honey or maple syrup
  • 1/2 cup unsweetened, natural applesauce
  • 1 Tbsp vanilla extract
  • 1 Tbsp molasses
  • 3/4 cup coconut flour
  • 1/2 tsp sea salt
  • 1/2 tsp baking soda
  • 1 Tbsp pumpkin pie spice

Directions:

Preheat oven to 350. In a large bowl, combine dry ingredients. In a medium bowl, combine wet ingredients. Pour wet ingredients into dry and blend until evenly combined. Grease pan(s).  Pour batter into 3 mini loaf pans or 1 large glass loaf pan. Bake for 35-40 minutes in mini pans.  Bake 65-70 minutes for 1 large loaf. Allow to cool completely.  Store in fridge.

Maple Roasted Chicken and Sweet Potatoes

WP_20140709_20_05_55_Pro

**Sorry for the lack of posting – things are much different in our house. My kids and I just finished our third week of homeschooling, so I have had to put the blog on the back burner 🙂 I will post when I can! Thanks for stopping by :)**

Quick Post: One of my favorite combinations is chicken and sweet potato – I practically live off of this pairing! This is one of the most simple and cheap dinners I have tried since I changed my eating habits, and it’s just so good. I love how crispy the skin becomes and I eat it unashamedly! 😉 Before I put the skillet in the oven, I browned up the skin in the pan on my stove – that’s optional, but I recommend it! Thanks for reading, enjoy!

  • WP_20140709_19_02_27_Pro (1)

Maple Roasted Chicken and Sweet Potatoes – adapted from Honey, Ghee and Me

  • 2-4 chicken pieces (bone-in, skin-on)
  • 2 sweet potatoes
  • 1 yellow onion
  • 3 tbsp maple syrup (the real stuff- makes a huge difference)
  • 8 sprigs fresh thyme
  • 2 tbsp olive oil
  • 3/4 tsp salt
  • 1/4 tsp pepper

Directions –

Preheat oven to 400 degrees. Begin by peeling sweet potatoes and chop them into one inch chunks. Chop the onions into a similar size and arrange the vegetables in the bottom of a baking dish. Pour in olive oil and maple syrup and season the chicken with salt and pepper. Toss to coat in the oil and maple syrup, and leave all the chicken and vegetables in one even layer. Top with thyme sprigs and bake for 1 hour uncovered, turning the chicken half way through cooking time.

Whole Grain Waffles

WP_20140128_17_58_53_Pro (1)

My kids love waffles – what’s not to love? I get to make a weeks worth of school breakfasts in less than an hour, and the kids get another maple syrup delivery system 😉 I I like to use wheat pastry flour because it’s mild enough that the kids don’t mind, and I like that I can sneak a little fiber into breakfast. This batch makes about 10 waffles, most of which get cooled, divided, bagged and frozen. Warm them up in a 350 degree oven for about 10 minutes, or mere seconds in your microwave. Thanks for reading, enjoy!

Whole Wheat Waffles – adapted from Cookie and Kate

  • 1 cup whole wheat pastry flour
  • 1 cup whole wheat flour (you can also use spelt, rye, cornmeal or buckwheat)
  • 1½ teaspoons baking powder
  • 1 teaspoon baking soda
  • ½ teaspoon salt
  • 2 cups buttermilk (make your own: add 2 tablespoons of vinegar or lemon juice to 2 cups milk, and let sit for 5 minutes)
  • 3 eggs
  • 1 tablespoon maple syrup (or honey)
  • ¼ cup (1/2 stick) butter (original recipe called for one full stick of butter)
  • ½ teaspoon cinnamon
  • ½ teaspoon vanilla extract
Directions –
  1. Preheat your oven to 200 degrees and heat up your waffle iron.
  2. Mix the dry ingredients (flours, baking powder, baking soda, and salt) in a large mixing bowl.
  3. In a large measuring cup, whisk together the buttermilk, eggs and syrup or honey.
  4. Pour the liquid ingredients into the dry ingredients. Stir just until they are mixed.
  5. Add the melted butter and mix well.
  6. Pour batter into your waffle iron until the butter reaches the edges of the iron. Cook until crisp and golden.
  7. Place each waffle on a rack in the oven (in a single layer) to keep them warm until you’re ready to serve. Five minutes in the oven may actually help them get a little crispier.

Salad with Maple-Dijon Dressing

salad123

It’s a new year and I tend to get inspired to eat a little healthier. This is a really simple, light but flavorful salad with lots of textures and flavors. Use whatever you have to make it interesting, because salads can be so bland and boring. I listed goat cheese in the ingredients even though I didn’t have any, but it would have been a nice tangy, creamy addition. Thanks for reading, enjoy!

Maple-Dijon Dressing – adapted from The Six o’clock Scramble

  • 1/4 cup extra virgin olive oil
  • 1/8 cup balsamic vinegar
  • 1 Tbsp. pure maple syrup
  • 1 tsp. Dijon mustard
  • 1/4 tsp. herbes de Provence

Salad –

  • grilled chicken, chopped
  • apple, sliced
  • tomatoes
  • almonds, chopped
  • crumbled goat cheese

Directions –

Place all dressing ingredients into a lidded jar and shake well to combine.  Spoon over your salad greens and toss.

Granola

Yes, another granola recipe. I have changed this one up a bit by using coconut oil, and a lower cooking temp. The coconut oil’s smoke point is 350, so I’m knocking the temp by 100 degrees just to be on the extra-safe side. This smells fantastic while baking!
Verdict: I enjoyed this granola with sliced bananas and raisins. This is my first time using sesame seeds for anything, but I can’t really taste them in this, but I have read how beneficial adding them to my diet is. Apparently the seeds are high in copper, manganese, calcium, fiber and other important nutrients. So, despite the maple syrup and honey in this, the granola is healthy and packed with nutrition. This was also my first time using coconut oil which is also super healthy and considered by some to be the healthiest oil on earth. My first thought about coconut oil was “is this going to make my food taste like coconut”, but it’s flavorless. I’ve been looking for ways to use the oil and it’s not just for food but can be used on your skin and hair. There is a lot of information to look through! 🙂 Thanks for reading, enjoy!
Aunt Melissa’s Granola – adapted from Artisan Bread in Five Minutes a Day
  • 1/3 cup honey
  • 1/4 cup maple syrup
  • 1/3 cup coconut oil
  • 2 tablespoons water
  • 1/2 teaspoon pure vanilla extract
  • 1/2 teaspoon ground cinnamon
  • 1/4 teaspoon salt
  • 4 cups rolled oats
  • 1/4 cup sesame seed
  • 1/2 cup raw sunflower seeds
  • 3/4 cup chopped almonds
  • 3/4 cup shredded unsweetened coconut
  • raisins or your favorite dried fruit for serving
Directions:
1. Preheat your oven to 250 degrees. Line two baking sheets with foil and lightly oiled or a silpat.
2. Combine the honey, maple syrup, oil, water and vanilla, set aside. Toss together all of the dry ingredients. (leaving the raisins and dried fruit out until after the granola is baked).
3. Add the honey mixture and toss with a spoon until the oats are well covered. Spread the granola in a thin layer on the baking sheet.
4. Bake for 40-50 minutes. After 20 minutes toss the granola with a spoon and rotate the trays from top to bottom so they both bake evenly. keep a close eye on it as it starts to turn brown so it doesn’t over bake. It will be a deep golden brown when it is done.

Fiber-tastic Granola

Here’s hoping this experiment goes well! I had all this stuff on hand, and the oat and wheat bran have been hanging out in my freezer for several months. I tried both of them and they weren’t rancid or smelly. The freezer is the best place for these kind of ingredients with fat (healthy of course) because it can go bad quickly. This really is full of fiber, minerals, vitamins, protein, omega-3, and nutrients. I pulled a few ideas from a couple of different recipes, so I can’t credit any one source.
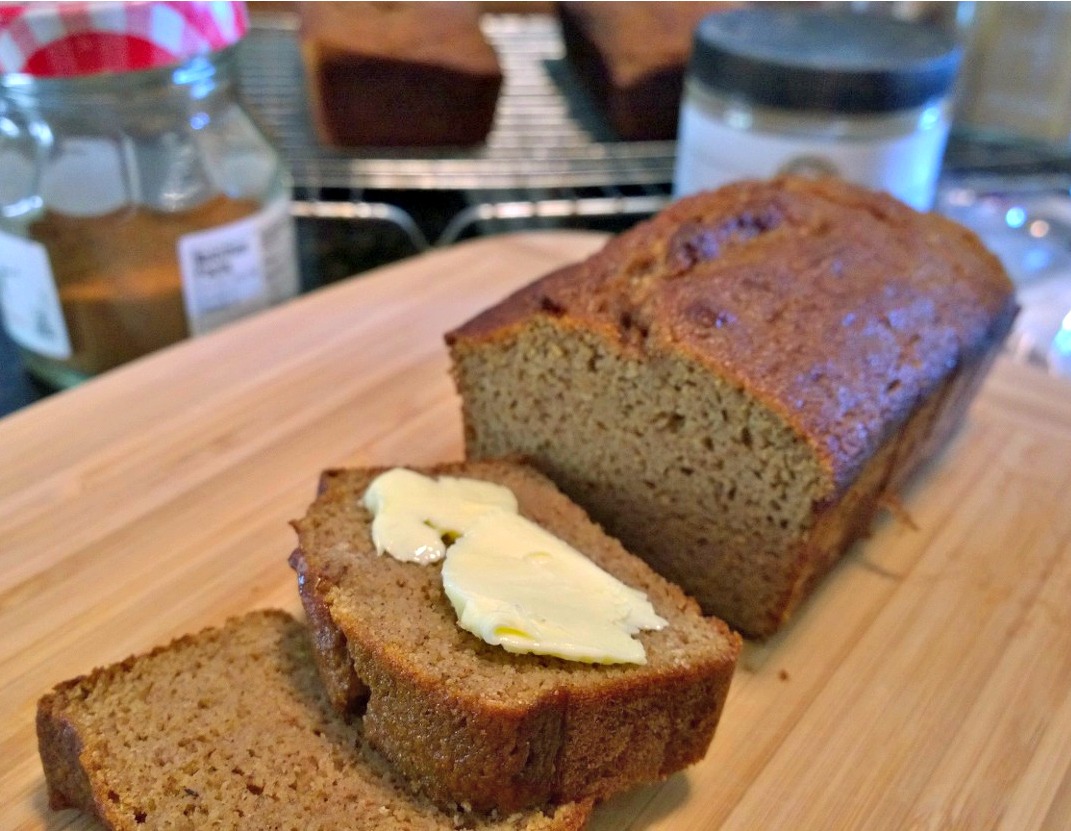
Verdict: Yum! My husband tried some of this and he didn’t recoil! I gave some to a friend and she declared it “tasted wonderful”. I have had it for breakfast the past few days and I can tell you, this will keep you full for several hours – that’s the fiber doing it’s job. I enjoy this with almond milk and a small handful of raisins. It’s hearty, filling, nutty, slightly sweet – near perfect in my opinion. Thanks for reading, enjoy!
Fiber-tastic Granola – 
  • 4 cups rolled oats
  • 1/3 cup raw almonds, chopped
  • 1/4 cup oat bran
  • 1/4 cup wheat bran
  • 1/4 cup flax meal (I ground up golden flax seeds for this)
  • ½ cup unsweetened shredded coconut
  • 1/3 cup sunflower seeds
  • 1 tsp. cinnamon
  • 1/3 cup maple syrup
  • 1/4 tsp. fine sea salt
  • 1/4 cup vegetable oil
  • *suggested additions after baking: 1/2 cup raisins or other dried fruit, chia seeds
Directions:
1. Preheat your oven to 250 degrees. Line two baking sheets with lightly oiled (or non-stick) foil.
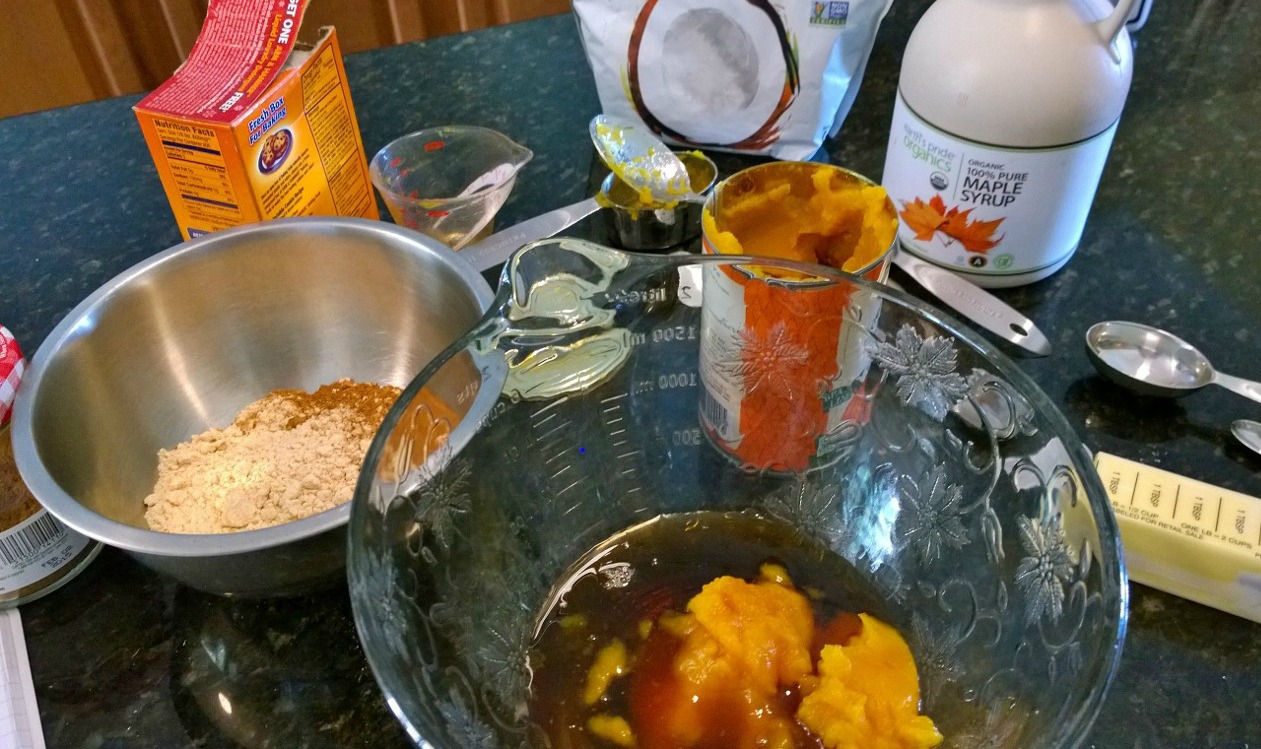
2. Toss all the dry ingredients together in a large bowl, then combine your liquid ingredients in a smaller bowl. Combine the wet and dry together with a rubber spatula then spread the granola evenly over the two baking sheets.
3. Bake for 40-50 minutes. Halfway through baking, stir the granola and spread out evenly again.
4. Place baking sheets on cooling racks – be sure to cool completely before storing in airtight containers. It’s best to store it in the fridge for a longer shelf life – about 7-10 days.