Asian Flank Steak Marinade

asian1

This recipe is perfect for those of you who’s tastebuds are burnt out from Thanksgiving leftovers 😉 My husband did a great job grilling this to the perfect medium doneness! The flavor was really good, but it lacked spice – next time I’ll add some red chili flakes or just coarsely cracked black pepper. Thanks for reading, enjoy!

Asian Flank Steak Marinade – adapted from Just a Taste

  • 1 ( 1 1/2- to 2-pound) flank steak, or skirt steak
  • 1/4 cup low sodium soy sauce
  • 1/4 cup balsamic vinegar
  • 1/2 cup vegetable oil
  • 3 Tablespoons honey
  • 4 garlic cloves, minced
  • 2 Tablespoons minced fresh ginger
  • 3 scallions, thinly sliced

Directions –

asiansteakPlace the plastic bag in a large bowl and then add the soy sauce, balsamic vinegar and oil to the bag. Whisk in the honey, garlic, ginger and scallions. Add the steak to the bag, flipping it to coat it in the marinade, and then seal the plastic bag.

Place the steak in the fridge and marinate it overnight, or for a minimum of 10 hours.

When ready to cook, remove the steak from the fridge and preheat your cooking surface (grill or stovetop grill pan). Remove the steak from the marinade, discard the leftover liquid, and sear the steak on each side until it’s cooked to your desired degree of doneness. Let the steak rest for 5 minutes and then slice it against the grain and serve.

Advertisement

Zesty Breakfast Potatoes

breakfast

Quick Post: My family loves these and they would go perfectly with leftover Thanksgiving ham. We enjoyed these in breakfast burritos with scrambled eggs and bacon, these tortillas,  and this pico de gallo. Thanks for reading, enjoy!

Zesty Breakfast Potatoes – adapted from Viking

  • 1 – 2 pounds Russett potatoes, par-cooked and diced into bite-sized chunks
  • 1 teaspoons garlic powder
  • 1 teaspoons onion poweder
  • 1 teaspoons paprika
  • 1 teaspoons ground cumin
  • 1/4 teaspoon cayenne
  • Fresh cracked black pepper to taste
  • Kosher salt to taste
  • 1/4 cup olive oil

Directions –

Quick Method for par-cooking potatoes – Scrub them clean, dry them then poke holes all over with a fork. Wrap each potato in a wet paper towel and place them on a plate in a circular fashion. Microwave on your “baked potato” setting if you have one – but only for a few minutes.

Preheat oven to 450 degrees.

Combine the spices and the olive oil in a small bowl. Place the potatoes in a bowl and toss with the spice-oil mixture.  Spread on a baking sheet and bake for 20 to 25 minutes, until browned and crispy. Serve immediately.

Citrus Brined Roasted Chicken

chicken

Do you need a special meal for Thanksgiving, but not enough people around to warrant roasting an entire turkey? There is nothing wrong with that, and I have been in that position before. While it’s not the best scenario celebrating the holidays without extended family, making a special meal is sometimes better than going out. Our first Thanksgiving away from family was the worst on record, and I never want to experience that again. We lived in a tiny city in Texas and the only place open that day was a buffet – yuck! We had no choice because I didn’t cook back then like I do now…live and learn, right?

Roast chicken is made even better with a tad more effort; and I can’t get over how much better chicken tastes once it has been brined! My husband took a bite and was confused because of the orange flavor, because he wasn’t expecting it. It was so juicy and flavorful that I’m not sure I’ll be able to skip brining next time. I have tried one other recipe before, but I concocted this recipe myself after searching around for ratios of water to salt to weight. Citrus and chicken make a winning combination, and the idea went from there. Thanks for reading, enjoy! 🙂

Citrus Brined Roast Chicken – a Mom-Makes original

  • 3-4 lb. whole chicken
  • 1/2 cup kosher salt
  • 1/4 cup sugar or honey
  • 4 quarts water
  • 1/2 lemon – juiced and zested (*save the other half for roasting*)
  • 1/2 orange – juiced and zested (*save the other half for roasting*)
  • 1 tsp peppercorns
  • 1/2 tsp dried rosemary
  • 2 bay leaves
  • 2 cloves garlic, smashed

Directions –

Heat 2 quarts of water in a small pot. Once the water simmers, add your salt and sugar – stir until dissolved. Allow to cool for 5 minutes. Meanwhile, rinse your chicken and remove anything inside the cavity (giblets, liver, ect).  Place your chicken in a large lidded container (mine holds 6 quarts of liquid) or a heavy-duty plastic bag. Add the citrus, garlic, spices and herbs. Pour the cold water and then the dissolved salt/sugar mixture. Cover and refrigerate of 8 hours or overnight.

*About an hour before roasting, take the chicken out of the brine and pat it dry with paper towels. Set it on a sheet pan and place it uncovered in the refrigerator so the skin can dry out a little.

**Citrus and Herb Butter –

  • 3 Tbsp unsalted butter, room temperature
  • heavy pinch of kosher salt
  • fresh cracked black pepper
  • 1/4 tsp of fresh rosemary, minced
  • 1/2 Tbsp lemon and orange zest
  • 1 tsp extra virgin olive oil

Directions –

Place butter in a small bowl.  Using a fork, mash until softened.  Add salt and pepper and mash to incorporate.  Add olive oil, zest and rosemary and stir to combine.

Roasting Directions –

Preheat oven to 400 degrees. Place the other half of lemon and orange in the cavity, and garlic or shallot if you have it. Truss chicken and coat generously with the citrus butter. Add salt and pepper to taste and place in roasting pan or a foil lined sheet pan; insert probe thermometer into the thickest part of one of the breasts. Roast the chicken until the thermometer reads 155-160 degrees, (about 70-75 minutes with my convection roast setting). Once the desired temperature is reached, loosely cover with foil and let rest for 15-20 minutes. Carve, serve and enjoy!

chicken1

Basic Buttery Brioche

brioche1

I have made this loaf every year for the past three Thanksgivings – it is amazing and an absolute must. This year I am using Kerry Gold butter – quality counts because the first year I made this bread, I used cheap stuff and it didn’t taste right. Be warned: you’ll need to start making this loaf at least  3 days before you bake it off! The starter needs at least 12 hours, the dough rests for another two – but again, it’s so worth the wait! The brioche is rich, but airy; and bakes up into shiny, gorgeous mahogany loaf. Thanks for reading, enjoy!

Basic Brioche – The Bread Bible

Dough Starter –

  • 2 TBSP room temperature water
  • 1 TBSP sugar
  • 1/4 tsp. instant yeast
  • 1/2 cup (2.5 ounces) all-purpose flour
  • 1 large egg

*Make the starter one to two days ahead. In a mixing bowl, add ingredients and mix until very smooth. Cover with plastic wrap.

20131122_163403

Flour Mixture –

  • 5.5 ounces all-purpose flour
  • 2 TBSP sugar
  • 1 1/4 tsp instant yeast
  • 1/2 tsp salt
  • 2 eggs
  • 8 TBSP room temperature butter

1. Combine first four ingredients and pour on top of the starter, cover with plastic wrap and let sit at room temperature for 1 1/2 to 2 hours.

2. Using a standing mixer, add eggs and mix on low speed for about a minute until evenly moistened. Raise speed to medium and beat for two minutes. Scrape the sides of the bowl with an oiled rubber scraper, then continue beating for five minutes longer or until the dough is smooth and shiny but very soft and sticky. It wont pull away from the bowl completely.

brioche2
3. Add the butter one TBSP at a time until all incorporated. The dough will be soft and sticky. Lightly oil top and cover with plastic wrap. Let rise until doubled, about 1 1/2 to 2 hours.

brioche6

4. Chill – refrigerate for one hour, then gently deflate with rubber spatula, then return it to the refrigerator for another hour.
brioche3

5. Deflate/Chill – turn the dough out onto a well floured surface. Press or roll into a rectangle, flour as needed. Give the dough a business letter turn, brushing off excess flour. Rotate 90 degrees so the closed side faces left. Make a second business turn and round the corners. Dust it lightly on all sides with flour. Wrap loosely but securely with plastic wrap and place in a large Ziploc bag. Refrigerate of at least six hours and up to two days.

brioche7

6.  Shape/Rise – remove from fridge and gently press down to deflate. Roll/press into a 7 1/2″ by 5″ wide rectangle. Roll down from top in three turns, being sure to brush off the excess flour. Place seam side down in a prepared 8×4 inch loaf pan pressing down firmly. Cover lightly with plastic wrap and allow to rise until the dough reaches the top of the pan – about 1 1/2 to 2 hours.

20131124_112127
7. Preheat oven to 350 degrees with a rack on the lowest position of the oven and place a baking stone or a baking sheet on the rack.

8. Glaze/Slash/Bake – glaze the top of the loaf with a mixture of one egg yolk and a splash of cream or milk. Slash the top of the loaf 1/4″ to 1/2″ deep lengthwise down the loaf, making sure to leave 1″ at each end. Set on hot stone and bake 35 to 40 minutes or until the internal temperature reaches 190 degrees.

9. Cool – un-mold loaf to cool on a wire rack at least two hours before cutting.

Chicken (or Turkey) Pot Pie with Cheddar Biscuit Crust

potpie1

Chicken pot pie is comfort food at its finest: rich, creamy and hearty filling topped with a golden, flaky, buttery crust….yes, please! But if you’re too busy, or you’d rather not mix, chill, roll and hope it was all worth the effort; do yourself a favor and make this biscuit topping instead. These biscuits are so simple to make and you can even stir them up ahead of time and they bake up light, fluffy, and flavorful.

Verdict: So.Freaking.Good. I can’t wait to make this again; and I know I’ll have a good excuse to make it with leftover turkey next time. Thanks for reading, enjoy!

Chicken Pot Pie – adapted from Food.com

*6-8 generous servings*

  • 1 cup potato, diced
  • 1 cup onion, diced
  • 1 cup celery, diced
  • 1 cup carrot, diced
  • 1/4 cup melted butter
  • 1/4 cup all-purpose flour
  • 3 cups chicken broth
  • 1  cup half and half
  • salt and pepper to taste
  • 4 cups roasted chicken breast or turkey, shredded
  • 1 cup frozen peas

Directions –

Preheat oven to 375°FSaute onion, celery, carrots and potatoes in butter for about 10 minutes. Add flour to sautéed mixture, stirring well. Cook one minute stirring constantly.Combine broth and half and half.Gradually stir into vegetable mixture.Cook over medium heat stirring constantly until thickened and bubbly.Stir in salt and pepper; add chicken and peas – stir to combine.Pour into one 13 x 9 casserole dish.

potpie2

For the biscuit crust – adapted from Just a Taste

  • 2 cups all-purpose flour
  • 2 teaspoons baking powder
  • 1 teaspoon baking soda
  • 1/2 teaspoon salt
  • 1/2 teaspoon black pepper, or to taste
  • 1 cup coarsely grated cheddar cheese
  • 1/4 cup grated parmesan cheese
  • 3/4 cup cold, unsalted butter, cut into 1/2-inch pieces
  • 1 1/4 cups well-shaken buttermilk

Directions –

*You can prepare the dough up to two days ahead of time*

Sift together the flour, baking powder, baking soda, salt and pepper into a medium bowl. Add the cheeses and toss to coat. Blend in the butter with your fingertips until the mixture resembles wet sand.

Add the buttermilk and stir just until a dough forms. Drop the biscuit dough onto the pot pie filling in small mounds, leaving spaces between biscuits.

Bake at 375 degrees until the biscuits are puffed and golden brown and the filling is bubbling, 35 to 40 minutes. Let stand 10 minutes before serving.

Pumpkin Cinnamon Rolls

roll

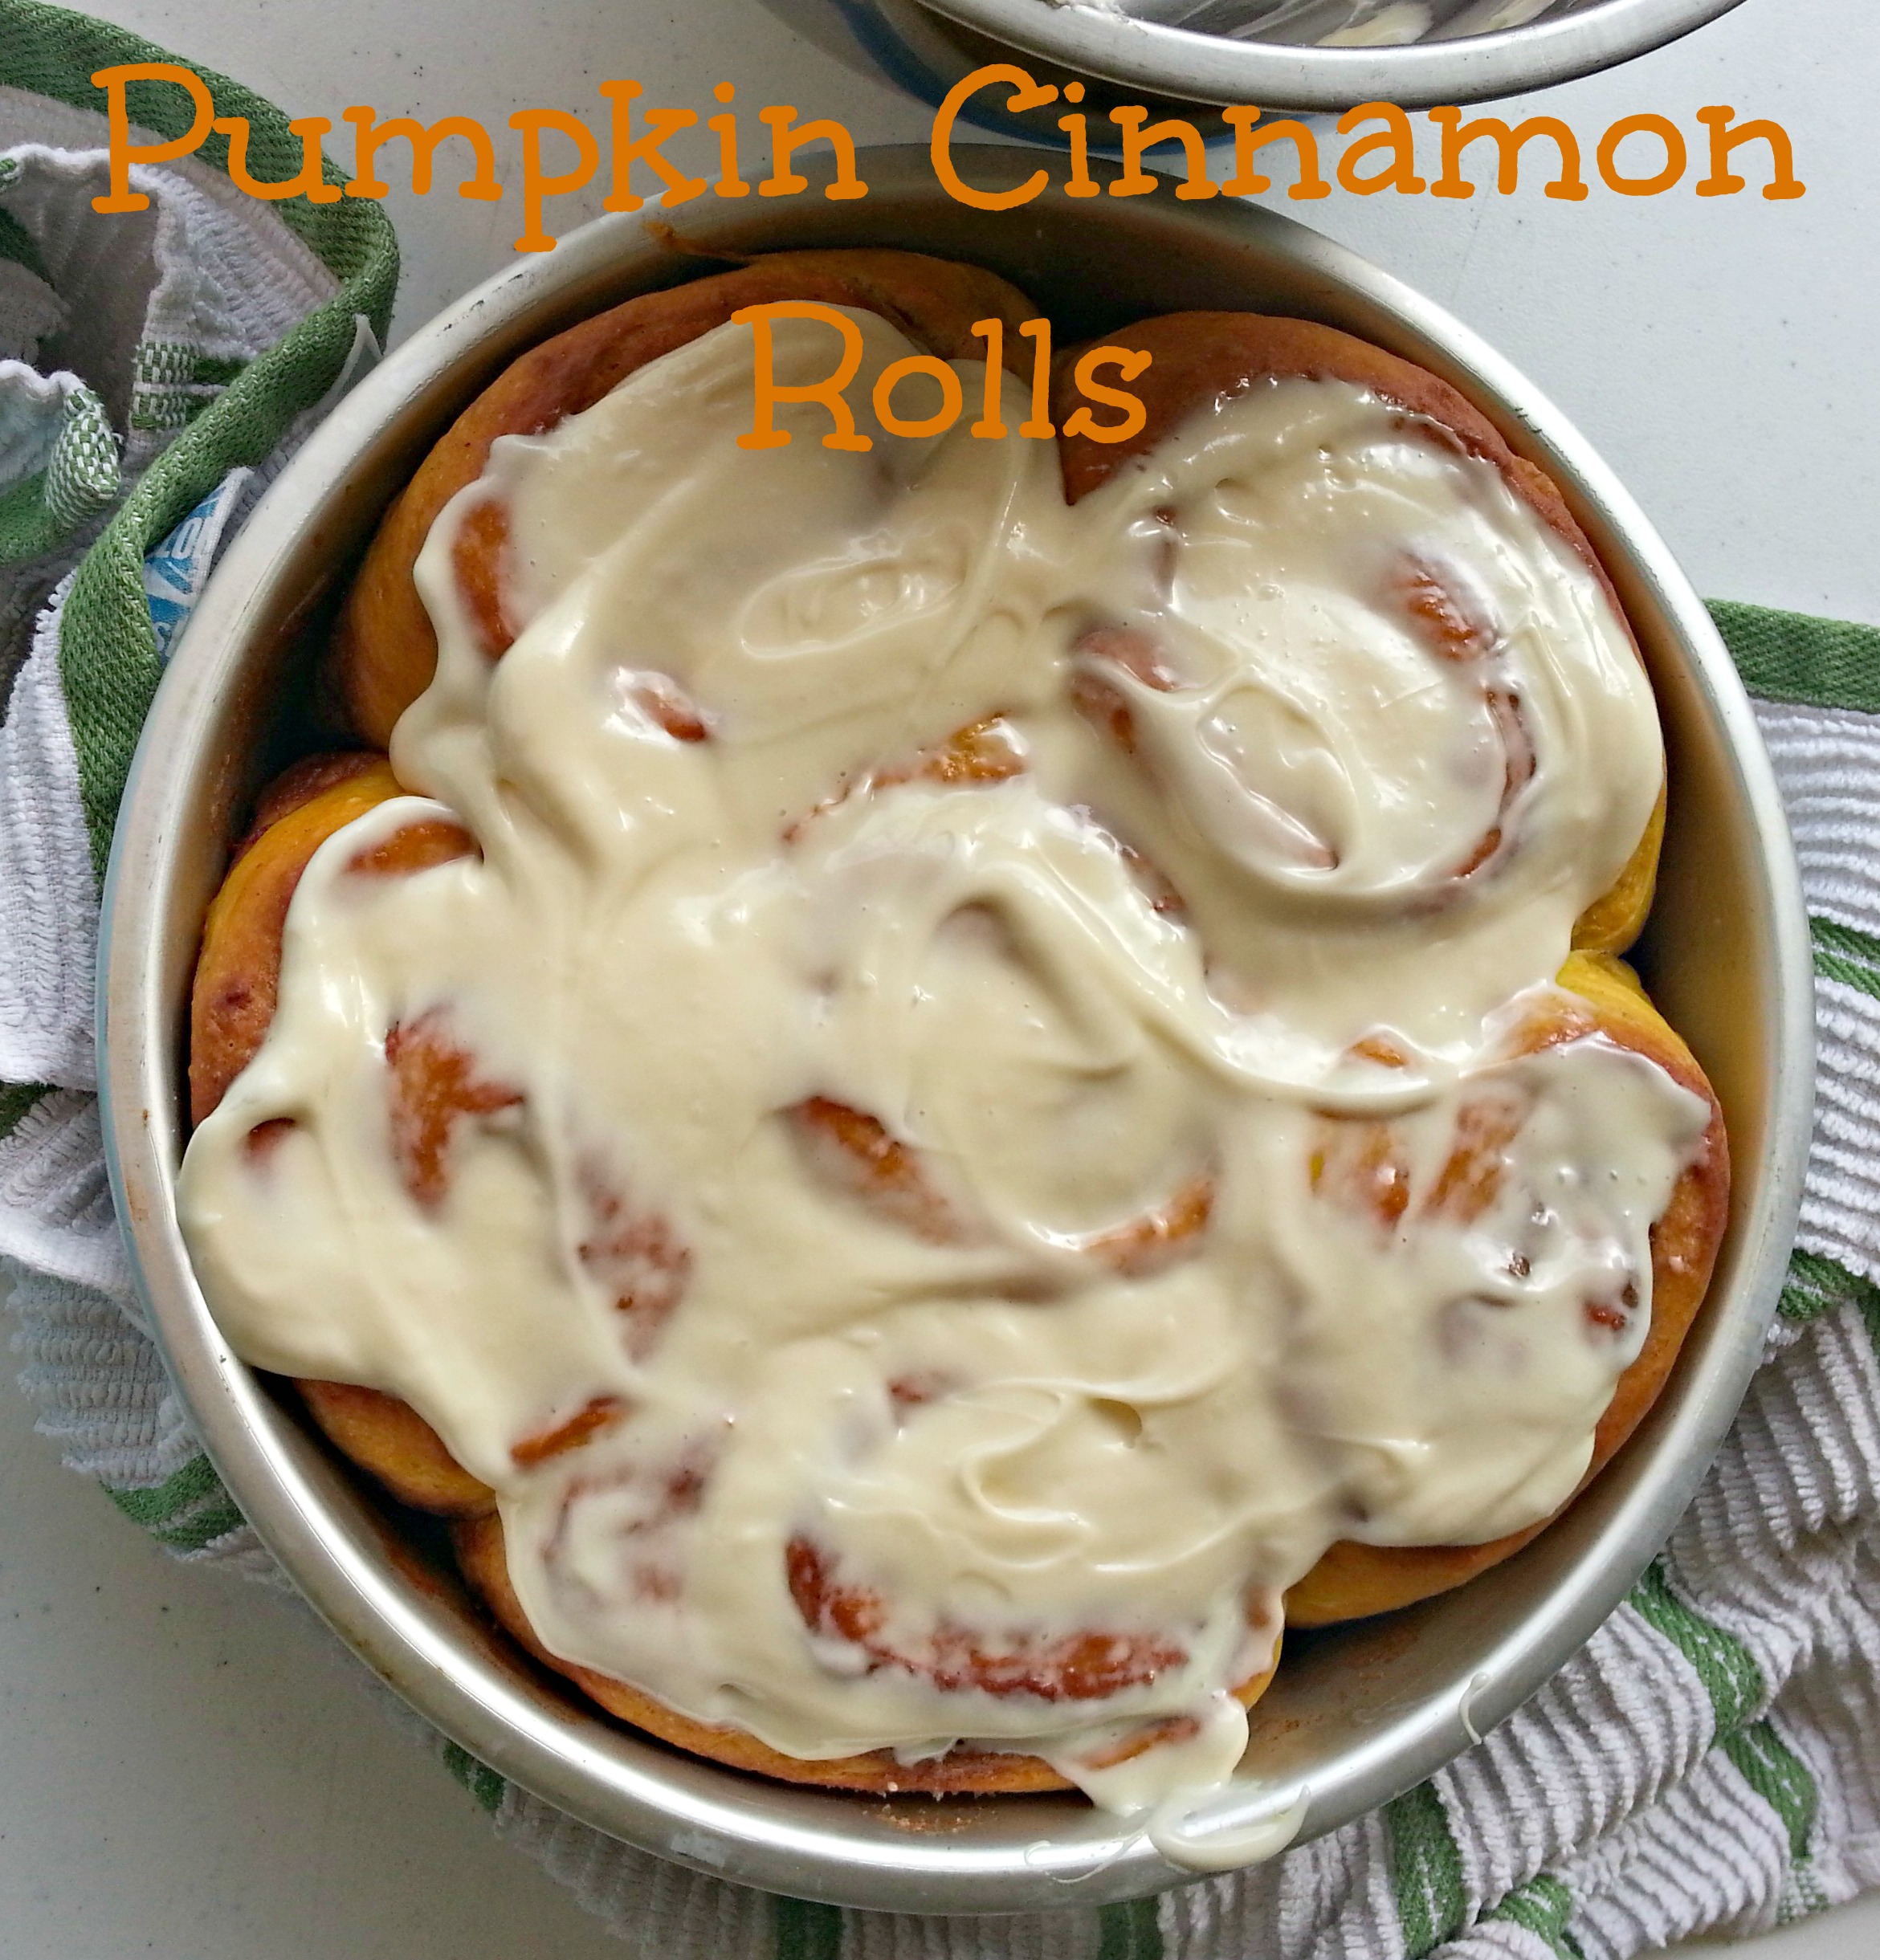
Just some random thoughts about these pumpkin cinnamon rolls:

I searched and searched for what seemed to be the perfect pumpkin cinnamon roll recipe. It wasn’t easy, but I’m hoping that these are good!

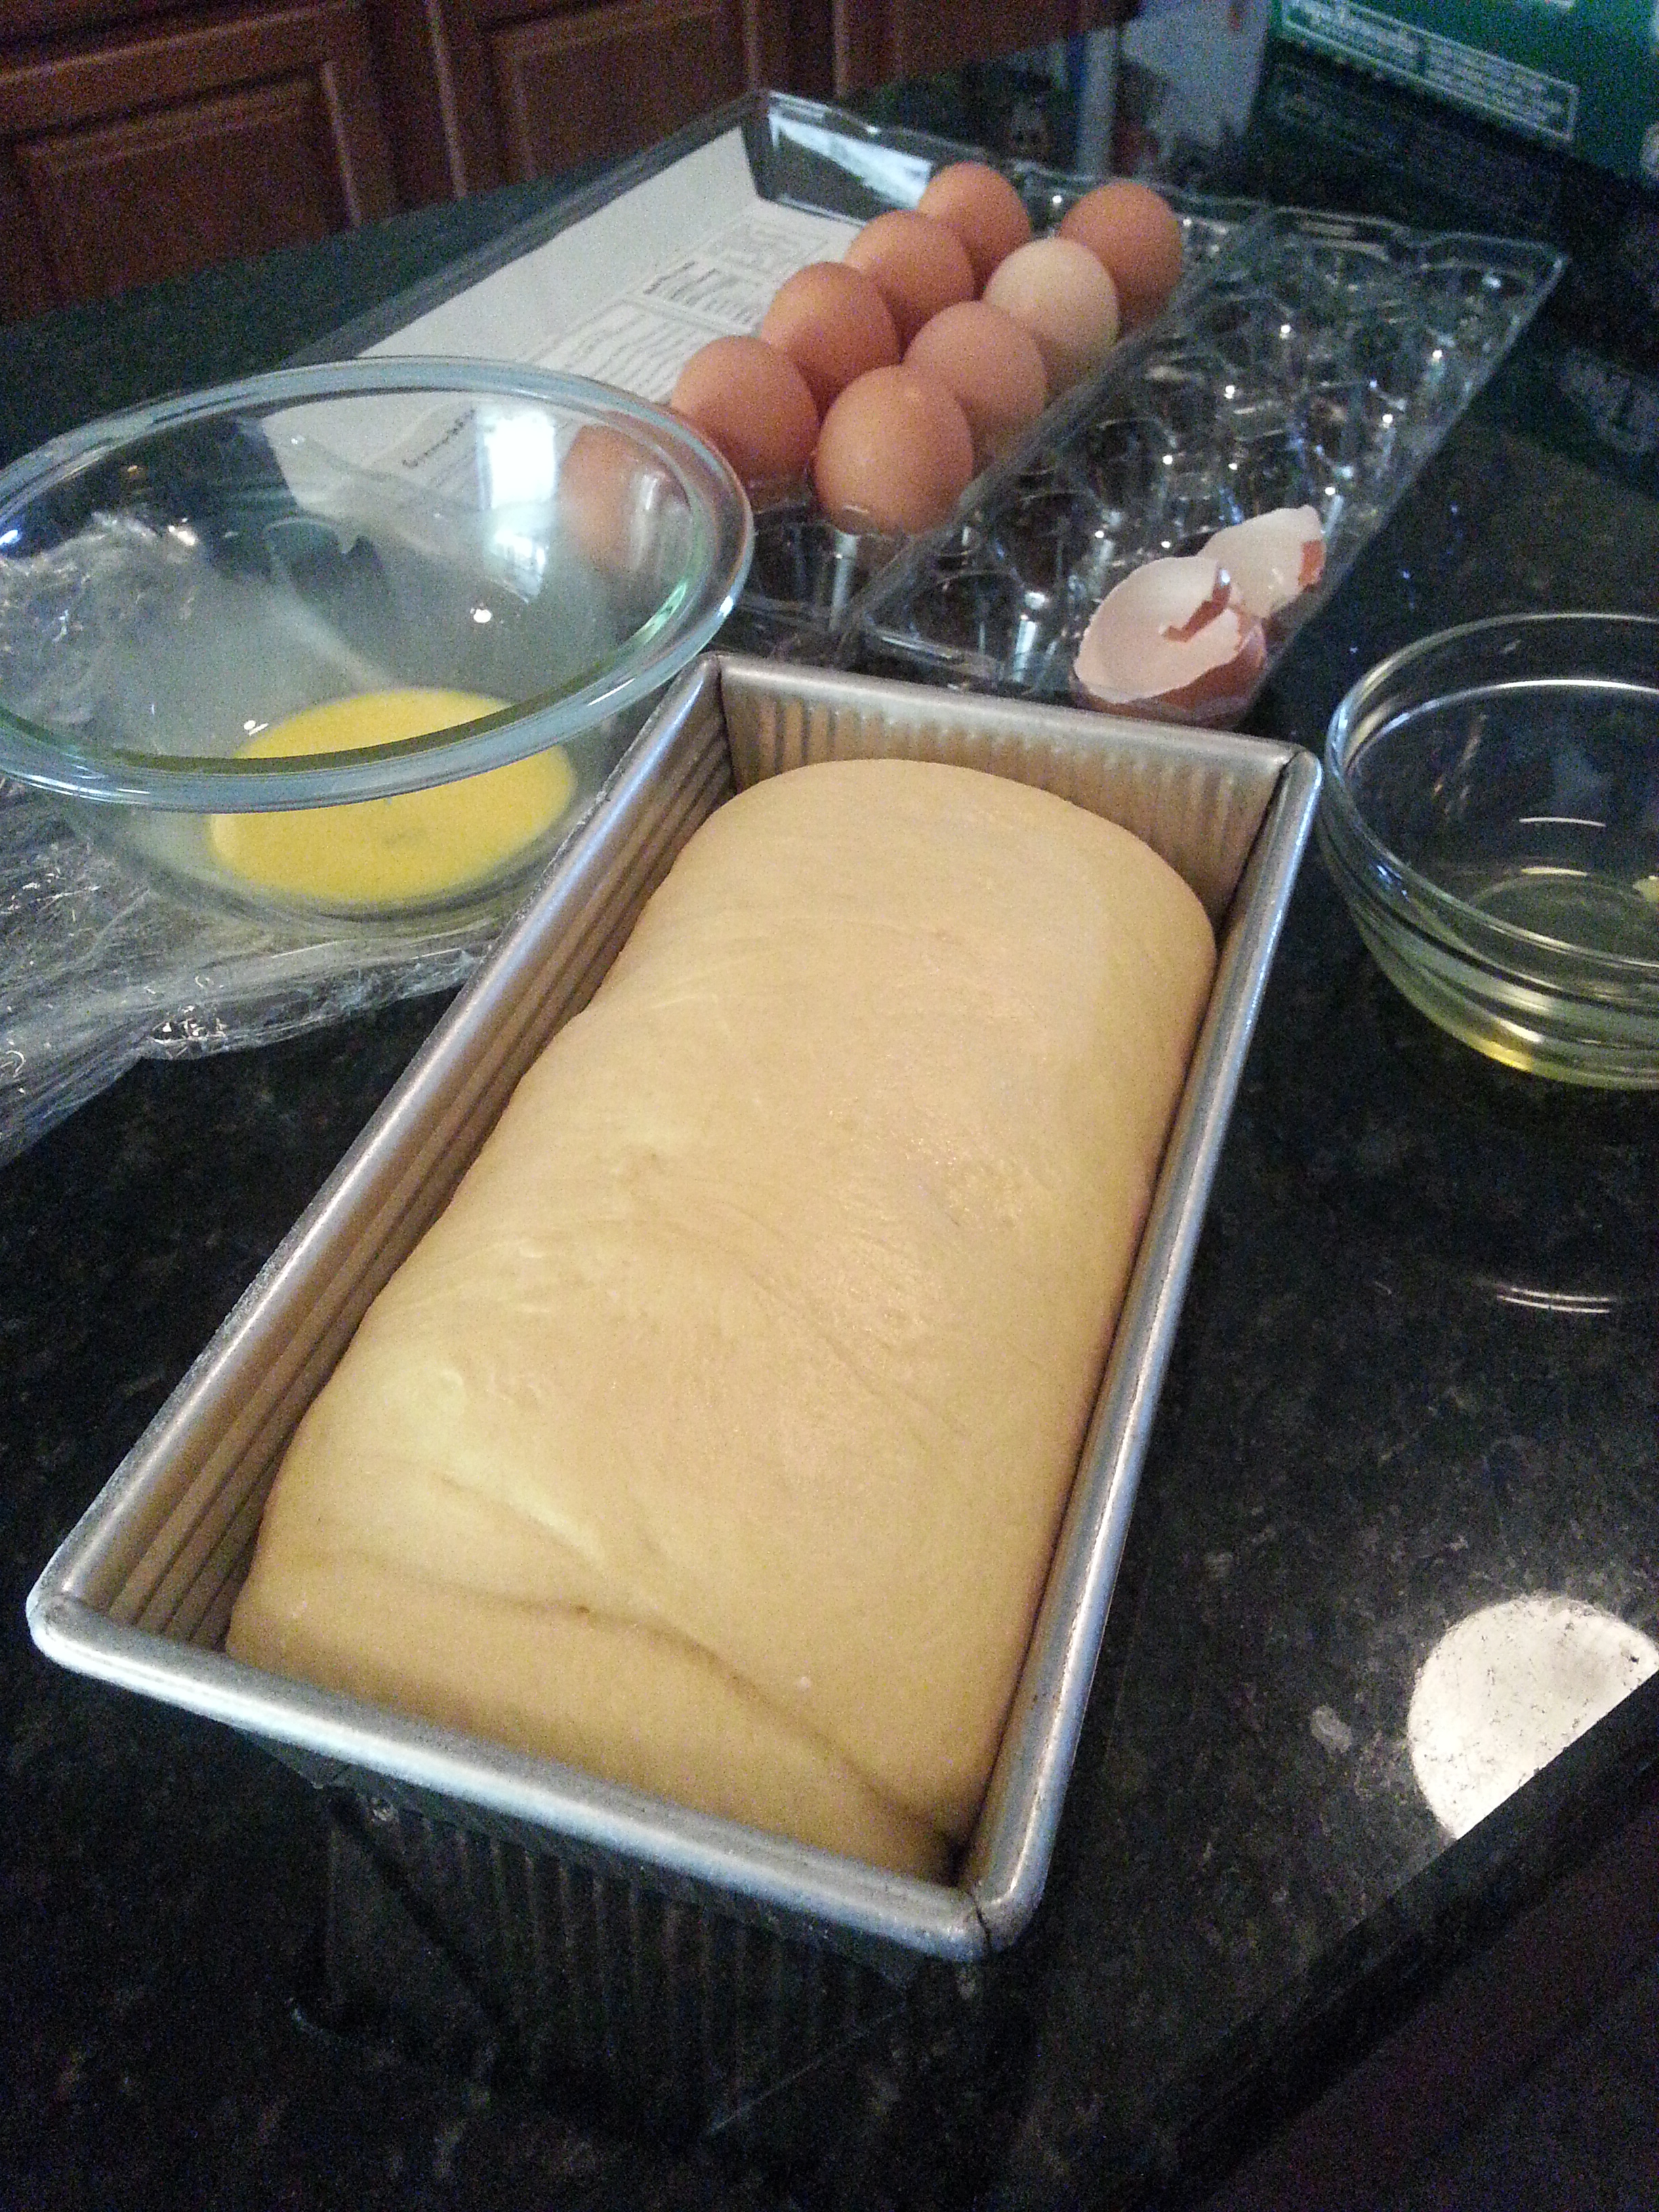
This dough was a pain in the butt to work with because it’s so soft, but I kept my self from adding too much flour.

I made some minor tweaks to this recipe, mostly just the amounts of spices in the filling.

Next time I will add a little more spice into the dough.

I used two 10″ cake pans for this batch and one is patiently waiting in the freezer now.

The pumpkin flavor was very subtle, so even those who don’t like pumpkin might enjoy these.

I thought the flavor was great, not too sweet, nice texture, color, smell.

My kids loved them and my friend and I polished off half of these ourselves 😉

Thanks for stopping by!

Pumpkin Cinnamon Rolls – adapted from The Busty Baker via Inspired by Charm

For the Dough:

  • 1 package yeast
  • ½ cup warm water
  • ½ cup milk
  • ¼ cup granulated sugar
  • 1/3 cup unsalted butter, melted
  • 1 cup pumpkin puree
  • 1 teaspoon salt
  • 1 tsp pumpkin pie spice
  • 1 egg
  • 4 to 5 cups all purpose flour, plus more for rolling (*I needed at least 1/2 cup more*)

Filling:

  • ½ cup unsalted butter, softened
  • 1/2 cup granulated sugar
  • 1/2 cup packed brown sugar
  • 1 tablespoon ground cinnamon
  • 1 teaspoon pumpkin pie spice

rolls9

Maple Cream Cheese Frosting –

  • 4 ounces cream cheese, room temp
  • 4 TBSP unsalted butter, room temp
  • 1 1/2 cup powdered sugar
  • 2-3 TBSP maple syrup (more to taste)
  • 2 TBSP milk (more if you want a thinner frosting)
  • a pinch of salt

Directions –

1. In a small bowl or liquid measuring cup, dissolve yeast in warm water, about 5 minutes; set aside.
2. While yeast is dissolving, heat milk in a small saucepan over medium heat until bubbles start to form around the edges and milk is warm to the touch; set aside to cool slightly.
3. In the bowl of an electric mixer, combine milk, granulated sugar, melted butter, pumpkin puree, salt, spices, and egg. Whisk together until well combined. Fit mixer with dough hook attachment. With mixer on low, add 2 cups of flour, mixing until combined. Add yeast mixture, mixing until incorporated. Add 2 remaining cups of flour and mix until combined. Raise mixer speed to medium and knead 5 minutes, until dough pulls away from the sides of the bowl, but is still slightly sticky to the touch. Add additional flour, 2 tablespoons at a time, if necessary to reach right consistency.
4. Spray a large bowl with nonstick cooking spray. Transfer the dough to the bowl and turn to coat with the cooking spray. Cover with plastic wrap and allow dough to rise in a warm place until doubled in size, about 1 to 1 ½ hours.
5. While dough is rising, make filling: In a small bowl, mix together granulated sugar, brown sugar, cinnamon, and pumpkin pie spice until well combined; set aside. Spray a 9×13 baking pan with nonstick cooking spray; set aside.
6. When dough has doubled in size, pull edges away from the sides of the bowl to deflate. (Or go ahead and punch it down. You know you want to.) Divide dough in half; setting half aside, covered in plastic wrap to keep from drying out. On a floured work surface, roll the other half of the dough out into a 12X8 inch rectangle. Spread 4 tablespoons of butter over the dough in an even layer. Sprinkle half of the filling mixture evenly over the butter.
7. Starting with the 12-inch side, roll dough up, pinching the edge to seal. Using a serrated knife, cut roll into six 2 inch pieces. Place pieces, cut side down into prepared baking pan, leaving about ¾-inch of room in between each piece. Repeat with remaining half of dough.* Allow dough to rise in pan in a warm place until doubled in size once more, about 45 minutes more.
8. Preheat oven to 350F. Once the rolls have doubled in size, bake for 25 to 30 minutes or until tops are golden brown. Remove from oven and allow to cool slightly before icing.

Chocolate Chip Banana Bread

chocchip

Quick Post – My daughter’s exact words: “It’s amazing!” I thought that was sweet of her, but why would a 7-year-old not like chocolate for breakfast? 😉 I took a taste and it’s very banana-y, so if you appreciate straight banana bread with out spices and fancy ingredients, this is a winner. I modified this slightly, but provided a link so you can see the original recipe. Thanks for reading, enjoy!

Chocolate Chip Banana Bread – adapted from Cannella Vita

  • 1 3/4 cup all-purpose flour (219 grams)
  • 1 1/2 teaspoons baking soda
  • 3/4 teaspoon kosher salt
  • 3 large eggs
  • 1/2 sugar
  • 1/2 brown sugar
  • 1 cup mashed ripe bananas (about 2 large)
  • 3/4 cup vegetable oil (* I used grapeseed oil*)
  • 1 cup bittersweet chocolate chips
Directions – 
Preheat oven to 350°. Coat a 9x5x3-inch loaf pan with nonstick spray. Whisk flour, baking soda, and salt in a medium bowl. Whisk eggs, sugar, bananas, and oil in a large bowl until smooth. Add dry ingredients to banana mixture and stir just until combined. Scrape batter into prepared pan and smooth top.

Bake until a tester inserted into the center of bread comes out clean, 60-70 minutes. Transfer to a wire rack; let bread cool in pan for 15 minutes. Run a knife around inside of pan to release the bread. Turn out onto rack and let cool completely.

Re-Post: Pot Roast

potroast1

I often plan my meals basted on the local weather forecast and I was so happy when I learned the high today would be 71 degrees and the low 61. I know some of you might not think that is at all cold – but this is Florida after all…I’ll take what I can get! 😉 Anything less than 80 degrees feels like a treat here and what better way to celebrate this cooler weather than to make something warm and comforting? I love its simplicity and all the great flavor that it creates; this one is hands-down my favorite, especially when we serve it over a big pile of roasted garlic mashed potatoes. Thanks for reading, enjoy!

potroast

Pot Roast with Vegetables – adapted from Tyler Florence

  • 1 (3 to 4 pound) piece beef chuck roast, trimmed of excess fat
  • Kosher salt and freshly ground black pepper
  • 3 tablespoons olive oil
  • 1 – 28 ounce can crushed tomatoes
  • 1/2 cup water
  • 2 yellow onions, halved
  • 2 garlic cloves, chopped
  • 4 large carrots, peeled and cut into chunks
  • 2 celery stalks, sliced
  • 12 – 16 ounces button mushrooms, stems removed and sliced in half
  • 2 sprigs fresh rosemary
  • 4 sprigs fresh thyme
  • 2 bay leaves

Directions –

Season all sides of the beef with a fair amount of salt and pepper. In a large Dutch oven or other heavy pot that has a tight cover; heat 2 tablespoons of the oil over moderately high heat. Brown the meat on all sides, taking the time to get a nice crust on the outside. Pour in the tomatoes and the water. Scatter the vegetables and herbs around the pot roast, season with salt and pepper; and drizzle with the remaining tablespoon of oil. Cover the pot and reduce the heat to low. Braise for about 3 hours, basting every 30 minutes with the pan juices, until the beef is fork tender.

Slice the pot roast and arrange on platter surrounded by the vegetables. Serve with the pot juices.

Thanksgiving Day Recipe Round-Up

rolls1
Fall is my absolute favorite season because of the cooler weather, but mostly it’s because of the food! Thanksgiving dinner is hands-down the most time-consuming meal I make all year; but I love it! It’s a little depressing when I think of all the planning, shopping, prep-work, cooking, baking – not to mention the dish washing involved; and everyone is finished eating in about 20 minutes. Thankfully, there are the leftovers which can be the best part of the ordeal 🙂 I decided to round-up some of our favorites to help those of you who need inspiration and ideas.

A couple of tips for you novices out there – don’t be intimidated! 🙂 Plan at least a week in advance, especially if you plan on brining your turkey – I highly recommend it! You will never have a more moist, perfectly seasoned bird than when you’ve taken the time to brine. It’s not difficult, but you will need some extra space in your refrigerator and if you don’t have a huge, lidded container you can use heavy-duty brining bags, (I have used these). Also, invest in a digital probe thermometer, because who wants to go through all that trouble only to end up with overcooked (or under-cooked) turkey? Thanks for reading!

3

Breakfast

*Update* Pumpkin Cinnamon Rolls

Pumpkin Chocolate Chip Muffins

Pumpkin Bread

Overnight Cinnamon Rolls

Pumpkin Waffles

Baked Apple Cinnamon Oatmeal

Cinnamon Pull-Apart Bread

Cinnamon Sugar Donut Muffins

soup12

Appetizer/Sides

Spinach Artichoke Dip

Vanilla Almonds

Brioche and Sausage Dressing

Loaded Potato Soup

Roasted Garlic Mashed Potatoes

Perfect Au Gratin Potatoes

Garlic Green Beans

rolls3

Breads

Honey Yeast Rolls

Basic Buttery Brioche

Homemade Crescent Rolls

Dinner Rolls

Parker House Rolls

Golden Pull-Apart Butter Buns

Honey Cornbread Muffins

4

Mains

Brined Herb-Crusted Turkey

Honey Ham 

pumpkincheesecake

Desserts

Pumpkin Cheesecake

Brown Sugar Apple Cheesecake

Deep Dish Apple Crumble Pie

Apple Crisp I

Apple Crisp II

Vegan Apple Crisp

1

For the Leftovers

*Update* Chicken (or Turkey) Pot Pie with Cheddar Biscuit Crust

Turkey, Bacon and Avocado Sandwiches

Navy Bean and Ham Soup

Ham and Potato Soup

Pumpkin Cheesecake

pumpkins

Last week I complained that I never get the opportunity to make desserts like this because my husband is not a fan of pumpkin anything. My home group crew saved the day when they selflessly volunteered to eat what ever pumpkin dessert I wanted to make. With all the great recipes to choose from, I decided on one I have never eaten or made. It’s been a couple of years since my last cheesecake (also a really great Fall dessert), so I hoped that this one would be worth making. Cheesecake is one of the more time-consuming desserts to make, not to mention the overnight stay in the refrigerator; but all that waiting paid off because this was a hit with everyone who tried it. It tasted better than I could have hoped! The cheesecake is so creamy and light and there was just a hint of cream cheese flavor, but the predominant flavor was pumpkin pie. This is apparently the type of cheesecake that appeals to people who don’t like cheesecake or don’t like pumpkin  pie. Everyone that tried it really enjoyed it and one even said it was better than Cheesecake Factory – what a great compliment 🙂 I made some minor tweaks to the recipe and combined some of My Baking Addiction’s recipe to Once Upon A Chef’s. My Baking Addiction shared a video with great tips to make the perfect cheesecake, like how to ensure that no water seeps into your cheesecake while it bakes in the water bath. Thanks for reading, enjoy!

Pumpkin Cheesecake – adapted from Once Upon A Chef with some tips from My Baking Addiction

For the Crust

  • 2 cups finely ground graham crackers (about 14 graham cracker sheets)
  • 1/4 granulated sugar
  • 6 tablespoons unsalted butter, melted
  • 1 teaspoon pumpkin pie spice

For the Filling

  • 1 15-ounce can pumpkin
  • 1-1/3 cups granulated sugar
  • 1 teaspoon ground cinnamon
  • 1/2 teaspoon ground ginger
  • 1/4 teaspoon ground nutmeg
  • 1/4 teaspoon ground cloves
  • 1/8 teaspoon ground all-spice (*optional*)
  • 1/2 teaspoon salt
  • 1 cup heavy cream, cold
  • 1-1/2 pounds (three 8-ounce packages) cream cheese, room temperature
  • 5 large eggs, room temperature

For Caramel Sauce – adapted from Kelsey’s Essentials

  • 1 cup sugar
  • 1/4 cup water
  • 3/4 cup heavy cream
  • 3 1/2 tablespoons unsalted butter
  • 1 teaspoon Fleur de Sel, or kosher salt

For the Crust

  1. Preheat the oven to 325 degrees. Wrap a 9-inch springform pan twice with aluminum foil (preferably heavy-duty). Take care to pull the foil all the way up the sides so that water cannot seep in from the water bath. Lightly oil the bottom and sides of the pan. Pulse the crackers (or crumbs), sugar and spices in a food processor fitted with the metal blade until finely ground. Add the butter and pulse a few times to combine. Dump the moistened crumbs into the prepared pan and, using a measuring cup or glass, press into an even layer. Bake until fragrant and set, about 15 minutes. Cool on a wire rack while you prepare the filling.

For the Filling

  1. Bring about 4 quarts of water to a simmer in a tea kettle (this will be used for the water bath). In a small, heavy saucepan, stir together the pumpkin, sugar, cinnamon, ginger, nutmeg, cloves, all-spice and salt. Over medium heat, bring the mixture to a sputter, stirring constantly. Reduce the heat to medium-low and cook, stirring constantly, for 5 minutes, until thick, bronzed and shiny. Scrape the mixture into a large food processor fitted with the metal blade and process for 1 minute with the feed tube open.
  2. With the motor running, add the cold cream. Add the cream cheese (cut into chunks) and process for about 30 seconds, scraping the sides if necessary, or until smoothly incorporated. Add the eggs and process for about 5 seconds or just until incorporated (do not overmix!).
  3. Set the cake pan in a large roasting pan. Pour the batter into the cooled crust, and then pour enough boiling water into the large roasting pan to come about halfway up side of the cake pan. Bake until the cake is just set, about 1-1/2 hours. If it jiggles, it’s not done. Carefully remove the roasting pan from the oven and set on a wire rack. Use a paring knife to loosen the cake from the sides of the pan. Cool until the water is just warm, about 45 minutes. Remove the springform pan from the water bath, discard the foil and set on a wire rack. Continue to cool at room temperature until barely warm, about 3 hours. Cover with plastic wrap and refrigerate until chilled, at least 4 hours or overnight.

For Caramel Sauce –

  1. In a heavy-bottomed saucepan, combine the sugar and water over medium-low heat until the sugar dissolves. Increase the heat and bring to a boil, without stirring. If necessary, use a wet pastry brush to wash down any crystals on the side of the pan. Boil until the syrup is a deep amber color, about 7-10 minutes.
  2. Remove the sugar from the heat and carefully whisk in the heavy cream. The mixture will bubble. Stir in the unsalted butter, and salt. Transfer the caramel to a dish and cool.