No Bean Turkey Chili

WP_20150218_011

Pinterest has saved the day several times in my kitchen. I had some produce that was passed its prime in my fridge, along with ground turkey that had to be used; and I even had a can of fire roasted tomatoes that I didn’t know why I purchased in the first place. I love how forgotten ingredients can become something so satisfying! Thanks for reading, enjoy!

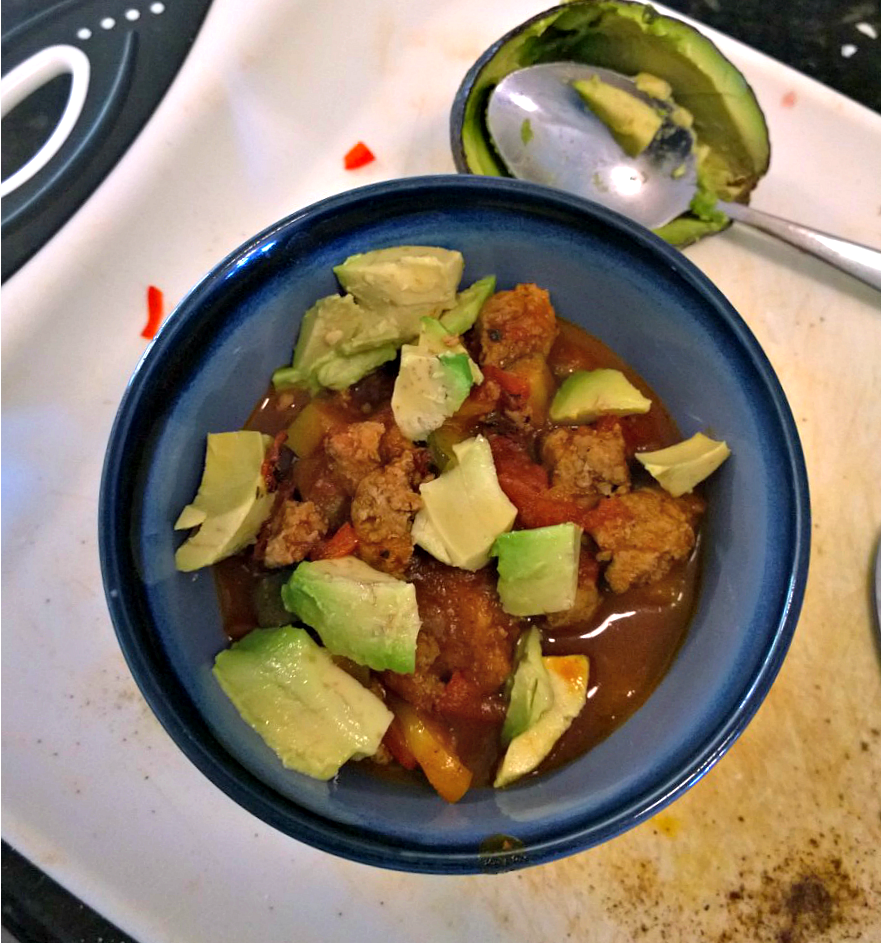
Paleo Turkey Chili – adapted from Turtlewoman

  • 1 lb ground turkey
  • 1 yellow bell pepper, chopped
  • 1 red bell pepper, chopped
  • 1 white onion, chopped
  • 1 zucchini, chopped
  • 2-3 cloves garlic, minced
  • 1 – 28 ounce can of fire roasted tomatoes
  • 1 1/2 TBSP DIY taco seasoning (*recipe below*)
  • 1/2 cup water or stock
  • salt and pepper to taste
  • Avocado for topping

Directions –

  1. Add ghee or cooking fat of your choice to a 5 quart soup pot over medium/high heat. Saute the onions for about 3-5 minutes, then add the bell peppers and cook for another 3 minutes. Then add the minced garlic and chopped zucchini. Continue cooking for about 3 more minutes. Set the cooked veggies aside.

WP_20150218_005

2. Add more fat to the pan and brown the turkey over medium heat, stirring to break up. Season lightly with salt and pepper. Once the meat is cooked through, add the veggies back into the pot and pour the tomatoes, water and seasoning over all. Stir to combine and bring to a boil. Turn down the heat to a simmer and cook for about 30 more minutes.

3. Stir periodically while it is simmering. Taste and adjust seasoning if needed. Serve with chili toppings of your choice – I added diced avocado!

WP_20150218_004

DIY Taco Seasoning – adapted from Against All Grain

  • 2 1/2 TBSP chili powder
  • 1 1/2 TBSP sea salt
  • 1 1/2 TBSP ground cumin
  • 1 TBSP dried Mexican oregano
  • 2 tsp onion powder
  • 2 tsp garlic powder
  • 2 tsp ground coriander
  • 1-3 tsp cayenne pepper
  • 1/4 tsp ground black pepper

Directions –

Mix all ingredients together thoroughly blended. Makes 1/2 cup.

Advertisement

Chili Con Carne

WP_20150218_021 1

Chilly nights are perfect for enjoying comfort foods that warm you from the inside out! This was flavorful and has the perfect amount of spiciness. We enjoyed it with this corn bread, aged cheddar cheese, cilantro and some sour cream. Thanks for reading, enjoy!

Chili Con Carne – adapted from Simply Recipes

  • 2 Tbsp red chili powder
  • 1 teaspoon chipotle chile powder
  • 1/2 teaspoon ancho chile powder
  • 1 Tbsp ground cumin
  • 2 teaspoons ground Mexican oregano
  • 1/2 teaspoon coriander
  • One – 2 pound chuck roast, cut into 1/2-inch cubes
  • Salt and pepper to taste – season lightly
  • 1 medium white onion, chopped
  • 3 cloves garlic, minced
  • 2 jalapeño chili peppers, stems removed, seeded, ribs removed, minced
  • 1 28-oz can whole tomatoes
  • 2 cups water
  • juice of 1/2 of a lime
  • 1 14-oz can red kidney beans, drained and rinsed
  • Salt to taste
  • Grated cheddar cheese, cilantro and lime wedges for serving

Directions –

1.  In a small bowl mix the chili powder, chipotle chili powder, ground cumin, oregano, and ground coriander. Set aside.

2. Heat a Dutch oven over medium high heat, add back in 1 tablespoon of bacon fat. Working in batches so that you don’t crowd the beef (crowding will steam cook the meat instead of browning it), brown the beef cubes on all sides. Remove beef from pan, set aside.

3.  Add another Tablespoon of bacon fat to the pan. Add the chopped onions and sauté until soft, about 5 minutes. Add the garlic and jalapeño, cook until fragrant, 1 minute more. Add the chili paste and cook for 2-3 more minutes.

4. Put onion chili mixture, beef, tomatoes, water, lime juice. Heat the chili on medium high heat until it comes to a simmer. Then reduce the heat to low. Cover and cook for 1 1/2 hours. Then uncover and cook for another half hour, keeping the temperature at a place where you can maintain a simmer.

5. Gently mix in the kidney beans. Add salt to taste. Adjust seasonings. Sprinkle with grated cheddar cheese, cilantro and sour cream if desired. Serve with cornbread.

Grandmother’s Buttermilk Cornbread – adapted from Allrecipes

  • 1/2 cup butter
  • 1/2 cup white sugar
  • 2 eggs
  • 1 cup buttermilk
  • 1/2 teaspoon baking soda
  • 1 cup cornmeal
  • 1 cup all-purpose flour
  • 1/2 tsp salt

Directions:

1. Preheat oven to 375 degrees F (175 degrees C). Butter a 8×8 baking dish or a 9 inch cake pan.

2. Melt butter in large skillet (I put it in the microwave for about 45 seconds). Remove from heat and stir in sugar. Quickly add eggs and beat until well blended. Combine buttermilk with baking soda and stir into mixture in pan. Stir in cornmeal, flour, and salt until well blended and few lumps remain. Fold in the cheese and pour into your prepared pan.

3. Bake in the preheated oven for 30 to 40 minutes, or until a toothpick inserted in the center comes out clean.(*mine took 30 minutes with convection)

Polish Sausage, Potato and Kale Soup

WP_20150128_021

Whenever it’s even a little cooler here, I like to take advantage. This winter has been so mild that it feels more like spring/early summer. Sometimes I wish for cooler air, but then I see the pictures of what Northerners are dealing with. I’m a lightweight when it comes to temperatures below 75!

This is a dairy-free, “creamy” soup but you can substitute unsweetened coconut milk with heavy cream or half and half. In my experience, the coconut milk doesn’t make the food taste “coconutty”. Thanks for reading, enjoy!

Sausage, Potato and Kale Soup – adapted from The Candid Appetite

  • 1 pound Polish sausage
  • 2 tablespoons ghee or olive oil
  • 1 large onion, chopped
  • 3 garlic cloves, minced
  • 1 teaspoon salt, plus more to taste
  • 1 teaspoon freshly cracked black pepper, plus more to taste
  • 1/2 teaspoon crushed red pepper flakes, optional
  • 2 large bunches of kale, stemmed and chopped
  • 1 pound red potatoes, sliced
  • 8 cups homemade chicken stock
  • 1/2 cup unsweetened coconut milk or heavy cream

Directions –

1. Heat a large heavy-duty pot over medium-high heat. Once the pot has heated through, add the sausage, which you removed from the casing. Using a wooden spoon, begin to break up the sausage and allow it to cook, stirring occasionally, until it has fully browned. Remove the crisped sausage from the pot and transfer it to a plate or bowl. Set aside.

2. Lower the heat to medium, add the butter or oil and throw in the onions and garlic. Stir, scraping down the bottom of the pot picking up the browned bits of sausage with the back of a wooden spoon, and cook until soft and translucent about 3 to 5 minutes. Season with salt, pepper, and crushed red pepper flakes, if using. Continue to sauté until the onions have caramelized. Add the chopped kale in batches, allowing it to wilt down as it cooks.Cook the kale for another 3 minutes until it has turned bright green and completely wilted down. Throw in the sliced potatoes and cooked sausage.

3. Pour in the chicken stock or broth and bring it up to a boil. Lower the heat and allow the soup to simmer until the potatoes are cooked tender and soft. Taste the soup for seasoning, at this point you may add more salt, pepper or red pepper flakes, if desired. Once the potatoes are fully cooked, stir in the heavy cream. Serve right away with some bread on the side. Enjoy!

Brownie in a Mug

WP_20150209_030 1

Sometimes, you just have to have chocolate, it has to be warm and vanilla ice cream is a must! Good quality cocoa powder is so important, and I used my stash of Valhrona 🙂 Yes, it is worth the $1 + an ounce price! This brownie is rich, moist, and more cakey than fudgy and hits all the right buttons. I’m kind of mad at myself for making this! 😉 Thanks for reading, enjoy!

Brownie in a Mug – adapted from Simply Recipes

  • 1/4 cup flour
  • 3 – 4 Tbsp sugar
  • 2 Tbsp cocoa
  • Pinch of salt
  • Tiny pinch of cinnamon
  • 1/4 cup water
  • 2 Tbsp unsalted butter, melted
  • 1 to 2 drops vanilla extract
  • ice cream

Directions –

Place flour, sugar, cocoa, salt, and cinnamon in a microwave safe ceramic mug. Stir with a fork or spoon to mix well and break up any clumps.

Add the butter, water, and vanilla to the cup and stir until the mixture is smooth and there are no lumps.

Place in microwave and heat on high until the mixture is cooked through, about a 1 minute and 20 seconds. If you don’t know the power level on your microwave, start with 60 seconds and increase until the brownie is done. It should still be moist when cooked through, not dry.

Let cool for a minute and serve with a scoop of vanilla ice cream.

Paleo Pancit

WP_20150127_021 1

After making this, I learned – one: I love fish sauce, and two: more cabbage, please! I was worried about using both but this recipe just looked and sounded so good. I’m glad I didn’t let apprehension get the best of me, because this was so perfect! It was savory, sour and had just enough saltiness; and textures in each bite of this pancit, (which I had never tried or heard of before), that I am on the look out for more Asian recipes that might hit all those notes again. Thanks for reading, enjoy!

Chicken Pancit – adapted from Everyday Paleo

  • 1.5 lbs chicken breasts, cut into small bite size pieces
  • 2 tablespoons coconut oil
  • 6 green onions, sliced thin
  • 2 cloves minced garlic
  • 2 carrots, sliced thin
  • 1 small bell pepper, sliced thin
  • 6 – 8 cups shredded green cabbage
  • ¼ cup coconut aminos or Tamari wheat free soy sauce
  • 1/4 cup chicken broth
  • 1 – 2 tablespoons fish sauce
  • Black pepper to taste
  • Lemon wedges

Directions –

In a large wok or skillet heat the coconut oil over medium to medium high heat.  When the wok or pan is nice and hot, add the chicken, green onions and garlic and saute for about 6-7 minutes or until the meat is done all the way through but still tender. Remove the meat from the pan and set aside.  Add the bell pepper and carrots to the wok or pan and cook for 3 minutes. Add in the cabbage and cook about 4 more minutes. Add the chicken back to the veggies and pour in the coconut aminos or soy sauce, chicken broth, and fish sauce. Season with lots of black pepper.  Stir well and cook for another minute or two.  Serve in bowls with a lemon wedge.

Avocado Super Smoothie

WP_20150124_029 1

This is amazing! It’s thick and creamy without the dairy and even my kids couldn’t detect the “green” in this smoothie. Thanks for reading, enjoy!

Avocado Super Smoothie –

  • 1 cup kale, washed and stems removed
  • 1 cup baby spinach, washed and big stems removed
  • 1 medium banana
  • 1/2 avocado
  • 1 small apple, cut into chunks
  • 1/2 cup coconut milk
  • 1/2 cup water, or more depending on how thick you prefer
  • Ice

WP_20150124_005

Directions –

Place all your ingredients in a blender carafe – starting with the liquid and topping off with the heavier items. Process for about 30 seconds until well blended. Pour into a tall glass and enjoy!

I Bought A Juicer!

WP_20150122_018

I bought a juicer! I wasn’t sure how this would turn out because I haven’t tried beets since I was a kid…and those were the gross canned kind that you find in salad bars. The finished juice was the most gorgeous magenta color, and I hoped that it would taste as good as it looked! The first taste of anything new is usually off-putting, but as I continued to sip it, it tasted better and better. It’s not my new favorite, but I know I will make it again. The other recipe is a great starter juice, especially for kids. My daughter enjoyed this one, but I didn’t add the ginger because she wouldn’t have appreciated the spiciness of it. Thanks for reading, enjoy! 🙂


WP_20150122_016

Ginger Beet Juice – adapted from Wonky Wonderful

  • 1 small beet, peeled and trimmed
  • 2 apples, washed and cut
  • 2 carrots, washed and trimmed
  • 1 orange, juiced
  • 1 lime, juiced
  • 1 inch piece of ginger, peeled

Directions –

  1. Put all of the ingredients into the juicer according to the manufacturer instructions.
  2. Serve the juice cold over ice.

WP_20150121_022 1

Carrot Apple Ginger Juice – adapted from The Roasted Root

  • 3 carrots, washed and trimmed
  • 2 apples
  • 1/2 inch piece of ginger, peeled (*optional*)

Directions –

  1. Put the ingredients through the juicer according to the manufacturer’s instructions.
  2. Drink immediately, or store in a sealed container in the refrigerator. Keeps for about 2 days.

Healthier Pumpkin Spice Latte

6

This was my first pumpkin spice latte ever, so I can’t compare it well to a coffee shop drink. What I can tell you is that this is like pumpkin pie in a cup! It’s also much cheaper and not full of empty calories and syrupy-goodness that is the typical coffee chain offering. Thanks for reading, enjoy!

Healthier Pumpkin Spice Latte – adapted from Detoxinista

  • 1 cup coconut milk
  • 1 cup hot brewed coffee
  • 2 tablespoons pumpkin puree
  • 2 tablespoons pure maple syrup
  • ½ teaspoon pumpkin pie spice
7
Directions – 
Combine all of the ingredients in a high-speed blender, and blend until smooth and creamy. Adjust flavor to taste, and serve warm.

Paleo Frappuccino

frappuccino

This blended coffee drink is so tasty, healthy and cheap! I modified the recipe slightly to suit my taste and I have made it about four times in the last week 😉 Thanks for reading, enjoy!

Paleo Frappuccino – adapted from You Hunt, I Gather

  • 1 small, frozen banana
  • 1/3 cup coconut milk
  • 3/4 – 1 cup cold coffee
  • 1 TBSP maple syrup
  • 1 TBSP good quality cocoa powder
  • 1 tsp vanilla extract
  • 1/2 cup ice

Directions – 

Add all ingredients to a high-speed blender and blend for 1 minute or until desired consistency is reached.

DIY Hot Chocolate Mix

WP_20150110_004 1

The kids had been asking for hot chocolate for a while now, so I decided to let them make it 🙂 I love that there are only three simple ingredients in this decadent hot chocolate and it makes 4 cups of mix. Thanks for reading, enjoy!

cbe948e4-3de7-4f33-9d01-ca3a3df96c09_full

All Natural Homemade Hot Chocolate Mix – adapted from Clean Mama

  • 2 1/2 cups sugar
  • 1 1/2 cups unsweetened cocoa – I used this Dutch cocoa
  • 3 teaspoons sea salt

Directions – 

In a large bowl, combine all ingredients with a whisk. Store in a four cup, air-tight container or into smaller jars for gifting.

To make one serving of hot chocolate, combine 1 cup of warm milk and two tablespoons of mix. Stir to combine and enjoy!

**I added the milk and cocoa to my Vitamix and blended it up for a few seconds to make it nice and frothy. Top it with mini marshmallows or whipped cream if desired 🙂