Oven Roasted Chicken Thighs with Carrots and Potatoes

chicken1

I love a cheap, no-brainer dinner! This meal was finished in under an hour, so that makes it even more appealing to lazy people like me. Everyone enjoyed the flavor of this, and I’m not ashamed to say it – but the skin was the highlight of this meal! Normally, I would pull it off and not indulge; but it looked way to crispy to pass up. It was like a salty, chicken flavored chip! Even my picky eater happily finished her portion, and wanted everyone else’s crispy skin. Thanks for reading, enjoy!

chicken

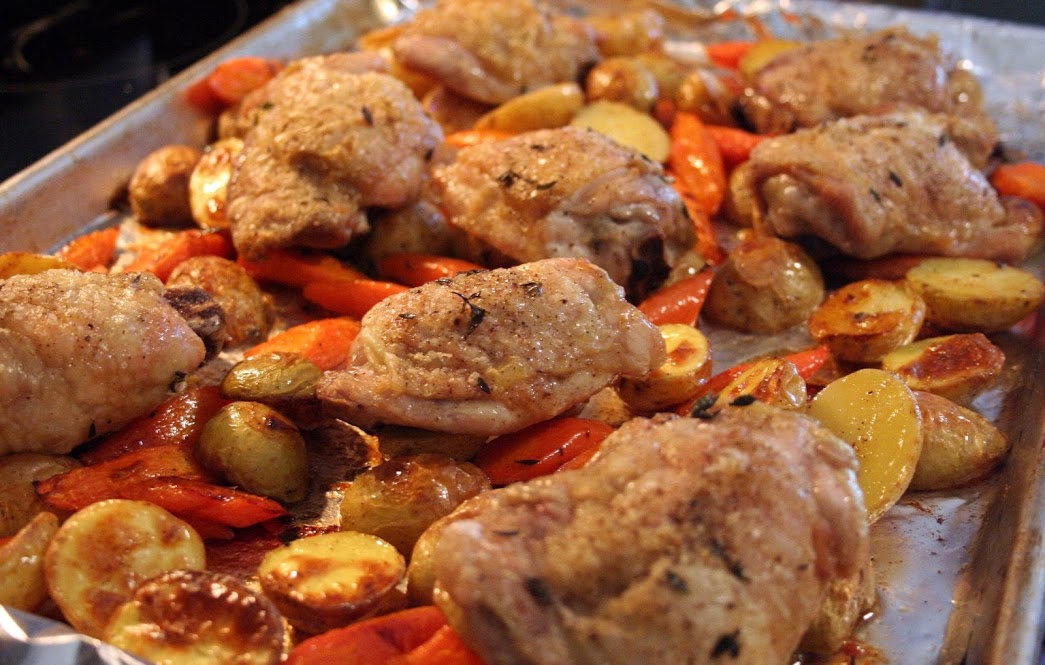
Oven Roasted Chicken Thighs with Carrots and Potatoes – adapted from Epicurious

  • 3 tablespoons olive oil, divided
  • 6 large chicken thighs with skin and bones (preferably organic; about 2 1/4 pounds total)
  • 1 tablespoon coarse kosher salt
  • 2 teaspoons dried thyme
  • 1 1/2 teaspoons freshly ground black pepper
  • 1/4 teaspoon freshly grated or ground nutmeg
  • 2 pounds unpeeled medium Yukon Gold potatoes, scrubbed, cut into 2-inch-long, 1/2-inch-thick spears
  • 2 pounds medium carrots, peeled, cut into 2-inch-long, 1/2-inch-thick spears
  • 3 tablespoons chopped fresh chives

Directions –

Preheat oven to 450°F. Coat large rimmed baking sheet with 1 tablespoon oil. Place chicken on baking sheet. Turn to coat with oil and set skin side up. Mix salt, thyme, 1½ teaspoons pepper, and nutmeg in small bowl. Sprinkle half of mixture over chicken. Roast until chicken starts to brown and some fat has rendered, about 30 minutes. Transfer thighs to medium bowl; set aside.

Meanwhile, combine potatoes, carrots, 2 tablespoons oil, and remaining salt thyme mixture in large bowl. Transfer potato-carrot mixture to same baking sheet; turn to coat with drippings. Roast until vegetables soften, 30 minutes.

Place thighs on vegetables; pour accumulated juices from chicken over. Return sheet to oven. Roast until chicken is cooked and vegetables brown, 15 minutes longer.

Place chicken on platter; top with chives.

Spinach Artichoke Pasta

Every once in a while I make something that isn’t worth making again, and this is a good example. It was bland and I forgot that I really don’t like the texture of wilted spinach – it grosses me out! I bet the hot spinach artichoke dip on the previous post would be amazing poured over pasta. I meant to try it; but when I make the dip, it’s meant for an appetizer and not an experiment 😉 If I ever do I’ll be sure to post about how it turned out. Thanks for reading!

Spinach Artichoke Pasta – adapted from The Pioneer Woman

  • 6 Tablespoons Butter
  • 4 cloves Garlic, Finely Minced
  • 2 bags Baby Spinach
  • 2 cans Artichoke Hearts, Drained And Halved
  • 3 Tablespoons Flour
  • 3 cups Whole Milk
  • 1/4 teaspoon Cayenne Pepper
  • Salt And Pepper, to taste
  • 1/2 cup Grated Parmesan Cheese
  • 1-1/2 cup Mozzarella Or Monterey Jack Cheese, Grated
  • 1/2 cup Low Sodium Chicken Broth (less Or More)
  • 12 ounces, weight Penne, Cooked Until Al Dente
  • 1/2 cup Seasoned Panko Breadcrumbs
  • Crushed Red Pepper, To Taste

Directions –

Melt 2 tablespoons butter in a large pot or skillet. Add garlic and throw in the spinach. Stir it around until it’s wilted, about 1 minute. Remove spinach from heat and set aside.

Add 2 tablespoons butter to the same pot and raise the heat to high. Throw in the halved artichokes and stir it around until they get a little color, 1 to 2 minutes. Remove the artichokes from the pot and set them aside.

Reduce the heat to low. Add 2 tablespoons butter to the pot. When melted, sprinkle in flour and whisk until it’s combined. Pour in milk and whisk to combine. Let it cook for 3 to 4 minutes, or until starting to thicken. Add Parmesan, Mozzarella/Monterey Jack, salt and pepper, and cayenne pepper. Stir to melt, and if it’s overly thick, splash in chicken broth.

Add artichokes and pasta, tossing gently to combine. Gently fold in spinach, then pour the pasta into a serving bowl. Sprinkle the top with crushed red pepper flakes and plenty of Panko breadcrumbs for crunch.

Repost: Hot Spinach Artichoke Dip

dip

Who doesn’t like spinach artichoke dip?? Seriously, this is the best I have tried and everyone loves it. This post shows all the modifications that I have made to the original recipe. For a big group, I pour it into a small crock pot to keep warm and serve with baguettes or scoop-shaped tortilla chips. Thanks for reading, enjoy!

Spinach Artichoke Dip – adapted from Allrecipes

  • 1 bulb garlic
  • 1 (10 ounce) package frozen chopped spinach, thawed and drained
  • 1 (14 ounce) can artichoke hearts, drained and chopped
  • 1 (10 ounce) container Alfredo-style pasta sauce
  • 1 cup shredded mozzarella cheese
  • 1/3 cup grated Parmesan cheese
  • 1 – 8 ounce package cream cheese, softened
  • fresh cracked pepper to taste

Directions –

1. Preheat oven to 400 degrees F (175 degrees C).

2. Prep the bulb for roasting: Peel away the outer layers of the garlic bulb skin, leaving the skins of the individual cloves intact. Using a knife, cut off 1/4 to a 1/2 inch of the top of cloves, exposing the individual cloves of garlic. Place the garlic heads in a baking pan; muffin pans work well for this purpose. Drizzle a couple teaspoons of olive oil over each head, using your fingers to make sure the garlic head is well coated. Cover with aluminum foil. Bake at 400°F for 30-35 minutes, or until the cloves feel soft when pressed.  Allow the garlic to cool enough so you can touch it without burning yourself. Use a small knife cut the skin slightly around each clove. Use a cocktail fork or your fingers to pull or squeeze the roasted garlic cloves out of their skins. (Directions with pictures at Simply Recipes)

3. In an 8×8 inch baking dish, spread the roasted garlic, spinach, artichoke hearts, Alfredo-style pasta sauce, mozzarella cheese, Parmesan cheese and cream cheese.

4. Cover and bake in the preheated oven 30 minutes, or until cheeses are melted and bubbly. Serve warm.


dip1

Zucchini Bread

zucchini

This one has been pinned for a while, and my friend inspired me to bake some of these off to give as teacher gifts for Valentine’s Day. I went out and bought mini loaf pans to make these the perfect size for gifting, plus small is cute! 😉 I will have to bake more teeny loaves of my favorite quick bread recipes now to justify the purchase of the pans, but that just means I can spread more of these carbs around! Next time I will use half whole wheat pastry flour and unsweetened applesauce for these, but I figured for the first try, I should make these as the recipe.

Verdict: I know my kids love this, but have yet to hear back from them about what their teachers thought. It’s always the thought that counts, but I love rave reviews as much as anyone 😉 The crust has a nice little crispness to it (probably because all of that sugar), but they’re not too sweet; and the loaves are very moist. My loaves needed to bake for 50 minutes in the mini loaf pans – just check yours every five minutes or so toward the end of baking time. Thanks for reading, enjoy!

Zucchini Bread – adapted Lion House via TSG Cookin’

  • 3 cups flour (375 grams)
  • 1 teaspoon baking soda
  • 1/2 teaspoon baking powder
  • 1 teaspoon cinnamon
  • 1/2 teaspoon finely grated nutmeg
  • 1/2 teaspoon salt
  • 1 cup toasted chopped pecans (toasting is optional, but adds extra flavor)
  • 3 eggs
  • 1 cup oil
  • 2 cups sugar
  • 1 tablespoon vanilla
  • 2 cups grated zucchini
Directions –
  1. Preheat oven to 325-degrees F.
  2. Grease well a large 8×4 inch loaf pan or 2 small 7×3 inch loaf pans. Set aside. (Please note: There was too much batter for an 8×4-inch loaf pan. I used one 8×4-inch loaf pan and one 7×3-inch loaf pan.)
  3. In large bowl, mix flour, baking soda, baking powder, cinnamon, nutmeg, salt, and toasted nuts. Set aside. (I toasted the pecans in a baking pan for 8-10 minutes in the preheated 325-degree F oven.)
  4. In separate mixing bowl, beat eggs until light and foamy. Add oil, sugar, vanilla and mix well. Stir in the zucchini.
  5. Add flour mixture to the wet ingredients. and mix just until moist. (Over-mixing causes tunnels and a coarse texture.)
  6. Pour into prepared pan or pans. (Pans should be about two-thirds full.) Bake at 325 degrees for 45 to 50 minutes for large loaf or 35 minutes for small loaves, or until wooden toothpick inserted in center comes out clean. Do not over-bake. (My ovens required 60-65 minutes baking time for the large loaf and 45-50 minutes baking time for the small loaf.)
  7. Remove from oven and allow bread to sit in pans for about 5 minutes. Loosen gently from sides of pan, if necessary, and turn out onto a wire rack to cool. To store, place in a closed plastic bag or wrap well in foil.

Thai Chicken Lettuce Wraps

lettucewrap
It was one of those days…I had no clue what I felt like making for dinner, and I was unmotivated ( lazy) to go grocery shopping. I wanted something quick and easy that required only what I had on hand. Thankfully, this PW recipe met all those requirements. I thought the flavor was really good and I will make this again! Thanks for reading, enjoy 🙂

Thai Chicken Lettuce Wraps – adapted from The Pioneer Woman

*I only had one lime that gave me 2 TBSP of juice, so I used half for the marinade and half for the sauce*

  • 2 whole Boneless, Skinless Chicken Breasts (breast Halves)
  • OPTION 1 MARINADE/SAUCE
  • 1 Tablespoon Rice Wine Vinegar
  • 1/4 cup Soy Sauce
  • 1 teaspoon Pure Sesame Oil
  • 1 teaspoon Hot Chili Oil
  • Juice Of 2 Limes
  • 1 Tablespoon Minced Fresh Ginger
  • 2 Tablespoons Brown Sugar (optional)
  • 1 teaspoon Cornstarch
  • 2 Tablespoons Honey (or Brown Sugar)
  • Peanut Or Canola Oil For Frying

For the Peanut Sauce

  • 1/2 cup Peanut Butter (crunch/chunky Is Good!)
  • 3 Tablespoons Soy Sauce
  • 3 Tablespoons Honey
  • 1/2 teaspoon Hot Chili Oil
  • 1 teaspoon Crushed Red Pepper
  • Juice Of 2 Limes
  • Water, As Needed For Thinning
  • Romain lettuce leaves
  • 1 whole carrot, julienned
  • 1/2 cucumber, seeded and julienned

Directions –

In a bowl, mix together the rice wine vinegar, soy sauce, sesame oil, hot chili oil, lime juice, ginger, and brown sugar if using. Whisk it together, then pour off half the liquid into a separate bowl.

Dice the chicken into bite-sized pieces and put them into the bowl you used to make the marinade. Throw in the squeezed lime halves and set this aside to marinate for a bit.

Into the small bowl with the other half of the marinade, whisk in the cornstarch and honey. Set aside.

In a heavy skillet over high heat, pour in a small amount of oil. When it’s hot, add the chicken pieces in a single layer. Let it sit on one side, undisturbed, for about a minute, then stir the chicken around and cook it until it’s totally done, about 3 to 4 minutes.

Reduce the heat to low, then pour in the sauce that you mixed in a separate bowl. Stir it around; the sauce will immediately start to thicken. Cook over low heat for 1 minute, then remove from heat and allow to cool.

Peanut Sauce: To make the peanut sauce, combine all the peanut sauce ingredients, adding water until it gets to a nice drizzle-able consistency. Taste and add more of what it needs: spice, sweetness, etc. Set aside.

Lay our lettuce leaves, add chicken, carrots and cucumber then top with peanut sauce.

Creamy Tomato Soup

image

Quick Post: As a kid, I hated tomato soup…but that was the condensed kind, so I had every right! 😉 Because of that bad experience, I have only recently tried tomato soup again. I was a little obsessed with Panera’s creamy tomato soup and adult grilled cheese, and decided that I needed to recreate that meal at home. This batch makes quite a lot of soup, but it freezes beautifully! My kids loved this and agree that I need to make it again 🙂 Thanks for reading, enjoy!

Creamy Tomato Soup –

  • 2 TBSP olive oil or butter
  • 1 small onion, diced
  • 3 cloves garlic, minced
  • 2 – 28 ounce cans of whole peeled tomatoes (San Marzano or other good quality is best)
  • 2 cups chicken stock
  • 2 sprigs fresh thyme
  • Kosher salt and fresh cracked pepper
  • 1 tsp. raw sugar
  • 1/2 cup heavy cream
  • Parmesan cheese, optional

*Special Equipment – immersion blender, food processor or blender

Directions –

1. Heat up oil or butter in a medium stockpot over medium heat. Cook onion and garlic (if using), stirring constantly, until soft and translucent, about 3 minutes.

2. Add tomatoes, their juices, thyme and stock. Season with salt and pepper and bring to a boil, then reduce heat and simmer 10 minutes.

3. Remove the thyme, and carefully puree the soup. ( I used my immersion blender in the pot, while using the pot lid as a shield 😉 It worked great!).

4. Whisk in cream; season with salt and pepper. Serve immediately with Parmesan if desired.

Perfect Au Gratin Potatoes

augratin1

The name says it all – these really are perfect! They are the easiest potato side dish I have ever made and I’m finding new excuses to make them. We enjoyed these alongside this roast chicken and these garlicky green beans. The leftovers heat up nicely too – if there are any! Thanks for reading, enjoy 🙂

Perfect Potatoes Au Gratin – adapted from The Pioneer Woman

  • 4 whole Russet Potatoes, Scrubbed Clean
  • 2 Tablespoons Butter, Softened
  • 1-1/2 cup Heavy Cream
  • 1/2 cup Whole Milk
  • 2 Tablespoons Flour
  • 4 cloves Garlic, Finely Minced
  • 1 teaspoon Salt
  • freshly Ground Pepper, to taste
  • fresh thyme to taste (my addition…so yummy)
  • 1 cup shredded cheddar cheese

Directions –

Preheat oven to 400 degrees.

Smear softened butter all over the bottom of a baking dish.

Slice potatoes, then cut slices into fourths.

In a separate bowl, whisk together cream, milk, flour, minced garlic, salt, and plenty of freshly ground black pepper.

Place 1/3 of the potatoes in the bottom of the baking dish. Pour 1/3 of the cream mixture over the potatoes.

Repeat this two more times, ending with the cream mixture. Cover with foil and bake for 30 minutes. Remove foil and bake for 20 minutes, or until potatoes are golden brown and really bubbling. Add grated cheese to the top of the potatoes and bake for 3 to 5 more minutes, until cheese is melted and bubbly.

Lettuce Wraps

lettucewraps

My family loved these – well, the DH liked the flavor but there are a few ingredients in these that he could do without. When I decided to make these, I knew that was a possibility so I cut back on those foods: water chesnuts and red bell pepper. I wanted a higher meat to extras ratio anyway so it worked out really well. I will make these again, but on those nights when M isn’t around for dinner 😉 Thanks for reading, enjoy!

Chicken or Pork Lettuce Wraps – adapted form Serious Eats

6 cloves garlic, chopped
1 cup hoisin sauce (about a 10-ounce container)
4 tablespoons oil, divided
1 medium yellow onion, finely chopped
1 tablespoon finely chopped ginger
1 pound ground chicken or pork
1 red pepper, finely diced
1 carrot, peeled and finely diced
1 medium red potato, finely diced
1 8-ounce can sliced water chesnuts, chopped
Black pepper, sea salt and chili flakes to taste
Romaine lettuce leaves, or Bibb lettuce

Directions –

In a small saucepan or skillet, combine half the garlic and the hoisin sauce. Over medium heat, reduce the sauce until thickened and beginning to turn syrupy, 2-5 minutes depending on the pot used.

In the meantime, in a large (12-inch) skillet, heat half the oil over medium-high heat until shimmering. Add the onion, ginger, and remaining garlic and sauté, stirring occasionally, until golden and soft. Add pork and break up with a wooden spoon. Cook, stirring occasionally, until all the moisture has evaporated and the pork is cooked through and tender.

In a second skillet, heat the remaining oil over medium-high heat until shimmering and add the carrot and potato. Cook until almost tender, then add pepper and water chestnuts and cook for a few minutes longer. Add this mixture to the pork along with the reduced hoisin sauce. Stir well to coat the pork and season to taste with salt and pepper.

Set out the pork and serve with lettuce leaves.

Best of 2012, Part 1

Happy New Year! I decided that since I have had this blog going for some time now, I should go back into the archives and share with you all which recipes are my favorites. In addition, I want to showcase a couple of my most popular posts from this year. I would never guess that my blog would have so many visitors in such a short amount of time. Thanks to Pinterest and a few other blogs; one recipe receives hundreds, and sometimes a thousand or more hits a day!

1g

Alfredo, Shells, Chicken, Broccoli and Cheese – It’s the picture that sells this one, for sure! (I really need to get my camera fixed). As soon as I uploaded this to Pinterest, it hasn’t stopped being my most popular post. This is probably the easiest and most customizable recipe I have here, and thankfully the people who have tried it enjoy it. To date, it has been pinned over 107,000 times!!

3

Roasted Garlic Bread – Hands down, this is the best garlic bread! Everyone loves it! To date, it has been pinned over 10,000 times – not exactly a close second, but impressive for being viewed only 13,000 times!

20120521_122033

Carrot Ginger Dressing – I double this recipe whenever I make it and it would be a mistake not to. The vibrant orange screams “healthy”,  and is perfect for your simple salads.

That’s it for now! I have over 20 favorite recipes from last year and I may have to narrow that down a bit 🙂 Thanks for reading, enjoy!

Sausage and Bean Soup with Pasta

Cooler weather always motivates me to make comforting meals, and what could be better than soup? This was so good and it made a huge batch – too bad we didn’t get to enjoy leftovers…the hubbs forgot to put the container in the fridge…and it stayed on the counter overnight…boo! I forgave him, of course 😉 There are worse things, I suppose. I once left a container of ice cream out on the counter overnight – don’t be like me! I remember the mess was thick, sticky, and a hassle to clean up! 😉 Thanks for reading, enjoy!

Sausage and Bean Soup with Pasta – adapted from The Italian Dish

  • 1 cup dried cannellini or cellini beans or 1 15-ounce can of any beans you like, drained
  • 1 pound ground sausage (*I used half hot, half mild Italian sausage*)
  • 1 medium onion, diced
  • 1 medium carrot, diced
  • 1 stalk celery, diced
  • 3 tablespoons olive oil
  • 2 garlic cloves, minced
  • 1 15-ounce can diced tomatoes
  • 6 to 8 cups chicken broth (*I used 6 cups homemade chicken stock*)
  • 1 teaspoon thyme, fresh if you have it
  • 1 bay leaf
  • salt and pepper
  • 1 cup ditalini pasta, or any small pasta
  • Parmigiano Reggiano rind (optional)
  • grated Parmigiano Reggiano cheese

Directions –

If using dried beans, place them in a pot, cover with cold water and let soak for several hours or overnight. Drain.

In a large pot, brown the sausage.  Remove from pot.  If there is a lot of fat left in the pot, pour this out but do not wipe out pot.  Add onion, carrot and olive oil and saute for 2-3 minutes until soft.  Add garlic and saute about a minute more.   Add  the tomatoes, chicken broth, Parm rind, thyme, bay leaf, some salt and pepper and the drained beans and the sausage and cover the pot. Cook for an hour over low heat, at a gentle simmer.

If using dried beans, check for doneness at this point.  (If using canned beans, add the pasta now.)  If the beans are not soft enough, cover the pot again and cook for another 30 minutes or until the beans are soft. Add the pasta and cook, uncovered, until the pasta is tender.  Check the seasoning and add more salt and pepper to taste.  If the soup is too thick for your liking, add some more chicken broth.

Serve with grated cheese on top and an extra drizzle of olive oil.