Buttermilk Blueberry Breakfast Cake

blueberrycake

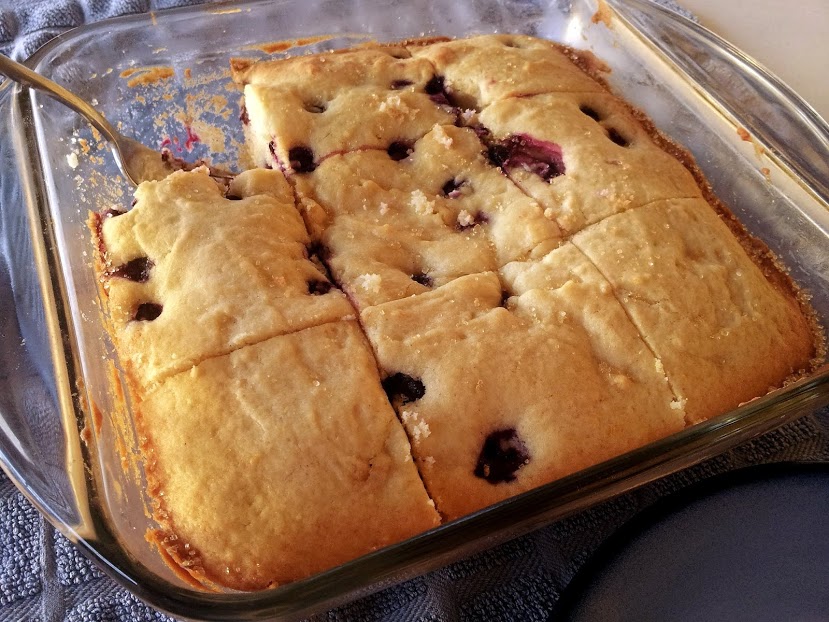
I made this one at least 7 months ago but haven’t gotten around to posting it; but I remember it because it is a fantastic treat for breakfast. I avoided posting because the pictures (and I took several) didn’t turn out well at all! (Click the link for a more appetizing shot). I sent my camera out a few weeks ago for repairs and it can’t come back soon enough. I’m sure I’ll make this one again soon and take a better picture. Thanks for reading, enjoy!

Buttermilk-Blueberry Breakfast Cake – adapted from Alexandra Cooks

  • ½ cup unsalted butter, room temperature
  • 2 tsp. lemon zest or more — zest from 1 large lemon
  • 3/4 cup sugar (use vanilla sugar if you have it)
  • 1 egg, room temperature
  • 1 1/2 tsp. vanilla
  • 2 cups flour
  • 2 tsp. baking powder
  • 1 tsp. kosher salt
  • 2 cups fresh blueberries
  • ½ cup buttermilk

1. Preheat the oven to 350ºF. Cream butter with lemon zest and sugar until light and fluffy.

2. Add the egg and vanilla and beat until combined. Meanwhile, toss the blueberries with ¼ cup of flour, then whisk together the remaining flour, baking powder and salt.

3. Add the flour mixture to the batter a little at a time, alternating with the buttermilk. Fold in the blueberries.

4. Grease a 9-inch square baking pan (or something similar) with butter or coat with non-stick spray. Spread batter into pan. Sprinkle batter with remaining tablespoon of sugar. Bake for 35 minutes. Check with a toothpick for doneness. If necessary, return pan to oven for a couple of more minutes. (Note: Baking for as long as 10 minutes more might be necessary.) Let cool at least 15 minutes before serving.

Advertisement

Blueberry Cakelets

Quick Post: I was on a hunt for more recipes that use self-rising flour. I recently purchased a bag for these two ingredient biscuits (they’re my absolute fave!) But I only made them that one time back in October, so the remainder of the flour sat in the pantry until it finally expired…I hate wasting food. This was pretty tasty and not too sweet. I bet that it would be even better with some fresh whipped cream. I like how quickly I was able to throw this together and next time I would love to try this recipe with strawberries. That might go over well with my family as they don’t seem to like blueberries that much…oh well! Thanks for reading, enjoy!
Individual Blueberry Cakes – adapted from Top With Cinnamon
  • 2 cups blueberries
  • 1/3 cup + 3 tbsp sugar
  • 1 egg
  • 1/3 cup whipping cream
  • 2/3 cup self-raising flour

Optional:

  • 1/2 tsp cinnamon
  • 1 tbsp lemon juice
  • zest of one lemon

Directions:

Preheat the oven to 350 degrees F.
Put the blueberries in a bowl, with 1/2 cup of water, the 1/3 cup of sugar (and cinnamon, lemon zest and lemon juice if you want them). Stir until the blueberries are coated with the mixture. Divide between 4 or 5 medium ramekins.

In a separate bowl, whisk together 2 tbsp of sugar, the egg and cream together. Add the flour and stir until just combined, don’t over mix it! Pour the mixture into the  ramekins and sprinkle the remaining 1 tbsp of sugar on top of the batter (or you could sprinkle cinnamon-sugar mixture onto the batter here…I highly recommend it!). Place the ramekins on a baking tray (to stop juice dripping everywhere in the oven).

Bake for 15-20 minutes, until well risen and golden brown.

Coconut Milk and Vanilla Bean Rice Pudding

I’m trying something a little crazy…my go to arroz con leche recipe has plain ‘ol milk in it. This is my first time using coconut milk and it’s my first time knowingly trying any food with this in it. Hopefully it’s not a complete waste of ingredients and time…I love rice pudding and it’s something that reminds me of my childhood. My Gram made her version (my fave no matter what) often and my siblings and I ate it hot as a breakfast treat. I’m sure I’ll never be able to recreate hers, but in the meantime, I’m having fun tasting other versions. This need for rice pudding came when I realized that I have several Madagascar vanilla beans patiently waiting to be used in my pantry. I bought them over the summer and haven’t used a single bean! How dare I! 😉 It has been at least a full year since the last time I made this decadent treat, so why not put the two together? While searching through Tastespotting, I found several versions of the classic – some with coconut milk and some with vanilla bean seeds. This recipe is a mishmash of a few recipes and techniques that will hopefully come together beautifully!

Verdict: So good, I love this stuff! Creamy, slightly sweet and perfectly comforting in my book.  I didn’t notice the coconut flavor, but it wasn’t as thick or “butter fatty” as the other recipe. I only used one cup because coconut milk has such a  high fat content, so I’ll be on the look out for lighter coconut milk. Also, I was also able to make a bigger batch of vanilla sugar the day I made this, so hopefully I can find the perfect use for some of it. Thanks for reading, enjoy!

Coconut and Vanilla Bean Rice Pudding – 

  • 4 cups water
  • 1 cup arborio rice
  • 1 cinnamon stick
  • 1 vanilla bean, split
  • lemon zest (strips, not grated)
  • 1 cup coconut milk
  • 2 cups milk
  • 1/2 cup sugar
  • pinch of kosher salt

Directions –

Pour rice and water into a 4 quart dutch oven or larger. Add the lemon peel, cinnamon stick and vanilla seeds to the pot. Let sit for an hour.

After soaking, bring the rice mixture to a boil on high heat, uncovered. When it starts to boil (about 5 minutes), lower the heat to medium and cook for 10 to 12 more minutes or until water is almost evaporated.

Add the milk and stir well to mix, add the sugar  and cook over medium-low heat, stirring carefully, until it thickens slightly or until desired consistency, about 25 to 35 minutes. Remove the lemon zest and cinnamon sticks.

Serve hot, cold or room temperature.

Marinated Chicken Breast

I came across this recipe the other day while trying to find a simple marinade for some chicken that I had sitting the fridge. This marinade has lemon zest, garlic and some dried herbs, but I decided to add two tablespoons of fresh lemon juice to go along with it. The night before I prepared the marinade in one of my dressing carafe and placed it in the fridge to let the flavors marry. Plan on marinating for at least four and up to twelve hours – any longer than that and the lemon juice will start to cook the meat. This morning I pounded the chicken breasts in a sealed, one gallon Ziploc bag – you don’t want all that chicken juice flying around your kitchen! Plus, once the chicken is nice and evenly pounded, you can pour the marinade over the chicken, mush the bag around a little and finally place it in the fridge. Whenever I marinade meat, I either put it in a Pyrex container and cover it, or as with this method I place the bag in another container. It’s just a way to be extra safe in keeping any raw meat juices from contaminating the rest of your fridge and it’s contents.

This chicken grilled up moist and flavorful and paired perfectly with the green salad. I added tomato, bell pepper, cucumber, avocado and grated carrot to the greens – the more veggies for me the better! Thanks for reading, enjoy!

Perfectly Grilled Chicken Breasts with Lemon Zest, Garlic & Herb Marinade – adapted from Once Upon a Chef

  • 4 boneless, skinless chicken breasts (about 1¾ pounds total)
  • 6 tablespoons extra virgin olive oil
  • 4 large garlic cloves, minced (use a garlic press)
  • 1 teaspoon dried thyme
  • ½ teaspoon dried oregano
  • 1¼ teaspoon salt
  • ½ teaspoon pepper
  • 1½ teaspoons lemon zest (you’ll need one lemon)
  • * I added 2 TBSP of lemon juice

Directions –

1. Place chicken breasts between 2 pieces of wax paper and, using a meat mallet, pound to an even ½-inch thickness.

2. Mix all ingredients except chicken together in a 1 gallon zip-lock bag. Add chicken breasts and massage marinade into meat until evenly coated. Seal the bag and place in a bowl in the refrigerator (the bowl protects against leakage); let the chicken marinate at least 4 hours or up to 12 hours.

2. Clean grill and preheat to high. Lightly dip a wad of paper towels in vegetable oil and, using tongs, carefully rub over grates several times until glossy and coated. Place chicken breasts on the grill (make sure they are well-coated with the marinade; the more garlic, lemon zest and herbs on the chicken, the better!). Grill, covered, for 2-3 minutes per side.

Use a fine or Microplane grater to zest the lemon. Simply rub the lemon in one direction against the blades, turning the lemon as you go. Be sure to remove only the yellow part; the white pith underneath is bitter.


If you are using less than 4 chicken breasts, you’ll need to reduce the salt accordingly.

Arroz con Leche

I love arroz con leche. It reminds me of my  Grandma Tavita, my childhood and simpler times. This recipe isn’t exactly like my Gram’s but it’s pretty similar. It’s good, comforting and creamy – and not exactly health food. That’s why this is only my third time making it this year…and I eat it all by myself! M and the kids wont touch it – maybe when the kids are older they might want to. But, I think for some people, if you didn’t grow up eating something you may never like it. I love Mexican food, because of course I grew up eating it and it always reminds me of my Gram 🙂 I miss her! Thanks for reading, enjoy!

Arroz con Leche Recipe – adapted from Ingrid Hoffman

  • 1 cup long-grain white rice ( I use Jasmin rice)
  • 2 cinnamon sticks
  • 1 tablespoon lemon zest
  • 3 whole cloves (I omit these)
  • 4 cups water
  • 1 egg
  • 3 cups whole milk
  • 1 (12-ounce) can sweetened condensed milk
  • 1 tablespoon vanilla extract
  • 1/2 cup raisins, optional

Directions –
Soak the rice, cinnamon sticks, lemon zest and whole cloves in the water in a heavy saucepan for 1 hour.

After soaking, bring the rice mixture to a boil on high heat, uncovered. When it starts to boil (about 5 minutes), lower the heat to medium and cook for 10 to 12 more minutes or until water is almost evaporated.

While rice is cooking, beat the egg in a bowl. Add the milk and stir well to mix. Add the egg mixture, vanilla extract and condensed milk to the rice and cook over medium-low heat, stirring carefully, until it thickens slightly or until desired consistency, about 25 to 35 minutes.

Let cool uncovered.

Note: be aware that as the rice cools it thickens. The finished product will be thinner than traditional rice pudding.