Buttermilk Oatmeal Bread

bread1

I love making bread – actually, I love that I know how to, and that it’s been three years since I tried it out for the first time. I remember feeling so intimidated by yeast (silly now that I think about it), but I’m so glad I got over that 🙂 When I see my daughter smiling as she’s smelling fresh from the oven bread, I know it’s something that she will always love and remember about me. I can’t wait to pass on what I have learned to her, so she can pass her knowledge onto someone else.

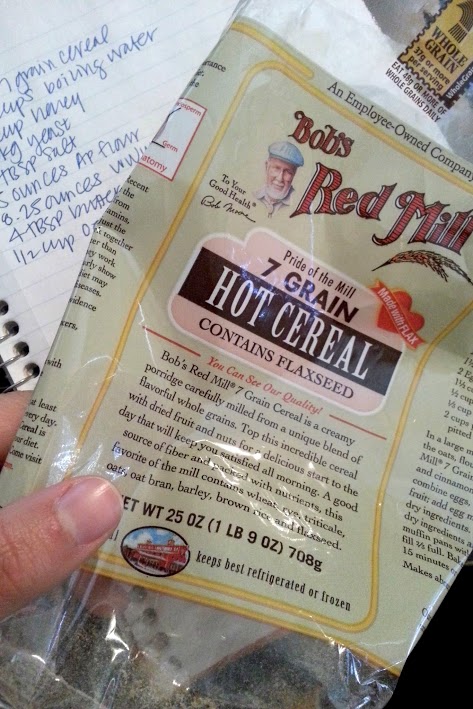
I had a homemade batch of buttermilk that I needed to use up, plus we were almost out of sandwich bread. Thankfully Pinterest came to my rescue again! I doubled this recipe  and my sweetener of choice was raw honey. When I took it out of the oven, I smelled the honey and oats – so perfect! It has a great slightly chewy bite and flavor is mild enough for sweet or savory toppings. Thanks for reading, enjoy!

bread

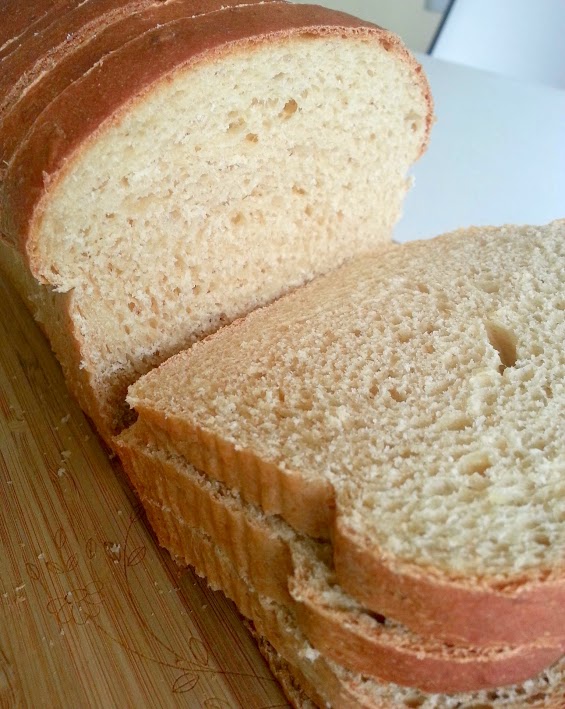
Buttermilk Oatmeal Bread – adapted from Buttered Side Up

  • 1/2 cup water
  • 1 cup buttermilk
  • 1 tablespoon instant yeast
  • 1/4 cup sugar, maple syrup or honey, divided
  • 1/4 cup butter, melted and cooled
  • 2 cups all-purpose flour (250 grams)
  • 2 cups whole wheat flour (262 grams)
  • 1/2 cup old-fashioned rolled oats
  • 2 teaspoons sea salt

Directions:

1) Gently warm the buttermilk in a 4 cup or larger measuring cup. Add the oats, hot water, melted butter, sweetener and salt. Stir to combine and set aside until it cools slightly.
2) In a standing mixer bowl, combine the flours, (I always hold back at least 1/2 cup). Add the yeast, and buttermilk mixture and mix to combine.
3) Using the dough hook, knead until smooth and elastic, about 5-7minutes. Add flour as necessary. Return to mixing bowl and let rise until doubled, about 1-2 hours, depending on how warm your house is.
4) Form risen dough into loaves, buns or whatever shape you wish. Place in greased pans (if making a loaf use a 9×5-inch pan) and let rise until nearly doubled, about 1 more hour.
5) During the last 15 minutes of rising, preheat your oven to 350, bake loaves for 35 -40 minutes or until the internal temp is 190 degrees. Remove from pan and allow to cool completely on a wire rack before slicing.

Vanilla Bean Ice Cream

icecream2

So smooth, creamy, decadent, flavorful and satisfying! I love the creaminess of custard-style ice cream over Philadelphia style hands down. The texture and mouth feel of custard based is so much more pleasant than the butter fattiness of Philadelphia. I learned that a couple of years ago when I tried this recipe; and even though my favorite style requires more ingredients and wait time, I promise it’s worth every minute. Thanks for reading, enjoy!

Vanilla Bean Ice Cream – adapted from The Food Network

  • 5 egg yolks
  • 3/4 cup sugar, vanilla sugar if you have it (next time I will use a less – it’s pretty sweet!)
  • 1 cup heavy cream
  • 2 cups whole milk
  • 1 vanilla bean, split and scraped

Directions –

custard2

Place the half-and-half and the heavy cream into a medium saucepan, over medium heat. Bring the mixture just to a simmer, stirring occasionally, and remove from the heat.

custard1

In a medium mixing bowl whisk the egg yolks until they lighten in color. Gradually add the sugar and whisk to combine.

custard

Temper the cream mixture into the eggs and sugar by gradually adding small amounts, until about a third of the cream mixture has been added. Pour in the remainder and return the entire mixture to the saucepan and place over low heat. Continue to cook, stirring frequently, until the mixture thickens slightly and coats the back of a spoon and reaches 170 to 175 degrees F. Pour the mixture into a container and allow to sit at room temperature for 30 minutes. Place the mixture into the refrigerator and once it is cool enough not to form condensation on the lid, cover and store for 4 to 8 hours or until the temperature reaches 40 degrees F or below.

icecream3

Pour into an ice cream maker and process according to the manufacturer’s directions. This should take approximately 25 to 35 minutes. Serve as is for soft serve or freeze for another 3 to 4 hours to allow the ice cream to harden.

Simple Brownies

brownie3

Woo! These are rich 🙂 They are thin but so fudgy and perfect with homemade vanilla ice cream, (*I’ll share the ice cream recipe soon*). Thanks for reading, enjoy!

Simple Brownies – adapted from Baked Bree

  • 10 TBSP unsalted butter
  • 1 1/4 cups sugar
  • 3/4 cup + 2 TBSP cocoa powder (*break out the good stuff for this!*)
  • 1/4 tsp salt
  • 2 tsp vanilla
  • 2 eggs
  • 1/2 cup all purpose flour

brownie2

Directions –

1 Preheat oven to 325°F with rack positioned in the lower third of the oven. Line the bottom and the sides of an 8-inch square baking pan with foil or parchment paper, leaving an overhang on two opposite sides to make it easier to lift the brownies out of the pan when they are done.
image

2 Combine the butter, cocoa, sugar, and salt in a medium heatproof bowl. Set the bowl in a wide skillet of barely simmering water. Stir the butter cocoa mixture from time to time until the butter is melted and the mixture is smooth and hot enough that you want to remove your finger quickly after dipping it in to test. Remove the bowl from the skillet and set aside briefly until the mixture is only warm, not hot.

3 Using a wooden spoon, stir in the vanilla extract. Add the eggs one at a time, stirring quickly after each one. When the batter looks shiny, thick, and well mixed, add the flour and stir until you cannot see it any longer, then beat for 40 strokes with the wooden spoon. Spread the batter evenly in the lined pan.

4 Bake until a tester inserted into the center comes out just slightly moist with batter, 20 to 25 minutes. Let the brownies cool completely on a rack. Lift up the ends of the foil or parchment paper liner, and transfer the brownies to a cutting board. Cut into 16 or 25 squares.

Multi-Grain Bread

multigrain

I’m always looking for new sandwich bread recipes, so when I came across this one (thank you Pinterest!), I knew it was going to be the next loaf on my long list of recipes to try. This loaf tastes nutty and slightly sweet; and I like that there is a boost in flavor and fiber with this Bob’s Red Mill 7-Grain Hot Cereal. I’m glad the loaves turned out so well, because now I don’t have to find other recipes to make sure this doesn’t go to waste. Thanks for reading, enjoy!

bobs

Multi-Grain Bread – adapted from Country Cleaver

  • 1 cup 7-grain Hot Cereal, such as Bob’s Red Mill
  • 2 ½ cups Boiling Water
  • ¼ cup Honey
  • 1 package Yeast
  • 1 Tbsp Salt
  • 3 cups All Purpose Flour, (15 ounces) *hold back at least 1/2 cup for kneading*
  • 1 ½ cup Whole Wheat Flour, 8 ¼ ounces
  • 4 Tablespoons Butter, melted and cooled
  • ½ cup Oatmeal

Directions –

1) Boil 2 ½ cups of water, pour over 7-grain hot cereal. Stir and let set until temperature cools to 100 degrees, about 1 hour.

2) Into stand mixer bowl fitted with dough attachment, pour in hot cereal. Add in honey and yeast. Turn on mixer and stir to combine. Lastly add in melted and cooled butter. Slowly add in flour. Knead until all ingredients combine. Cover with plastic wrap and let rest for 20 minutes. Add in salt. Knead again until salt has been combined – about 1 minute.

3) Remove dough from mixer bowl, and onto a lightly floured surface. Flatten and knead until dough shapes into a large ball. Pour a small amount of oil into a large bowl. Add dough to bowl and roll around bowl gently to ensure it is coated with oil. Cover with plastic wrap and towel to keep away light. Set aside in a warm place for one hour.

4) Remove risen dough from bowl and place on lightly floured surface. Pull and stretch dough into a 18×12 inch rectangle. Using a sharp knife divide in half so it measures 2 9″x12″ sheets. Starting from the top, tightly roll each dough sheet into a log. Flip and pinch all ends together with thumb and forefingers. Repeat with other dough log. Temporarily set aside.

5) Sprinkle oatmeal out onto surface and carefully set into two loaf pans. Gently cover with plastic wrap and set in warm place to rise a second time. Let rise for one hour.

6) Preheat oven to 350 degrees. If you do have a pizza stone, it is a good idea to put in oven and let come to temperature – not necessary, but does make crusts of bread extra crispy and helps distribute heat evenly in the oven.

7) Unwrap loaves and bake for 35-40 minutes or until the center of the loaves reaches 200 degrees. Remove from loaf pans and let cool on wire rack.

Copycat Panera Chewy Chocolate Chip Cookies

cookie1

I haven’t had any cookies other than homemade for quite some time now, but I make the exception for Panera’s chocolate chip cookies. They are huge and too hard to pass up, especially when the kid at the register asks me if I would like to add one to my order for 99 cents! They are my weakness along with the adult grilled cheese sandwich and the creamy tomato soup!

What did we ever do before Pinterest?? Seriously, I have collected some gems in the past year that I would probably not find if not for the convenient and genius site that is Pinterest! I just stumbled upon this recipe last night and made them today. These are the biggest cookies I have made to date, but there is really no way around the 1/4 cup serving 😉

cookie

(some complimentary cookie close-ups!)

cookie2

Verdict: Wow – perfection! I will make these again. I baked off six – for quality control sake, of course 😉 Slightly crispy edges and chewy middles with plenty of sticky, sweet flavor from the dark brown sugar. One is more than enough for this lady! 😉 Thanks for reading, enjoy!

*TIP: If you’re like me and you only buy light brown sugar, you can add one tablespoon of molasses per one cup of packed light brown sugar. Not to worry if you only have white sugar on hand; add 1/4 cup of molasses to one cup of white sugar.

*TIP: I use a disher to portion out the dough onto my cookie sheet, and then I use a fork to scrape the dome off the tops of each to flatten. They bake up as pictured – thanks to all the commenters! I hope this helps.

Copycat Panera Chewy Chocolate Chip Cookies – adapted from The Pinning Mama

  • 1 c butter, softened
  • 1/2 c shortening
  • 1 1/2 cup dark brown sugar
  • 1/2 cup granulated sugar
  • 2 large eggs
  • 4 teaspoon vanilla extract
  • 4 1/3 cup all-purpose flour (541 grams)
  • 2 tablespoon cornstarch
  • 2 teaspoon baking soda
  • 1 teaspoon salt
  • 1 – 12 ounce bag mini semi-sweet chocolate chips

Directions –

  1. Mix butter, shortening and sugars until light and fluffy.
  2. Add egg and vanilla and mix until well combined.
  3. Combine flour, cornstarch, baking soda, and salt and mix together.
  4. Mix dry ingredients slowly into wet ingredients and blend well.
  5. If the dough is crumbly, stir in water 1 teaspoon at a time until it just holds together. The dough should not be sticky.
  6. Add in chocolate chips and stir until evenly distributed.
  7. Using ¼ cup measure, scoop out dough and form into a ball. Continue until all dough is balled. Approx 24 cookies.
  8. Place dough in the freezer for 2 hours or up to 3 months.
  9. Place frozen cookie onto parchment lined baking sheet and bake at 350 degrees F for 15 min.
  10. Let cool 2 minutes.

Sweet and Sour Chicken

image

I have made this twice in two weeks! My picky daughter loves this dinner and can't get enough of the peppers and pineapple 🙂 This is a fairly guilt-free take-out fake-out meal when you consider that Chinese restaurants bread and then deep fry their chicken, this is stir fried instead. Thanks for reading, enjoy! 🙂

Chinese Sweet and Sour Chicken – adapted from Steamy Kitchen via The Shiksa

  • 1 egg white
  • 2 tsp cornstarch
  • 1/2 tsp salt, divided
  • 1 lb boneless, skinless chicken breasts or thighs, cut into 1-inch chunks
  • 1 can (8 to 10 oz) pineapple chunks in juice (reserve the juice)
  • 1 tsp fresh grated ginger
  • 1/4 cup white vinegar
  • 1/4 cup ketchup
  • 2-3 tbsp brown sugar
  • 1-2 pinches cayenne pepper (or more to taste– spicy!)
  • 2 tbsp high heat cooking oil, divded (ex. grapeseed, peanut oil)
  • 1 red bell pepper, seeded and cut into 1-inch chunks
  • 1 yellow bell pepper, seeded and cut into 1-inch chunks

Directions – 

    In a bowl, whisk together the egg white, cornstarch, and 1/4 tsp of the salt. Add the chicken pieces and stir to coat evenly. Let sit for 15 minutes at room temperature or up to overnight in the refrigerator.

    Meanwhile, whisk together 1/4 cup of the reserved pineapple juice, ginger, vinegar, ketchup, brown sugar, remaining 1/4 tsp of salt, and 1-2 pinches cayenne pepper (or more to taste–optional).

    Set a wok or large saute pan over high heat. When a bead of water instantly sizzles and evaporates, pour in 1 tbsp of the oil and swirl to coat. Add the red and yellow bell pepper chunks and cook for 2 minutes. Remove from the wok onto a plate. Wipe the wok or pan dry.

    Return the wok to the stove on high heat. When a bead of water instantly sizzles and evaporates, pour in the remaining 1 tbsp of oil and swirl to coat (be sure to fully coat the pan so the meat won’t stick). Add the chicken to the pan, spreading it out in one layer.

    Let the chicken fry, untouched, for 1 minute, until the bottoms are browned. Flip and fry the other side the same for 1 minute. The chicken will still be pinkish in the middle.

    Add the cooked bell peppers, pineapple chunks, and pineapple juice mixture to the pan. Let simmer for about 2 minutes until the chicken is cooked through. Remove from heat. Let the chicken rest for a few minutes till the sauce thickens. Serve over Jasmine rice.

DIY Sunscreen

sunscreen

I am a bit of a crunchy mom…this is just another example of that! 😉 I love making as much as I can for my family for their health and my peace of mind. So far I have made laundry detergent, disinfecting spray/all purpose cleaner,  soft scrub, window cleaner, enzyme cleaner and floor cleaner. Making these products versus buying them gives me a lot more satisfaction then spending way too much money on more toxic products that don’t work as good as homemade. I made the laundry detergent 8 months ago, and there is still some left! One of the best things about using it is that my washer never smells of mildew, the clothes wash up really well, smell fresh and haven’t faded a bit!

Anyway, back to the sunscreen! It’s super emollient and much more beneficial for your skin than anything you can buy at the store. The upfront cost is a bit expensive, but I’ve already sold a jar so it’s a good start at recouping some of that money. We’ve  tested this during the worst time to be outside (noon to 3:00), because the neighbors needed help with their landscaping. The kids were all over that when they were promised payment for their hard work 😉 As I rubbed it on them, I added a few drops of an essential oil blend that repels bugs (lots of those out here in Florida), and they came back in the house burn free and without a single bug bite. Thanks for reading!

DIY Sunscreen –

Directions –

In a double boiler over medium low heat, melt coconut oil, shea butter and beeswax. Stir until completely melted. Add vitamin E oil to the mixture then remove from heat. Carefully add the zinc powder and stir to combine. It’s not necessary, but I used my hand mixer to blend the zinc powder within the butter/oil mixture. Carefully pour the sunscreen into glass jars. Let cool completely with the lids off. Once it’s cooled, you can place it in the refrigerator for about 6 months or store at room temperature for about 3 months.

Spaghetti with Shrimp and Vodka Cream Sauce

pasta

I posted this recipe over a year ago, but I wanted to share it with you all again cause it’s just that good! I made it exactly as the recipe calls for – 1 cup of heavy cream and 1/2 cup of vodka and everything 😉 No worries – I didn’t have two drunk minors stumbling around after they ate this. Thanks for reading, enjoy!

Penne and Shrimp with Vodka Cream Sauce – adapted from The Pioneer Woman

  • 3/4 pounds Penne pasta (I used a pound of spaghetti)
  • 1 pound shrimp (I used 1.5 pounds, we love shrimp)
  • 2 Tablespoons Butter
  • 2 Tablespoons olive oil
  • 1 whole onion (small), diced fine
  • 2 cloves garlic, minced
  • 1/2 cup vodka (or white wine)
  • 1 – 8 ounce can tomato sauce
  • 1 cup heavy cream
  • salt To Taste
  • pepper To Taste
  • Parmesan cheese

Directions –

Cook the penne pasta until tender-firm, also known as al dente.

Peel, devein and rinse (under cool water) 1 pound of extra large shrimp. Heat about 1 tbsp. butter and olive oil in a skillet. Add the shrimp and cook for a couple of minutes until just opaque. Do not overcook them. Remove from heat and let cool for a few minutes. Now, put the cooked shrimp on the cutting board and pull off the tails. Chop the shrimp into bite –sized pieces and set aside.

In a large skillet heat 2 tablespoons of butter and 2 tablespoons olive oil. Add the garlic and onion and sauté, stirring occasionally. After the garlic and onions have cooked a bit add your vodka or white wine. Let the vodka or wine evaporate for a few minutes, stirring occasionally. If you would rather not use alcohol, you can use low-sodium chicken broth instead (about ½ cup).

Now add an 8-ounce can of plain tomato sauce. Stir well until combined. Then add 1 cup of heavy cream. Continue stirring. Turn heat down to low and let simmer.

Now add your chopped shrimp back into the tomato cream sauce. Give it a stir and add salt and pepper to taste. Finally add your cooked penne pasta and give it a good stir.

Buttermilk Pancakes II and Strawberry Sauce

strawberry2
I wanted to try a new recipe for pancakes that didn’t require lots of ingredients or that made a huge batch, (like our favorite, go-to recipe). The pancakes are more dense than I prefer, but I’m sure pastry flour or even cake flour would take care of that issue. I also decided to make this simple strawberry sauce because I had less than a pint of strawberries left in the fridge that needed to be used up. The strawberry sauce is so easy to throw together and would taste great on top of waffles, ice cream, cheesecake, angel food, yogurt or you could stir it into milk, or lemonade! Thanks for reading, enjoy!
strawberry1
 
Best Buttermilk Pancakes – adapted from Nummy Kitchen
  •  2 cups sifted all-purpose flour
  • 1 teaspoon soda (baking soda)
  • 1 teaspoon salt
  • 2 tablespoons sugar
  • 2 slightly beaten eggs
  • 2 cups buttermilk
  • 2 tablespoons melted butter

Directions –

Sift flour, soda, salt, and sugar into bowl. Add eggs, buttermilk, and melted butter, stirring only until flour is barely moistened.
Bake on hot, lightly greased griddle or electric skilled heated to 375 degrees. For uniform pancakes, use a 1/4 cup measure – or use a drip-cup pitcher and count 1-2-3 as you pour. Turn cakes when center springs back to touch, or when bubbles on surface break. Flip cakes only once. Makes about 1 and 1/2 dozen 4 inch cakes.

strawberry

Strawberry Sauce – adapted from Our Best Bites 

  • 1 pint strawberries
  • 1/3 c. white sugar (*I used vanilla sugar, so I omit the extract*)
  • 1 tsp. almond extract or vanilla extract

Directions –

Wash strawberries and remove stems. If you’re feeling ambitious, you can roughly chop the berries, but I say you’re already feeling ambitious enough by making your own strawberry sauce. So don’t sweat it.

Combine berries, sugar, and extract in medium saucepan and bring to a simmer over medium heat. Cook for five minutes, stirring/breaking strawberries up with a wooden spoon constantly.

After five minutes, remove from heat and allow to cool slightly. When cool enough, transfer mixture to blender and pulse until desired consistency is reached.


Broccoli Cheese Soup II (with Ham)

soup

Even before I baked ham the other day, I already had plans for the leftovers! I wanted to make ham and potato soup, but he had a different craving. M loves Panera Bread broccoli cheese soup – I like it too. That’s not the problem…when I have a plan, I’m not immediately flexible to accommodate different ideas! He doesn’t really like my version because it’s not as thick as Panera’s – but I have a feeling they accomplish this by adding processed cheese. After deciding to go ahead with his plan, I quickly looked for a recipe that called for the stuff, but I couldn’t find one. I was in the parking lot of the grocery store, using my slow phone and didn’t have a whole lot of time. This recipe makes a small batch of thick, rich soup – all that half and half kept the base nice and creamy. I usually double my go-to recipe and use whatever milk I have, so it’s much thinner.

Verdict: Okay…this recipe is better than the other one. It’s rich and creamy, thanks to all that half and half! Also, the addition of diced ham (from a new recipe I’ll share soon) was a tasty, meaty and a perfect complement. Everyone loved it and the rolls I paired with it. Thanks for reading, enjoy!

soup1

Panera Broccoli Cheese Soup – adapted from Cookbook-Recipes

  • 1 tablespoon butter, melted
  • ½ medium onion, chopped
  • ¼ cup melted butter
  • ¼ cup flour
  • 2 cups half-and-half
  • 2 cups chicken stock
  • ½ pound fresh broccoli
  • 1 cup carrots, julienned
  • salt and pepper, to taste
  • ¼ teaspoon nutmeg
  • 8 ounces grated sharp cheddar cheese
  • 1 heaping cup of diced ham, optional

Directions:

Saute onion in butter. Set aside. Cook melted butter and flour using a whisk over medium heat for 3-5 minutes. Stir constantly and slowly add the half-and-half (this is called making a roux). Add the chicken stock whisking all the time. Simmer for 20 minutes.

Add the broccoli, carrots and onions. Cook over low heat until the veggies are tender for 20-25 minutes. Add salt and pepper. The soup should be thickened by now. Pour in batches into blender and puree. Return to pot over low heat and add the grated cheese; stir until well blended. Stir in the nutmeg and serve.