Salted Caramel Sauce

caramel1

I have never made caramel before, but I watched this episode of Kelsey’s Essentials and decided that this should be easy enough to try. Thankfully it worked out really well and I will use this recipe again. This caramel is destined to become part of the Snicker’s cake that I will be serving on Labor Day. I am also going to attempt making marshmallow fluff from scratch so hopefully that recipe turns out as well as this caramel! 🙂 Thanks for reading, enjoy!

Salted Caramel Sauce – adapted from Kelsey’s Essentials

  • 1 cup sugar
  • 1/4 cup water
  • 3/4 cup heavy cream
  • 3 1/2 tablespoons unsalted butter
  • 1 teaspoon Fleur de Sel, or kosher salt

Directions –

In a heavy-bottomed saucepan, combine the sugar and water over medium-low heat until the sugar dissolves. Increase the heat and bring to a boil, without stirring. If necessary, use a wet pastry brush to wash down any crystals on the side of the pan. Boil until the syrup is a deep amber color, about 7-10 minutes.

Remove the sugar from the heat and carefully whisk in the heavy cream. The mixture will bubble. Stir in the unsalted butter, and salt. Transfer the caramel to a dish and cool.

*Cook’s Note: The salted caramel sauce will keep in the refrigerator up to 2 weeks. Reheat before serving.

Key Lime Pie

keylimepie1
He is seriously spoiled…I don’t even like key lime pie, but he has been asking for it recently; and lucky for him I stumbled upon two pound bags of these cuties at my fave store.
wpid-13-1-5.jpg
Peruvian lime meets baby key lime 😉
wpid-13-1-6.jpg

Just when I thought they couldn’t possibly be any cuter, I cut them in half to juice them – I was wrong!
wpid-13-1-7.jpg

But those fuzzy feelings quickly disappeared when I proceeded to squeeze 1 3/4 pounds of these to produce the required 3/4 cup…owee. Other than squeezing all those limes, this is a super easy pie to make.

Verdict: This pie is smooth, creamy and the most tart dessert I have ever had. I loved decorating the pie the whipped cream rosettes, key lime slices and zest. I don’t usually break out the piping bag, but any proper key lime pie seems to have them so I went with it.

keylimepie2

Key Lime Pie – adapted from I Wash You Dry

  • 9″ graham cracker pie crust
  • 4 egg yolks
  • 1 egg white, lightly beaten
  • 3/4 cup key lime juice
  • 1 1/2 tsp grated lime peel
  • 1 ( 14 oz) can sweetened condensed milk
  • 1/2 cup sour cream
  • Whipped Cream (optional)

Graham Cracker Crust – adapted from Martha Stewart

  • 6 1/2 ounces graham crackers (12 crackers), finely ground (1 1/2 cups)
  • 2 1/2 ounces (5 tablespoons) unsalted butter, melted
  • 1/4 cup sugar
  • 1/8 teaspoon salt

Directions –

  1. Preheat oven to 350 degrees. Pulse graham cracker crumbs, butter, sugar, and salt in a food processor until combined
  2. Firmly press crumb mixture into bottom and up sides of a 9-inch pie dish. Bake until crust is fragrant and edges are golden, 12 to 14 minutes. Let cool completely on a wire rack.

For the Pie

  1. Heat oven to 375 degrees F.
  2. Brush the graham cracker pie crust with the lightly beaten egg white, then bake for 5 minutes. Remove from the oven and set aside.
  3. Reduce oven to 350 degrees F.
  4. Meanwhile combine the egg yolks, key lime juice, lime peel, sweetened condensed milk, and sour cream in a medium bowl. Whisk until smooth. Pour into the prepared crust.
  5. Bake for 15 minutes, then remove from oven and let cool to room temp.
  6. Chill in fridge for at least three hours, then serve with whipped cream if desired.

Vanilla Bean Ice Cream

icecream2

So smooth, creamy, decadent, flavorful and satisfying! I love the creaminess of custard-style ice cream over Philadelphia style hands down. The texture and mouth feel of custard based is so much more pleasant than the butter fattiness of Philadelphia. I learned that a couple of years ago when I tried this recipe; and even though my favorite style requires more ingredients and wait time, I promise it’s worth every minute. Thanks for reading, enjoy!

Vanilla Bean Ice Cream – adapted from The Food Network

  • 5 egg yolks
  • 3/4 cup sugar, vanilla sugar if you have it (next time I will use a less – it’s pretty sweet!)
  • 1 cup heavy cream
  • 2 cups whole milk
  • 1 vanilla bean, split and scraped

Directions –

custard2

Place the half-and-half and the heavy cream into a medium saucepan, over medium heat. Bring the mixture just to a simmer, stirring occasionally, and remove from the heat.

custard1

In a medium mixing bowl whisk the egg yolks until they lighten in color. Gradually add the sugar and whisk to combine.

custard

Temper the cream mixture into the eggs and sugar by gradually adding small amounts, until about a third of the cream mixture has been added. Pour in the remainder and return the entire mixture to the saucepan and place over low heat. Continue to cook, stirring frequently, until the mixture thickens slightly and coats the back of a spoon and reaches 170 to 175 degrees F. Pour the mixture into a container and allow to sit at room temperature for 30 minutes. Place the mixture into the refrigerator and once it is cool enough not to form condensation on the lid, cover and store for 4 to 8 hours or until the temperature reaches 40 degrees F or below.

icecream3

Pour into an ice cream maker and process according to the manufacturer’s directions. This should take approximately 25 to 35 minutes. Serve as is for soft serve or freeze for another 3 to 4 hours to allow the ice cream to harden.

Simple Brownies

brownie3

Woo! These are rich 🙂 They are thin but so fudgy and perfect with homemade vanilla ice cream, (*I’ll share the ice cream recipe soon*). Thanks for reading, enjoy!

Simple Brownies – adapted from Baked Bree

  • 10 TBSP unsalted butter
  • 1 1/4 cups sugar
  • 3/4 cup + 2 TBSP cocoa powder (*break out the good stuff for this!*)
  • 1/4 tsp salt
  • 2 tsp vanilla
  • 2 eggs
  • 1/2 cup all purpose flour

brownie2

Directions –

1 Preheat oven to 325°F with rack positioned in the lower third of the oven. Line the bottom and the sides of an 8-inch square baking pan with foil or parchment paper, leaving an overhang on two opposite sides to make it easier to lift the brownies out of the pan when they are done.
image

2 Combine the butter, cocoa, sugar, and salt in a medium heatproof bowl. Set the bowl in a wide skillet of barely simmering water. Stir the butter cocoa mixture from time to time until the butter is melted and the mixture is smooth and hot enough that you want to remove your finger quickly after dipping it in to test. Remove the bowl from the skillet and set aside briefly until the mixture is only warm, not hot.

3 Using a wooden spoon, stir in the vanilla extract. Add the eggs one at a time, stirring quickly after each one. When the batter looks shiny, thick, and well mixed, add the flour and stir until you cannot see it any longer, then beat for 40 strokes with the wooden spoon. Spread the batter evenly in the lined pan.

4 Bake until a tester inserted into the center comes out just slightly moist with batter, 20 to 25 minutes. Let the brownies cool completely on a rack. Lift up the ends of the foil or parchment paper liner, and transfer the brownies to a cutting board. Cut into 16 or 25 squares.

Copycat Panera Chewy Chocolate Chip Cookies

cookie1

I haven’t had any cookies other than homemade for quite some time now, but I make the exception for Panera’s chocolate chip cookies. They are huge and too hard to pass up, especially when the kid at the register asks me if I would like to add one to my order for 99 cents! They are my weakness along with the adult grilled cheese sandwich and the creamy tomato soup!

What did we ever do before Pinterest?? Seriously, I have collected some gems in the past year that I would probably not find if not for the convenient and genius site that is Pinterest! I just stumbled upon this recipe last night and made them today. These are the biggest cookies I have made to date, but there is really no way around the 1/4 cup serving 😉

cookie

(some complimentary cookie close-ups!)

cookie2

Verdict: Wow – perfection! I will make these again. I baked off six – for quality control sake, of course 😉 Slightly crispy edges and chewy middles with plenty of sticky, sweet flavor from the dark brown sugar. One is more than enough for this lady! 😉 Thanks for reading, enjoy!

*TIP: If you’re like me and you only buy light brown sugar, you can add one tablespoon of molasses per one cup of packed light brown sugar. Not to worry if you only have white sugar on hand; add 1/4 cup of molasses to one cup of white sugar.

*TIP: I use a disher to portion out the dough onto my cookie sheet, and then I use a fork to scrape the dome off the tops of each to flatten. They bake up as pictured – thanks to all the commenters! I hope this helps.

Copycat Panera Chewy Chocolate Chip Cookies – adapted from The Pinning Mama

  • 1 c butter, softened
  • 1/2 c shortening
  • 1 1/2 cup dark brown sugar
  • 1/2 cup granulated sugar
  • 2 large eggs
  • 4 teaspoon vanilla extract
  • 4 1/3 cup all-purpose flour (541 grams)
  • 2 tablespoon cornstarch
  • 2 teaspoon baking soda
  • 1 teaspoon salt
  • 1 – 12 ounce bag mini semi-sweet chocolate chips

Directions –

  1. Mix butter, shortening and sugars until light and fluffy.
  2. Add egg and vanilla and mix until well combined.
  3. Combine flour, cornstarch, baking soda, and salt and mix together.
  4. Mix dry ingredients slowly into wet ingredients and blend well.
  5. If the dough is crumbly, stir in water 1 teaspoon at a time until it just holds together. The dough should not be sticky.
  6. Add in chocolate chips and stir until evenly distributed.
  7. Using ¼ cup measure, scoop out dough and form into a ball. Continue until all dough is balled. Approx 24 cookies.
  8. Place dough in the freezer for 2 hours or up to 3 months.
  9. Place frozen cookie onto parchment lined baking sheet and bake at 350 degrees F for 15 min.
  10. Let cool 2 minutes.

Cookies & Cream Muddy Buddies

oreo

The best thing I heard someone say about these last night was: “I can tell without even trying them; they’re good!” And they are, and completely addicting…it’s a good thing that I made them for a big group of people and not for my family of four! The recipe that I found suggested the candy melts, but I didn’t have them. Recently, I found a tip  for melting chocolate with a little bit of coconut oil to replace those, and it worked so well I decided to use the method again. The white chocolate didn’t want to melt as smoothly as the semi-sweet kind, so I just kept adding coconut oil by the teaspoon, and melting the mixture slowly until it became the right consistency. I forgot to add more chopped Oreos to the mix, but these were still so good. Next time I will not skip that step 😉 Thanks for reading, enjoy!

Cookies and Cream Muddy Buddies – adapted from Your Cup of Cake

“Cream”

  • 5 cups Rice Chex cereal
  • 1 cup white chocolate chips
  • 8 Oreos finely crushed
  • 1/2 cup powdered sugar
  • 1 tsp – 3 tsp coconut oil

“Cookies”

  • 5 cups Rice Chex cereal
  • 1 cup semi sweet chocolate chips
  • 8 Oreos finely crushed
  • 1/2 cup powdered sugar
  • 1 tsp coconut oil

Directions –

1. “Cream”- Measure out the rice Chex and place in a large bowl. Measure out powdered sugar and crushed Oreos and place in a container with a lid (You’ll need to shake the mixture in this later).

2. Melt white chocolate with the coconut oil, be careful not to burn it! (My microwave has a melt setting that I use) Pour melted chocolate over rice cereal and stir until coated. Transfer the coated cereal to the container with the powdered sugar and cookies. Shake until evenly coated. Dump the mixture on to a cookie sheet to cool.

3. Repeat steps 1 and 2 using the “Cookies” ingredients. Once cooled, mix the two batches together and fold in more chopped Oreos (I skipped this step – oops!)

Peanut Butter Cup Smoothie

smoothie

Ok, shake! 😉 My husband loves this “smoothie” that you can buy at Tropical Smoothie Cafe, and ever since I bought my Vitamix he’s asked me to make him one. I couldn’t find a copy cat version anywhere, but I think this one is a good substitute for the real thing. Thanks for reading, enjoy!

Peanut Butter Cup Smoothie – 

  • 1 banana, cut up and frozen
  • 2-3 cups chocolate frozen yogurt
  • 1 – 2 TBSP peanut butter
  • 1 cup coconut milk

Directions –

Pour the coconut milk into your blender carafe, followed by peanut butter, banana and yogurt. Blend until smooth, adding more coconut milk if necessary.

Chocolate Peanut Butter Cookies

cookie1

These cookies are so good and easily in my top five! They’re cakey, fudgy, rich and chocolaty. I’m not usually a fan of softer cookies, but these are so perfect. I am really glad that I made two batches – not all for my family of course!  Once every few weeks, my husband serves as assistant director and I always send goodies for the production crew. I know they appreciate the baked goods, and I love hearing about it 😉 Eight people polished off nearly three dozen cookies! Thanks for reading, enjoy 🙂

Chocolate Peanut Butter Cookies – adapted from King Arthur Flour

  • 1 1/2 cups all-purpose flour
  • 1/2 cup Dutch-processed baking cocoa
  • 1/2 teaspoon baking soda
  • 1/4 teaspoon salt
  • 1/2 cup granulated sugar
  • 1/2 cup brown sugar
  • 1/2 cup (8 tablespoons) unsalted butter, softened
  • 1/4 cup smooth peanut butter
  • 1 teaspoon vanilla extract
  • 1 large egg
  • 2 tablespoons water
  • 1 1/2 cups mini peanut butter cups

Directions

1) Preheat the oven to 375°F. Lightly grease (or line with parchment) two baking sheets.

2) In a medium-sized bowl, whisk together the flour, cocoa, baking soda, and salt.

3) In another bowl, beat together the sugars, butter, and peanut butter until light and fluffy.

4) Beat in the vanilla, egg, and water, then stir in the dry ingredients, blending well.

5) Stir in the mini peanut butter cups.

6) Scoop rounded tablespoonfuls of dough onto the prepared baking sheets. Flatten each cookie to about 1/2″ thick.

7) Bake the cookies for 7 to 9 minutes, or until they’re set and you can smell chocolate. Remove them from the oven, and cool on a rack.

Chocolate Cobbler

cake1

Chocolate – okay. Cobbler – what?? Never heard of you!  This recipe seems to be a favorite among Tasty Kitchen members, and since I have this brand new bag of King Arthur Self-Rising flour waiting to be used, I figured this was a good place to start. What makes KAF Self-Rising flour (besides the quality), is that it is unbleached and the baking powder is aluminum free. I know my local grocery store does not carry a similar product, and now I’m hoping that it will stock this soon!

I thought about making a fruit cobbler, but I know the hubbs appreciates a good chocolate dessert. This one is so simple and because I’m so darn lazy and didn’t feel like making a special trip to the store for fruit, I went with it. The batter is different from most desserts, especially because you don’t stir the whole batter together before pouring in the baking dish. It’s super simple and requires pantry and kitchen staples, but it takes 40 long minutes to bake! Hopefully it’s worth the wait! 🙂

Verdict: Chocolatey, gooey goodness! Make sure to top it off with a generous scoop of vanilla ice cream! Thanks for reading, enjoy!

cake

Chocolate Cobbler – adapted from Tasty Kitchen

  • 1 cup King Arthur Unbleached Self-Rising Flour
  • ¼ teaspoons Salt
  • 7 TBSP Cocoa Powder, Divided (*this is my favorite*)
  • 1-¼ cup Sugar, Divided
  • ½ cups Milk
  • â…“ cups Melted Butter
  • 1-½ tsp Vanilla Extract
  • ½ cups Light Brown Sugar, Packed
  • 1-½ cup Hot Tap Water (*I added 1 tsp of this espresso powder*)

Directions:

Preheat oven to 350 degrees.

First stir together the flour, baking powder, salt, 3 tablespoons of the cocoa, and 3/4 cup of the white sugar. Reserve the remaining cocoa and sugar.

Stir in the milk, melted butter, and vanilla to the flour mixture. Mix until smooth.

Pour the mixture into an ungreased 8-inch baking dish. I prefer my 2 quart casserole from Princess House.

In a separate small bowl, mix the remaining white sugar (it should be 1/2 cup), the brown sugar, and remaining 4 tablespoons of cocoa. Sprinkle this mixture evenly over the batter.

Pour the hot tap water over all. DO NOT STIR!

Bake for about 40 minutes or until the center is set.

Let stand for a few minutes if you can hold yourself back. Serve with homemade ice cream using the gooey sauce to spoon over all.

White Chocolate Macadamia Nut Cookies

IMG_20130311_171328 (1)

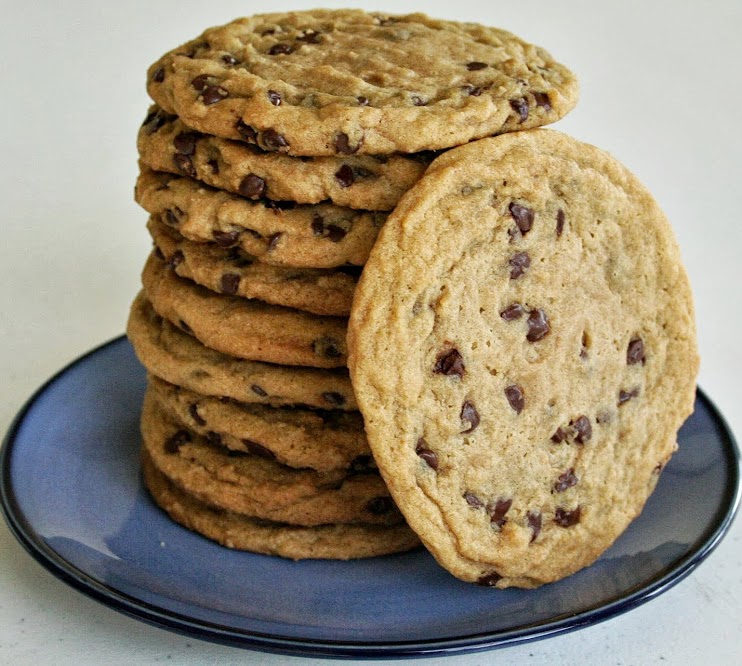
AKA the most expensive homemade cookies ever! Seriously though – the chocolate can cost about 12 dollars, the nuts are $20.00 a pound! Even if my husband knew how much the ingredients cost, I don’t think he’d change his mind about asking for these. Food is definitely his weakness 😉

I bought a quarter pound of nuts which ended up being a cup, but I think the ratio of cookie to add-ins was just right. I weighed these out (cause I’m neurotic like that) and each ball was 4 ounces before I split it in half. I also didn’t have coconut extract, but it probably would have added a nice flavor to these.

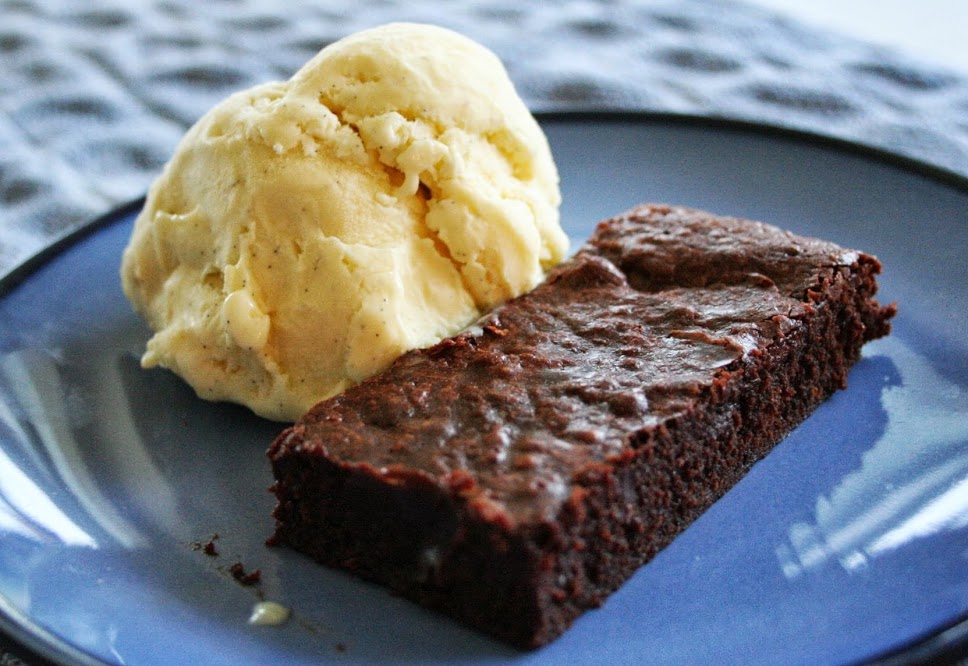
To be honest, I didn’t care for the taste the first day…day two is a totally different cookie. The flavors have time to get to know one another; and they’re not so “one note” anymore. These would be amazing as an ice cream sandwich, maybe even with that fancy coconut milk ice cream! Thanks for reading, enjoy!

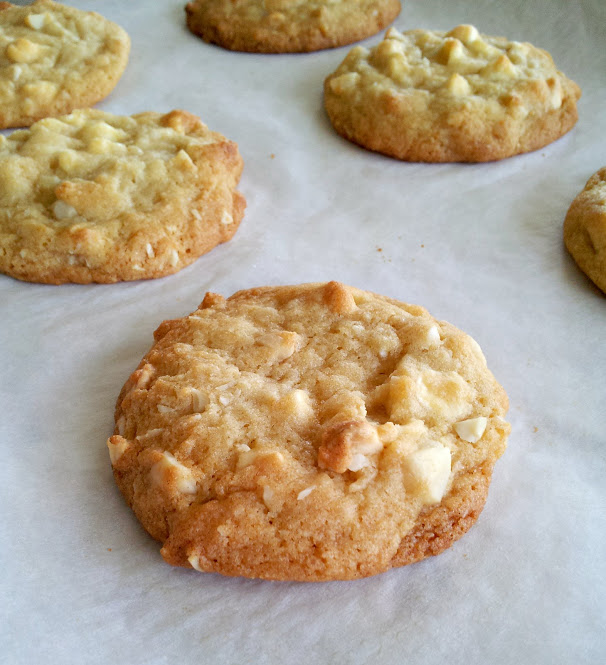
White Chocolate Chunk Macadamia Nut Cookies – adapted from Annie’s Eats

  • 3 cups all-purpose flour (375 grams)
  • 1 tsp. coarse salt
  • 1 1/4 tsp. baking powder
  • 1/2 tsp. baking soda
  • 1 cup unsalted butter, cold and cut into chunks
  • 1 cup granulated sugar
  • 1/2 cup brown sugar
  • 2 eggs
  • 1 tsp. vanilla extract
  • 12 oz. white chocolate chips
  • 1 1/2 cups coarsely chopped macadamia nuts

Directions

In a medium bowl, combine the flour, salt, baking powder, and baking soda. Whisk to blend.

In the bowl of a stand mixer, combine the cold butter and the sugars. Beat on medium-high speed until smooth and just combined, 1-2 minutes. Blend in the eggs on at a time, scraping down the bowl as needed. Blend in vanilla extract. With the mixer on low-speed, mix in dry ingredients just until incorporated. Fold in the white chocolate and macadamia nuts with a spatula. Cover and refrigerate the dough for about 30-60 minutes.

Preheat oven 350 degrees. Line baking sheets with parchment paper. Roll a scant half-cup of dough into a ball. Holding dough ball in fingertips of both hands, pull apart into two equal halves. Rotate the halves 90 degrees and with jagged surfaces facing up, place the formed dough onto cookie sheet, leaving ample room between each ball. (The fussy shaping seems well…fussy – but it gives the cookies nicer appearance after they are baked!)

Bake the cookies, rotating halfway through, until light golden and just set, about 14-16 minutes total. Let cool on the baking sheets for a few minutes, then transfer to a wire rack to cool completely. Store in an airtight container. Yield: 24 cookies