Orange Blueberry Bread

WP_20150422_013

I received local blueberries in my farm share this week and needed to use them. What better way than in a yummy baked good? 🙂 Thanks for reading, enjoy!

Orange Blueberry Bread – adapted from Julia’s Album

WP_20150421_013

  • 1/3 cup melted butter
  • 1 cup white sugar
  • 1/4 cup freshly squeezed orange juice
  • 2 eggs
  • 1 and 1/2 cups all-purpose flour
  • 1 teaspoon baking powder
  • 1 teaspoon salt
  • 1/2 cup milk
  • 2 tablespoons grated orange zest
  • 1 cup fresh or frozen blueberries
  • 2 tablespoons all-purpose flour

Directions –

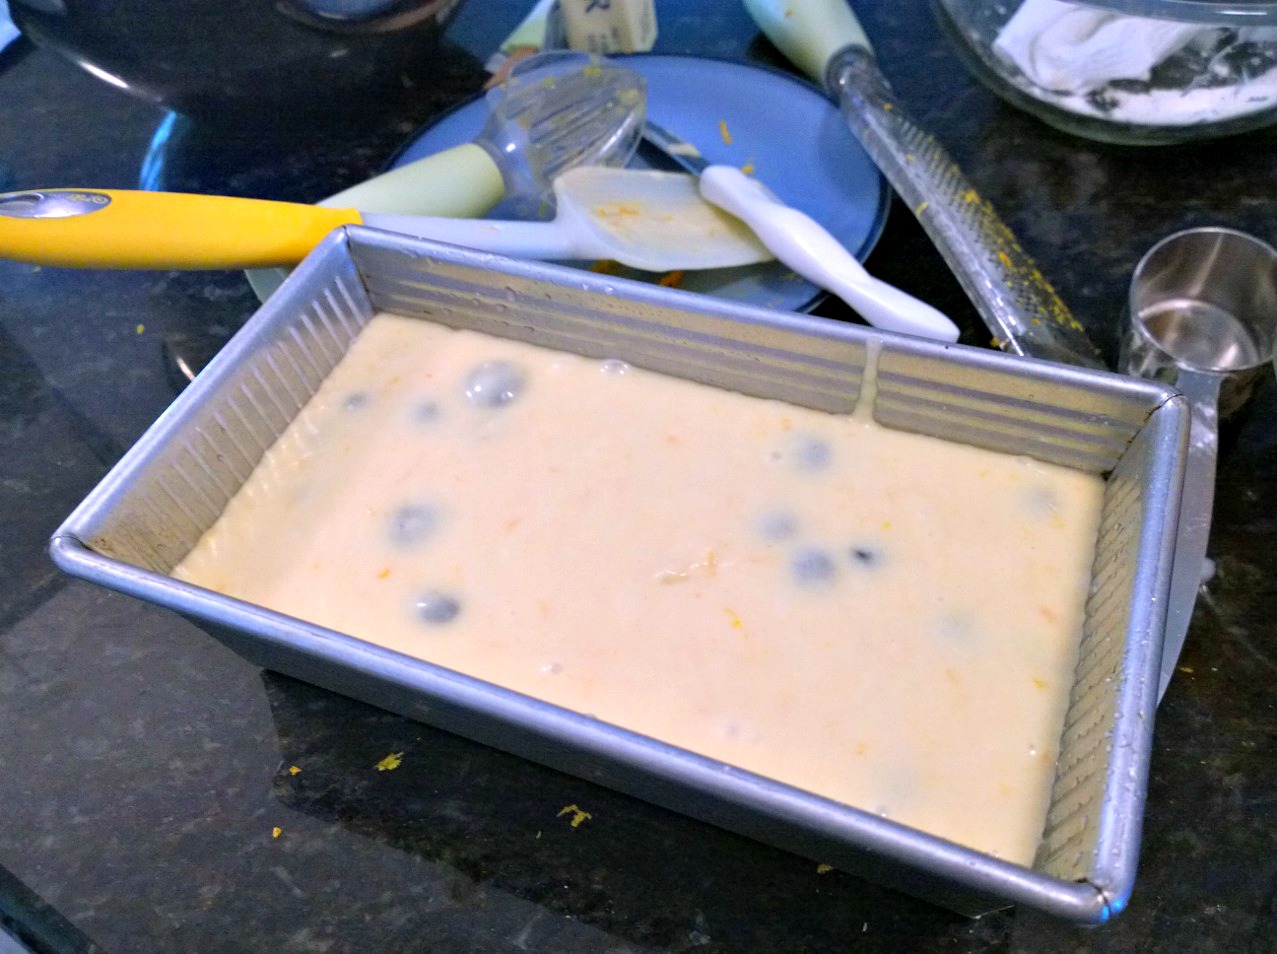
  1. Preheat oven to 350 degrees F (175 degrees C). Butter a 8×4 inch loaf pan.
  2. In a mixing bowl, beat together butter, 1 cup sugar, orange juice and eggs.
  3. In a separate bowl, combine flour, baking powder and salt; stir into egg mixture alternately with milk.
  4. In the same bowl where you combined flour, add blueberries and toss them in 2 tablespoons of flour. This will help prevent blueberries from sinking.

WP_20150421_016                  5. Fold in orange zest, and blueberries into the batter. Pour batter into prepared pan.

WP_20150421_020                   6.   Bake in preheated oven for about 60 minutes, until a toothpick inserted into center of the loaf comes out clean.

WP_20150422_005               7. Cool bread in pan for 40 minutes on a wire rack.

Advertisement

Mint Chip Brownie Ice Cream “Cake”

Phototastic-4_10_2015_7c9089d4-123e-45a9-9768-e145bc42fb12

My daughter just turned 9! This birthday celebration-worthy dessert was super sweet and decadent – my daughter called it “amazing”! 😉 Thanks for reading, enjoy!

Brownie Layer – adapted from Handle the Heat

  • 1 cup semi-sweet chocolate chips (*next time I think I’ll use bittersweet chocolate*)
  • 1 1/2 sticks (6 ounces) unsalted butter, cut into pieces
  • 4 ounces unsweetened chocolate, chopped
  • 1 1/2 cups granulated sugar
  • 3 large eggs plus 1 egg yolk
  • 1 teaspoon vanilla extract
  • 3/4 cup (94 grams) all-purpose flour
  • 1/4 teaspoon fine sea salt

Directions –

Preheat the oven to 350°F. Line an 8×8-inch or a 13×9-inch baking pan with parchment paper. (*I didn’t do this, but it makes for easier pan removal and slicing later on*)

WP_20150409_003

Melt the chocolate and butter over a double boiler. Stir to combine and take off the heat and set aside to cool slightly.

In a large bowl, use an electric mixer to beat the eggs and sugar on medium-high speed until light and thick, about 3 minutes. Beat in the vanilla extract. Stir in the cooled chocolate mixture with a rubber spatula. Add the flour and salt, folding gently until combined.

WP_20150409_006 1

Pour the batter into the prepared baking pan. Bake until a tester comes out with moist crumbs still attached, 35 to 40 for the 8×8 pan, or 20-25 minutes for the 13×9 pan. Do not overbake. Let cool to room temperature. Once cooled, place it in the freezer for at least 4 hours or overnight in preparation for the ice cream layer.

For the Mint Chip “Cake” – adapted from Glorious Treats

Ice Cream Layer- 

  • 1 carton (1.5 quarts) Mint Chip Ice Cream

Chocolate Layer-

  • 3/4 cup heavy whipping cream
  • 1 cup semi-sweet chocolate chips

Whipped Cream Layer-

    • 1- 8oz tub of Whipped Topping (*I used Truwhip*)

Garnish/Toppings-

  • Chopped Andes Mints, and/or mini chocolate chips

Directions –

Ice Cream Layer

WP_20150410_001
Allow a carton of ice cream to sit out at room temperature about 20 minutes, until soft enough to spread over the cooled brownies. Once the ice cream has been evenly spread, place the entire pan in the freezer to allow the ice cream to re-freeze.

Chocolate Layer

WP_20150410_008 1Heat the cream in the microwave for 1-2 minutes until hot (watch it so it does not boil). Add chocolate chips to the hot cream and set aside (undisturbed) about 3 minutes to allow the chocolate to melt. After 3 minutes, stir the chocolate until the cream and chocolate are fully combined. Set aside and allow to cool to about room temperature. Once cool, pour the chocolate over the ice cream layer, and spread evenly. Return pan to freezer.

Whipped Cream Layer

WP_20150410_010

Spread the whipped topping over the chocolate layer, then garnish with toppings of your choice. Return pan to freezer and FREEZE AT LEAST 3 HOURS before serving. The entire dessert can be made ahead, and kept in the freezer (covered) up to 3 days in advance.

Homemade Crunchy Taco Hamburger Helper

WP_20150324_005

I have made it at least three times but I wasn’t able to take decent pictures of it to post. It’s not the prettiest meal I have ever made, but it is a new favorite in my house. Thanks for reading, enjoy! 🙂

Homemade Taco Hamburger Helper – adapted from Iowa Girl Eats

  • 1 lb lean ground beef
  • 1 large shallot or 1/2 small onion, chopped
  • 1 – 2 TBSP homemade taco seasoning
  • 1/2 cup salsa
  • 1-3/4 cup chicken broth
  • 1 cup long grain white rice
  • 1 cup shredded sharp cheddar cheese
  • Toppings: crushed tortilla chips, salsa, sliced avocado, chopped green onions

Directions –

Brown ground beef with shallot in a large skillet over medium-high heat. Drain then return to the skillet. Add taco seasoning, salsa, and chicken broth then bring to a boil. Add rice then place a lid on top and reduce heat to medium-low. Simmer for 15-20 minutes or until rice is tender then remove from heat and stir in cheddar cheese until melted. Place lid back on the skillet then let sit for 5 minutes before serving with toppings.

The “I want Chocolate Cake” Cake

My son turned 12! Good grief, where did the time go? PicMonkey Collage
The “I Want Chocolate Cake” Cake – adapted from Smitten Kitchen 

Cake

  • 6 tablespoons unsalted butter, at room temperature
  • 3/4 cup firmly packed dark brown sugar
  • 2 tablespoons granulated sugar
  • 1 large egg 1 large egg yolk
  • 3/4 cup buttermilk
  • 1 teaspoon vanilla extract
  • 1/2 cup Dutch cocoa powder
  • 1 cup all-purpose flour
  • 1/4 teaspoon baking soda
  • 1/2 teaspoon baking powder
  • 1/2 teaspoon table or fine sea salt

Frosting

  • 2 ounces unsweetened chocolate
  • melted and cooled
  • 1 1/2 cups powdered sugar
  • 1/2 cup unsalted butter, at room temperature
  • Pinch of fine sea salt (optional)
  • 1 tablespoons cream or whole milk
  • 1/2 teaspoon vanilla extract

Directions –

Make the cake: Heat oven to 350°F. Line the bottom of an 8-inch square cake pan with parchment paper, and either butter the parchment and exposed sides of the pan, or spray the interior with a nonstick spray.

In a large bowl, use a hand or stand mixer to beat the butter and sugars until fluffy; scrape down bowl. Add the egg, yolk and vanilla and beat until combined, then the buttermilk and mix again. Scrape the bowl down well and don’t worry if the batter looks uneven. Place your flour, cocoa, baking soda, baking powder and salt in a sifter (I find this step necessary because my cocoa is very lumpy) and shake it over the batter bowl. Stir on low until just combined; scrape down bowl a final time. Scoop batter into prepared pan and smooth flat.

Bake for 18 to 22 minutes, until a toothpick inserted into the center comes out clean. Let cool for 5 to 10 minutes in cake pan on cooling rack, then flip out onto rack or serving plate to completely finish cooling before frosting.

Make the frosting: Place frosting ingredients in a food processor and run machine to to mix. Scrape down bowl then process for another 1 to 2 minutes, until smooth and somewhat fluffed. Scoop the frosting onto the cooled chocolate cake and swirl it around. Cake keeps at room temperature for a day or two, or in the fridge up to a week,.